
|
 03-01-2013, 01:33 AM
|
#1 |
|
Gone Wild

Join Date: Apr 2010
Location: Latonia KY
Posts: 604
|
OK Kids, Here I go again!
Since my cart is pretty much ready for paint, I am at a stand still at the moment. So I get to move on to other things........ Like getting my near 16 yr. old son something to drive. In the State of KY you pretty much hold your temps until you are 17. My Son Trace (Nicknamed, Bubby After my Grandpa) is dying for something of his own to drive. He has been helping build my cart, and keeps talking about how cool it would be for him to have his own for running around town, and cruising at Ocean Lakes. (Loves the place) So I thought I would go covert, and build him his own cart! This has several advantages, 1. He has something that's his. 2. He's get's something to drive pretty much anywhere. 3. gives him responsibility and freedom. 4. Keeps his little butt from driving mine! So I set out my parameters, and budget. The wife and I decided to do this, we need to do this pretty cheap. After scouring craigslist, ebay, here, etc. I came up with this.......... 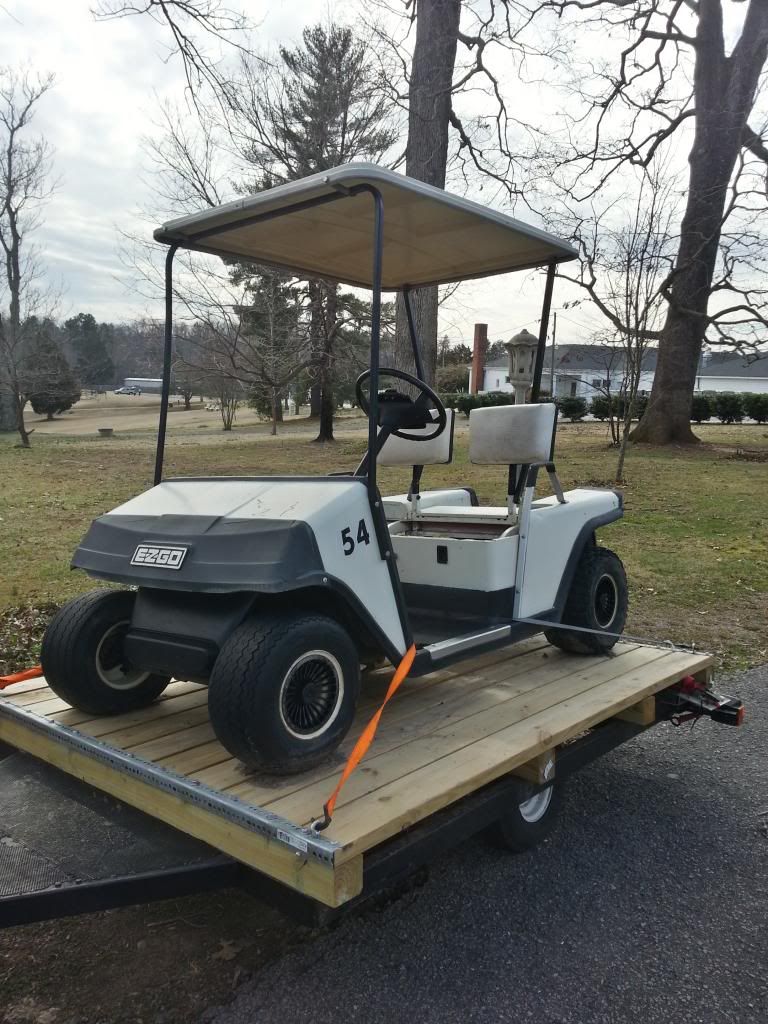 an 89 Marathon for 200 bucks. it's in pretty good shape if you didn't look a th the battery trays and the middle cross support. 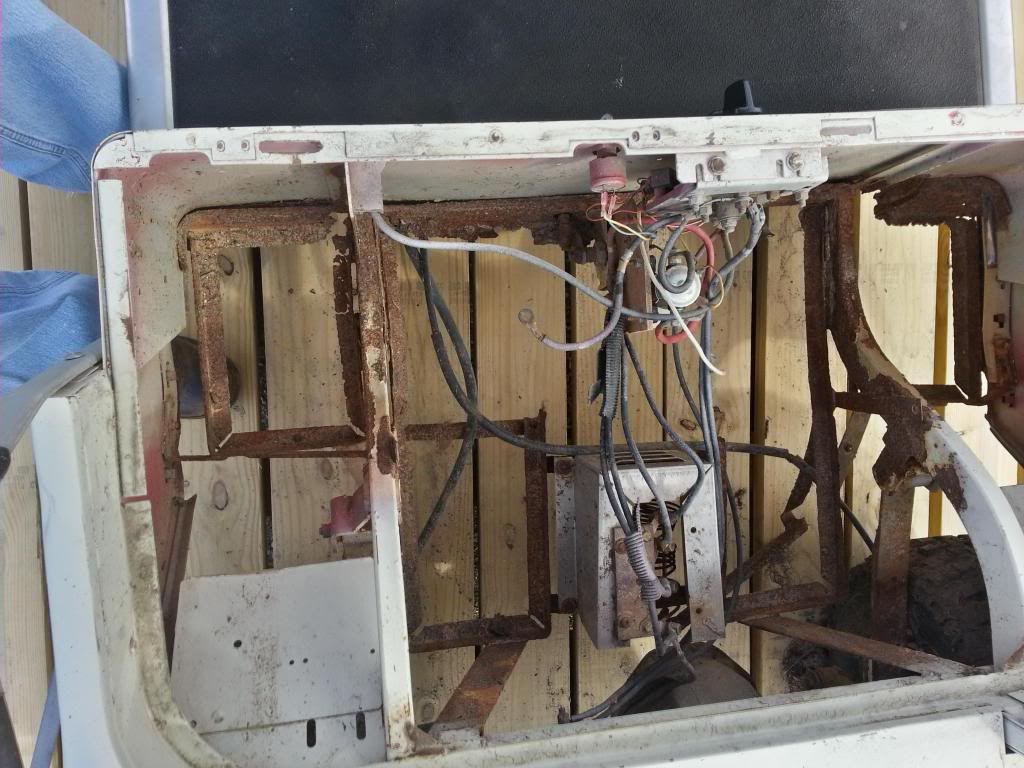 Here's the rest of the walk around.....   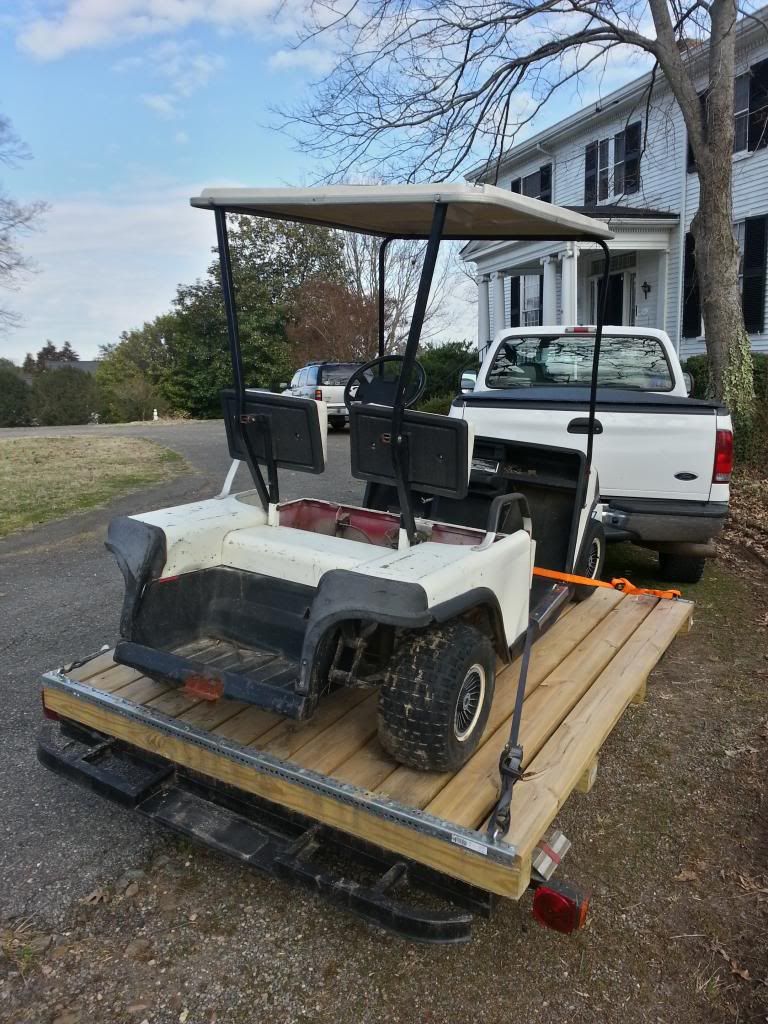  Plans are simple, small lift, tires, lights to make it street legal, Stereo, brush guard/prerunner bar, rear bumper with hitch, small truck bed, and vinyl wrap. I had most of the stuff lying around, things picked up in lot buys, things replaced, or left overs from other projects. Here's the list: Truck bed - Sheet metal from Computer Cabinets being sent to the scrap yard. - Free. Stereo - the free one from a buy 1 get one free sale at the local pick a part yard. Front and rear speakers - removed from a truck that i upgraded the system in - Free. Amp - 4 Channel, given to me by a neighbor for helping me remove the stereo from a car he was trading in. - Free Tail lights - the free ones from the buy 2 get 2, deal from when I ordered my tail lights for my cart. Seat re-upholstery - The seat bottom needs a total re do. 1 inch plywood from a Computer cabinet shipping crate taken apart at work. - Free. the foam, high density stuff used to ship Computer servers, destined for the dumpster - Free, Black vinyl, from a textile plant I saw on the way back from picking up the cart advertising free material, went in to the onsite store, while the "free" stuff didn't work, got 2 yards of material for 19 bucks. the battery trays - all the replacement metal needed to rebuild the trays and the cross supports. While I was able to haggle with the Tractor supply store manager to get me a better price, I still had to pay more than I would have from a steel supplier like I use at home, but being 500 miles away working a job, I didn't have a lot of options esp. since Tractor supply was an hour away as it was - $80. Batteries - This cart didn't have any, but since I am going to replace mine after the repaint, I "borrowed" mine for Bub's buggy, I will look in to new ones down the road. - Free. That's it for now on the parts. I am accepting Donations!!!! OK It's a lot to say, i know, but wanted to share the story. I have started work on the cart, but the pics I took today were corrupted, so i have to take more tomorrow, look for an update soon! (Wish me luck! Thanks for looking at my long winded post!!!  Arin |

|

|
 Today Today
|
|
|
__________________
This advertising will not be shown in this way to registered members. Register your free account today and become a member on Buggies Gone Wild Golf Cart Forum |
|
|
03-01-2013, 01:53 AM
|
#2 |
|
Gone Wild

 Join Date: Sep 2012
Location: Missouri
Posts: 2,755
|
Sounds like a good plan and it will pay you back dividends as you mentioned. Look forward to seeing what he ends up with.
|
|
|
|
|
03-01-2013, 06:50 AM
|
#3 |
|
Admin/Moderator
Join Date: Dec 2006
Location: Ohio
Posts: 18,052
|
Nice starter cart! He has got to be happy!
 |
|
Ron
 PLEASE VISIT Our Sponsors * BGW GEAR The Store The G2 Project * Swing Arm Drop & Repair * Geep1 Project |
|
|
|
|
|
03-01-2013, 08:29 AM
|
#4 |
|
Gone Wild
Join Date: Feb 2013
Location: Plant City, FL
Posts: 2,212
|
That's a great idea and nice start. I'm sure it will be good bonding experience and an excellent way to learn responsibility as you've stated.
|
|
|
|
|
03-01-2013, 08:30 AM
|
#5 |
|
Gone Wild
Join Date: Apr 2010
Location: Latonia KY
Posts: 604
|
He doesn't know. He won't see it until his birthday. This is a total Cover Operation. Luckily I am out of town doing a job and this is how I will be spending my off work hours.
Thanks for the comments. Arin |
|
|
|
|
03-01-2013, 09:46 AM
|
#6 |
|
Gone Wild
Join Date: Feb 2013
Location: Plant City, FL
Posts: 2,212
|
That's really cool Arin. I see a "coolest dad award" coming your way.
|
|
|
|
|
03-01-2013, 07:43 PM
|
#7 |
|
Gone Wild
Join Date: Apr 2010
Location: Latonia KY
Posts: 604
|
That would be cool Joe! I just do it for the kids, and it's cool to hear them say "My Daddy built it!" (yes even my 15/16 yr old still calls me Daddy)
it means so much more to me to build it than buy it! I may not look as expensive or high end, but it's much more satisfying! |
|
|
|
|
03-01-2013, 09:35 PM
|
#8 | |
|
Gone Wild
Join Date: Feb 2013
Location: Plant City, FL
Posts: 2,212
|
Quote:
It is really cool that you and your son are sharing a common interest, for the longest the only interest my dad and I shared was working. At 22yrs old, the wife and I sold our condo and purchased a house and that was the first time my dad and I actually bonded by putting a 150g saltwater tank into a wall. He always had tanks when I was a kid and I finally got one of my own and could say I helped him build it. |
|
|
|
|
|
03-02-2013, 02:21 PM
|
#9 |
|
Gone Wild
Join Date: Apr 2010
Location: Latonia KY
Posts: 604
|
Those things stick with you. My dad wasn't around but My Grandpa(Pop) and Step dad stepped in. They taught me Cars, mechanics, and working with my hands. We have done a lot of stuff together, I always remember that stuff. I got started at 6 and I will be 40 this year still feels like yesterday on a lot of stuff. So I know EXACTLY where you are coming from. I hope my boys and I can do the same thing.
Arin |
|
|
|
|
03-04-2013, 01:42 AM
|
#10 |
|
Gone Wild
Join Date: Apr 2010
Location: Latonia KY
Posts: 604
|
OK here we go!
Got a lot accomplished today, at least I think I did. Since some of my pics from the other day didn't come out, so here is where we started the day. 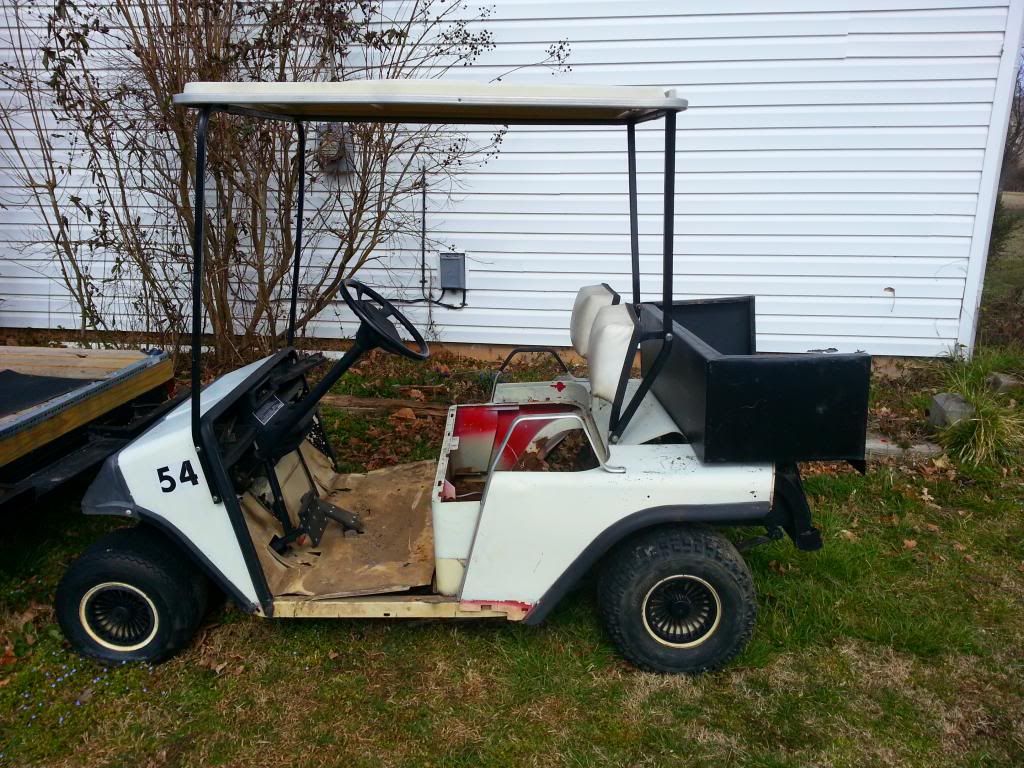 Notice on the back is the Free Sheet metal I had. I got it bent up in to the truck bed.  I Still have some bracing to add and I have not welded it up yet. but I think it will work well. I didnt' like the look of the normal truck beds as they hung way off the back so I went shorter and it only has a 4" over hang. Demensions are 42"w 18"l and 12" d I have the tail gate made up, but no hinges or cables yet. I have custom touches for the tail gate that I will share as i get them done. 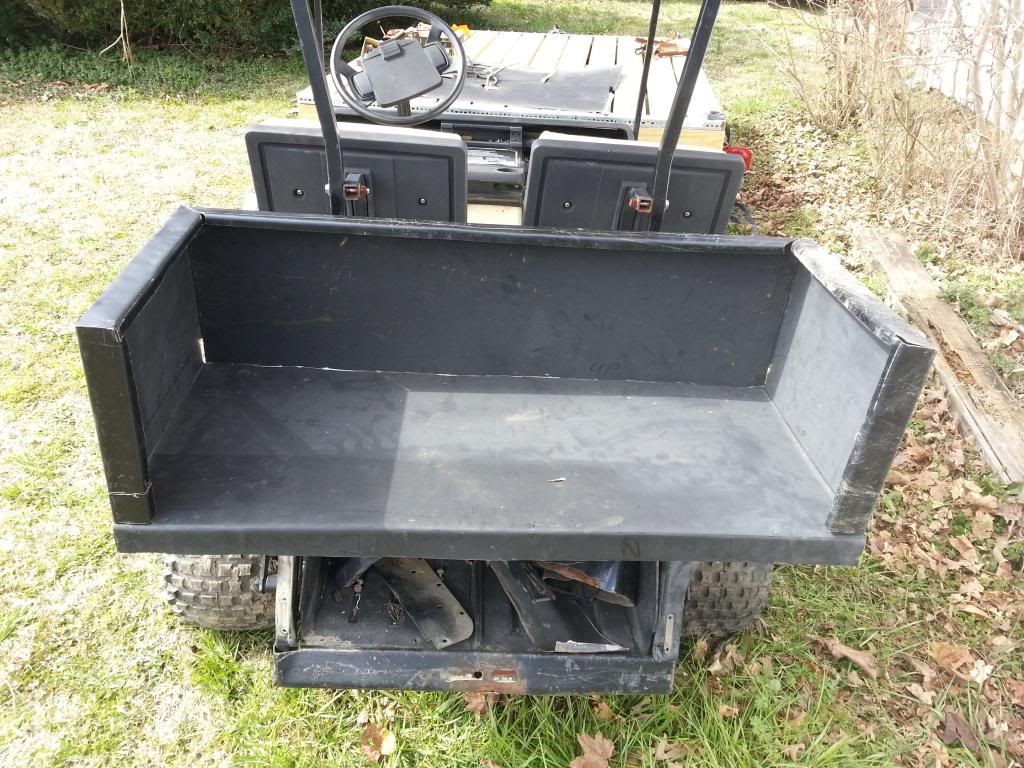 Heres the rear sheet metal off the cart. 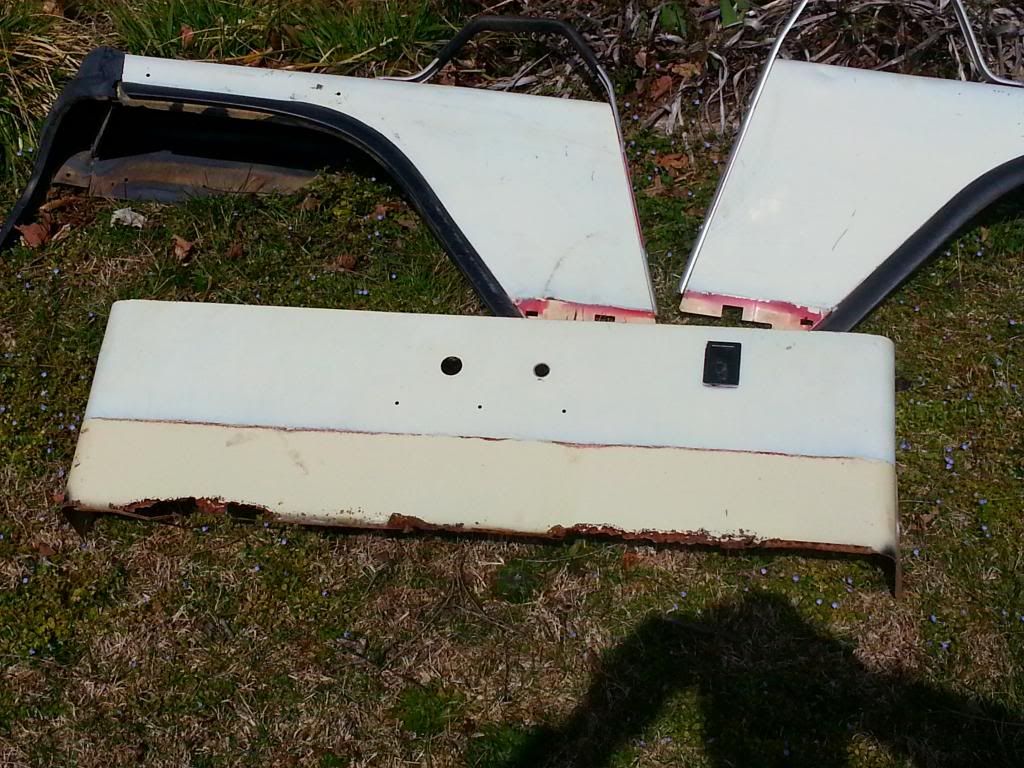 the rear fenders are in decent shape just had to pop a couple of dents. I do have some smaller ones to attend to, but that will be when i get in to body work. Notice the rust on the bottom of the seat support/kick panel. I will have to cut that out and replace it. I am thinking about just cutting the bad parts out and then picking up a piece of diamond plate to bolt on and cover it. not sure yet. If I could pick up a new rust free piece, I would rather do that. any one got one near Raleigh NC? Next up is the shot of the under seat area where the battery trays were. I removed all the angle for the trays and the cross member that held the brake cables, Throttle rod and the swipe board, it was all shot. the frame rails have some pitting, but they are still really solid. 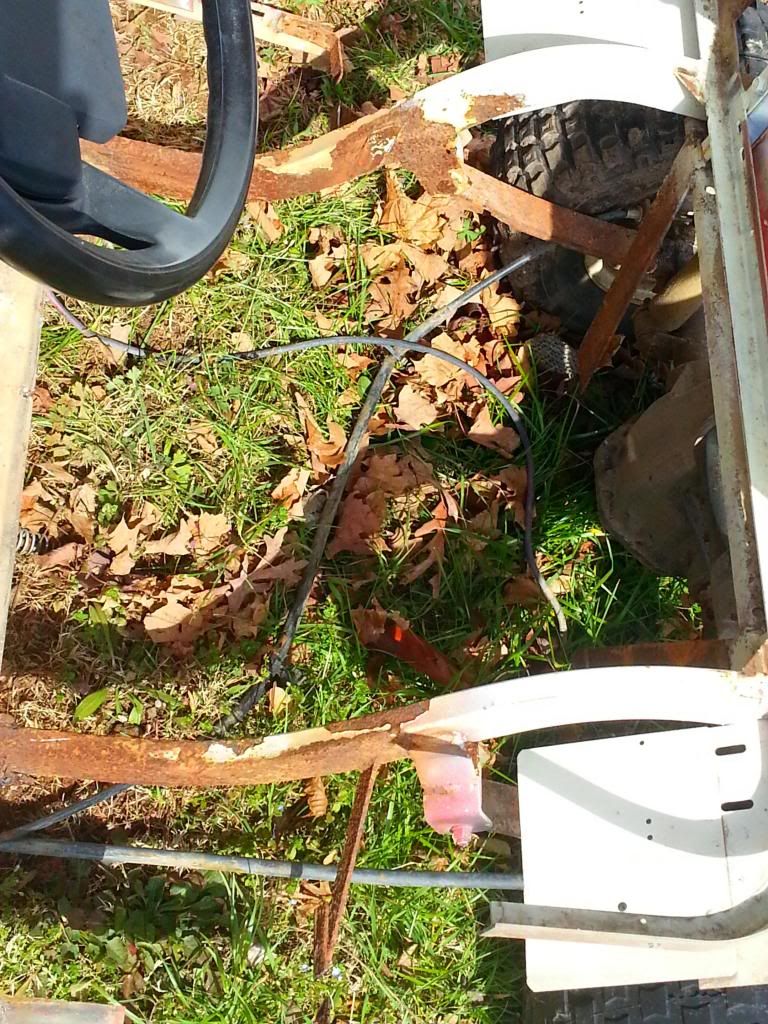 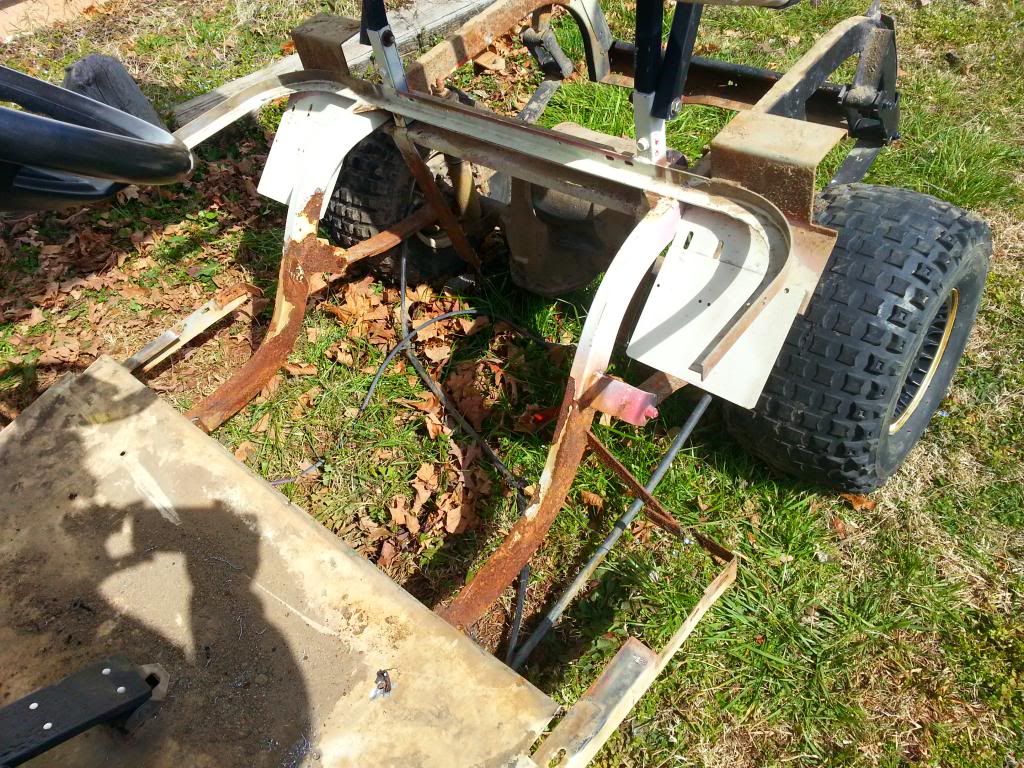 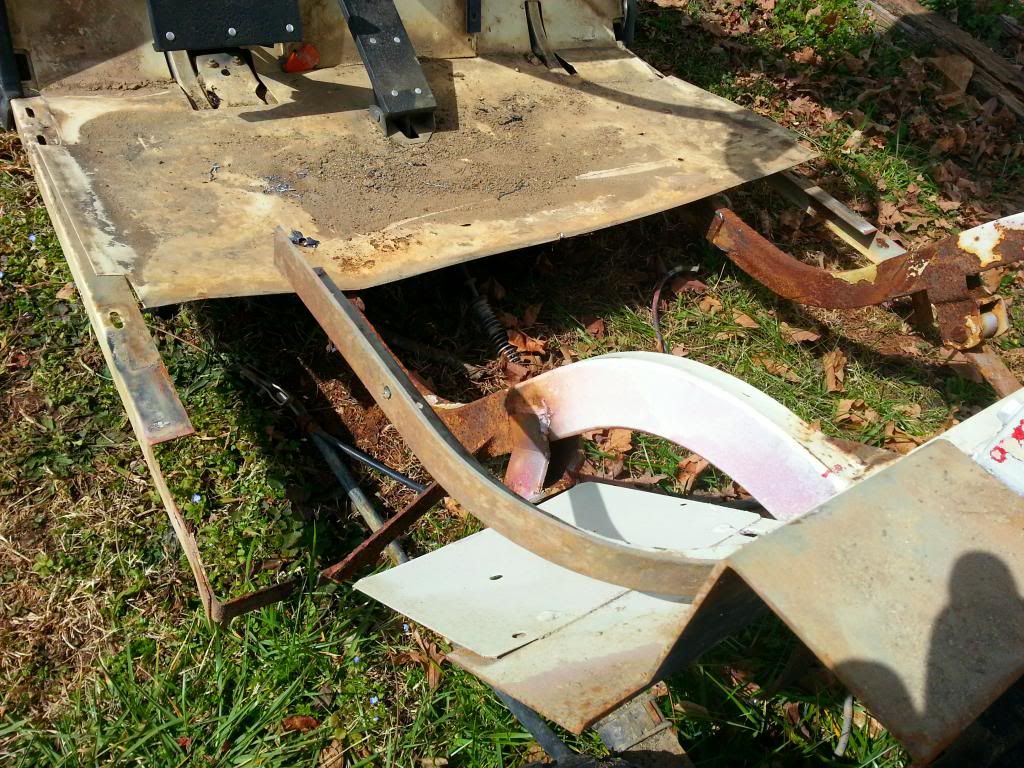 after some quality time with a flap wheel, grinder stone, and assorted wire brushes, here is the back half cleaned up. 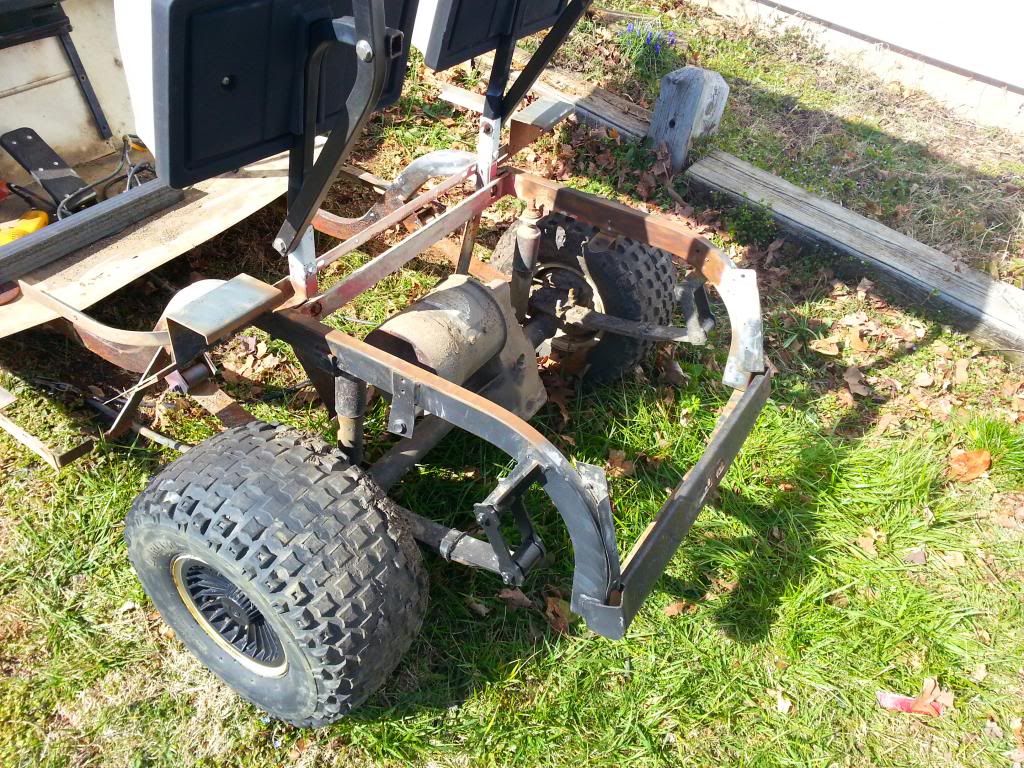  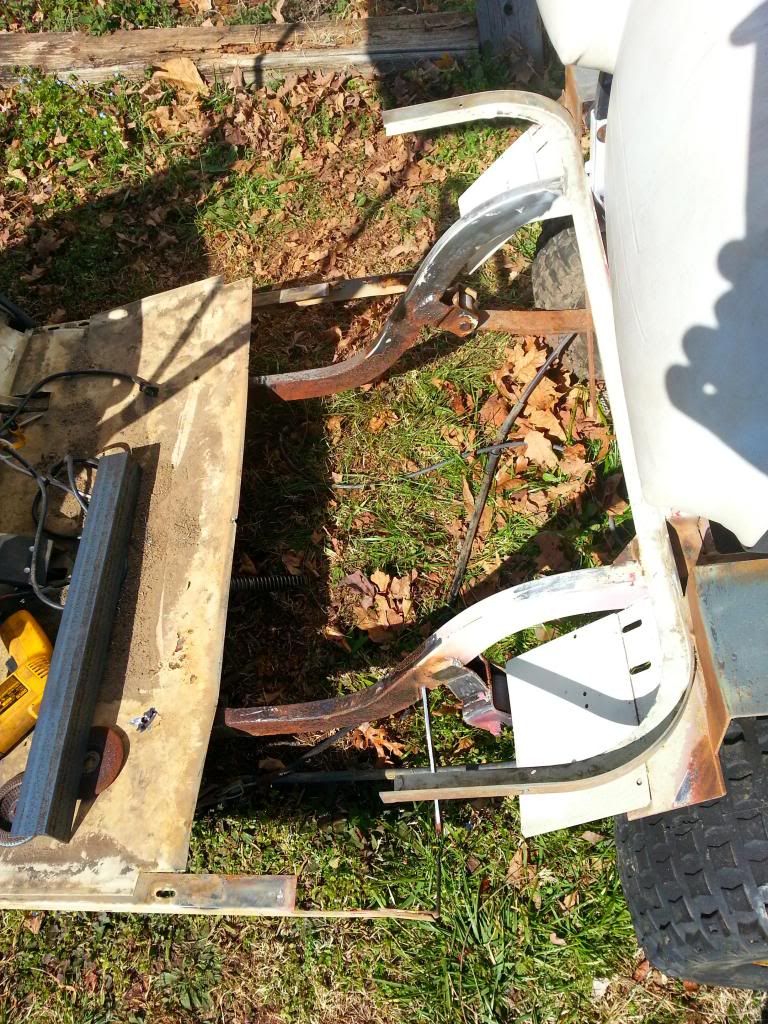 You can see in the left of the last pic, is a piece of angle that will be the new cross member. it's a 2x2 1/8" angle. I have enough left over to weld on a bracket for the brake cable holder and tabs to make the seat bottom a bolt on deal. Here is a pic of the cross member mocked in, just before I tacked it in place. I also added 2 pieces to the outside of the frame to connect the rockers. 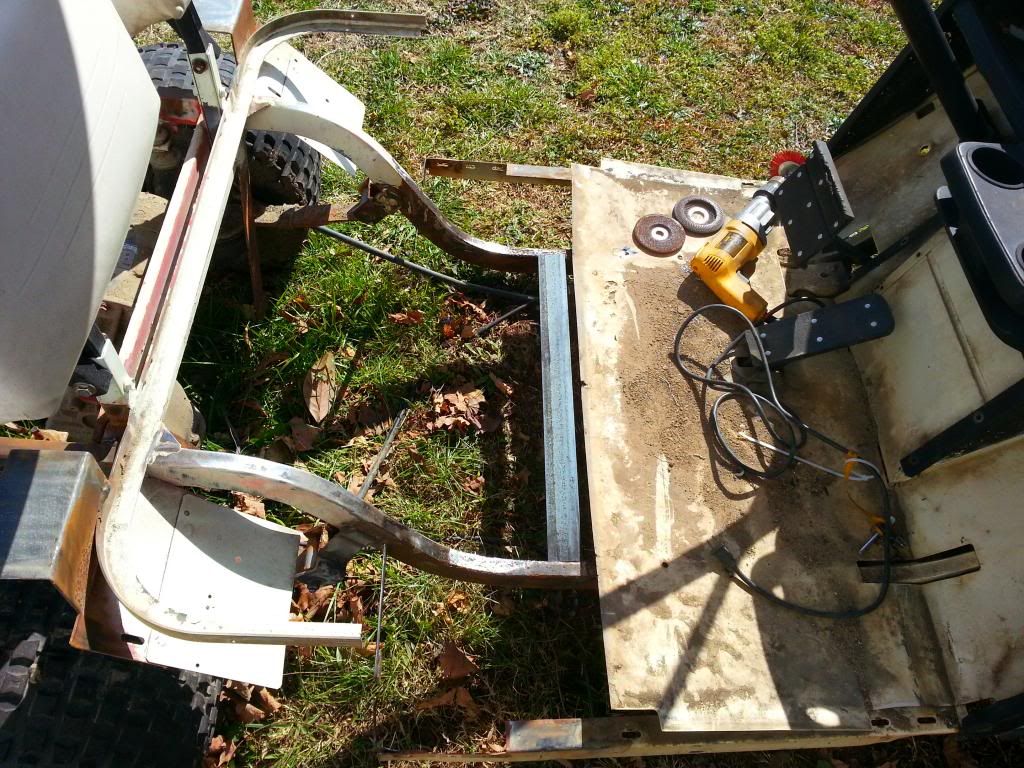 With this all done it was time to move on to the main reason i tore this thing down. the Battery trays. As mentioned above I picked up some 1x1" 1/8" angle and bent it up to make the trays. I have never been a fan of just an open bottom of the battery trays, I always thought they needed something to protect the bottom of the battery so for over kill and because I had it laying around I added Expansion steel to the bottom of the trays for a little added protection. Here is the first battery tray made up. it's hard to see but the mesh is on the tray. it matches with welding table. Quick side note and tip. That table you see was a freebie I picked up from Freecycle. it started out life as a piece of outdoor furniture. it came as you see it, I took a flap wheel to the stop to strip the paint. I can tack stuff down to it and build off the table then cut the tacks and remove the part I built. another cool thing is if you build on this table and run the welder you can just clamp your ground clamp to the table and you can still weld you work piece. Thought I would share, so if you see one being tossed out or it's at a yard sale or on a freebie list, pick one up! 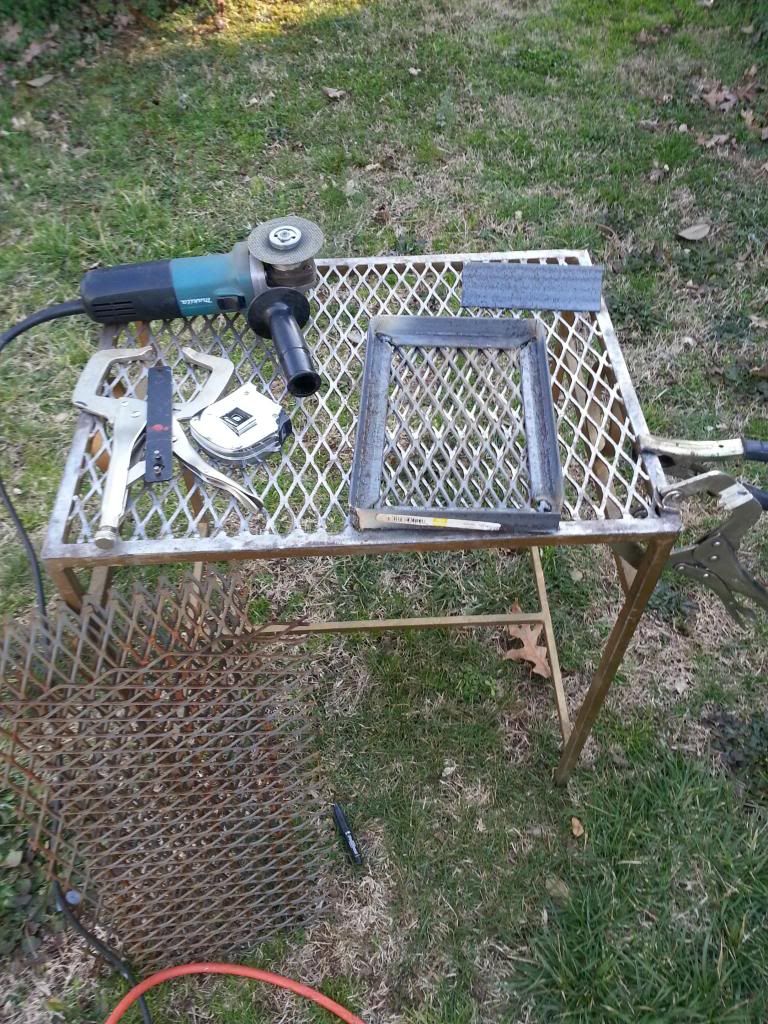 here is number 2. 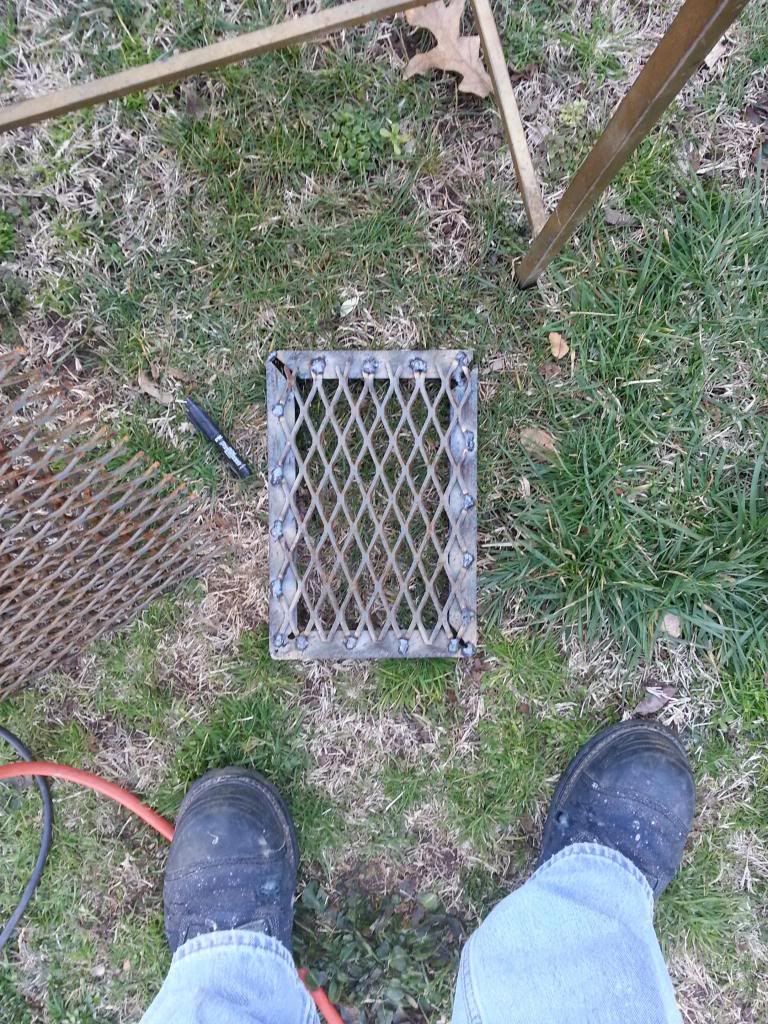 I was able to complete the other 2 but it was too dark to get a decent pic, so I will get those tomorrow. I have them mocked in to place and ready to weld in. I do have a question for you guys concerning the resistor coils. I know they are going to be short lived in this cart but I have to have them for the time being. My question is, I want to relocate them and put a the 12 v battery in its place. as long as I have clearance, and it's not touching and free of contact with any thing, is there a problem moving it the passenger wheel well similar to where the controller would be on a newer cart? it will still get air and not contact anything and it has a shield around it. I want to get as much fab work done now so I don't have to do any when the cart is complete. if I add the 12v to this spot now, it will be easier esp. with the work and wiring I have to do. Looking for thoughts. Thanks for following ! Arin Last edited by BumbleBee; 03-04-2013 at 01:50 AM.. Reason: proof read,proof read,proof read! |
|
|
|
|
|
|
 |
|
||||||
|
|
 Similar Threads
|
||||
| Thread | Forum | |||
| Bad Boy Buggy Help??? | Electric golf carts | |||
| bad boy buggy | Side x Sides/ATVs/Quads/Bikes/Jeeps/4x4's! | |||
| Bad Boy Buggy? | Electric golf carts | |||


 Linear Mode
