
 |
|
|||||||
| Electric Club Car Electric DS, and Precedent golf cars |
  |
|
|
Thread Tools | Display Modes |
|
|
#1 |
|
Not Yet Wild

Join Date: Oct 2016
Location: AL Gulf Coast
Posts: 23
|
This is my first cart rebuild, but I've used my father in laws late 90s CC DS for the last 10 or so years at his farm for hunting. Looking forward to having one of my own to play with now.
I bought this one locally in pieces. It was a project someone started and couldn't finish. I'll attach some before/progress/after pics. Had a Jake's Lift and 22x10 tires already when I got it. I added: Kryptek Camo Paint Job Custom Winch Bumper with Rack 3500lb Winch with in-cab remote Alltrax XCT400IQ Motor Controller 2GA Wiring (6) Trojan T875 8v Batteries U1P-7 Lawn/Garden 12v Battery for Winch and Lights Halogen/LED Light kit 12" Front spot/flood Light Bar (2) 7" Rear flood Light Bars (2) Interior Red LED overhead lights Marine Switch Panel with Custom Mount 12v Volt Meter with USB Charger Ports Plastidip Black Coating on Seat Pads Custom Rear Seat Lower Pads Rear Storage Box doubles as Center Console on Rear Seat Rear Storage Box for Charger and Extension Cord Battery Tender 12v Onboard Charger Here's the cart unloaded at home and starting some of the prep work 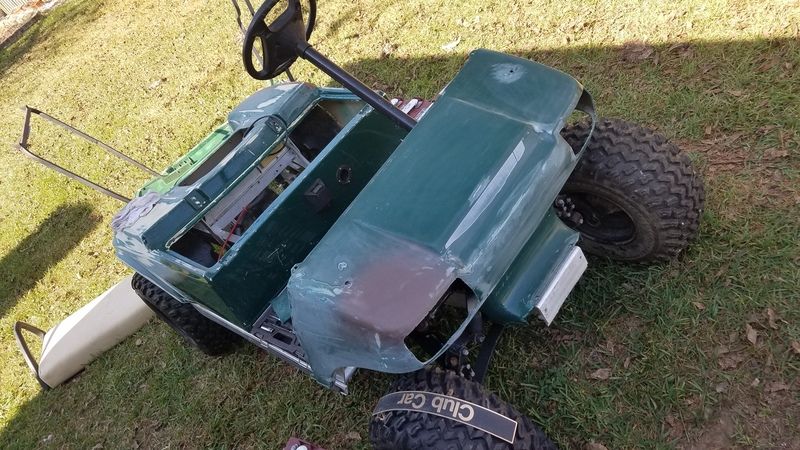 I pulled the mix of Napa and Trojan batteries out for cores, and sprayed the aluminum framing with rubberized undercoating to help protect it from corrosion and provide slight padding for the new T875s. 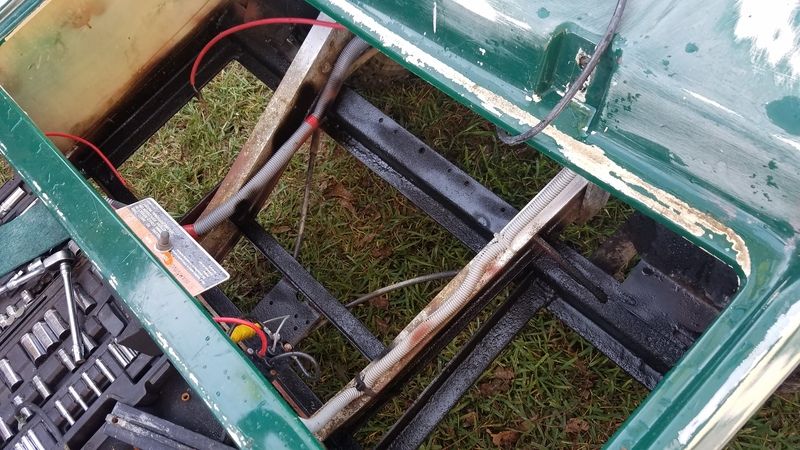 Going to have to clean up the contacts on the motor when I replace the wiring with new 2ga 48v leads. 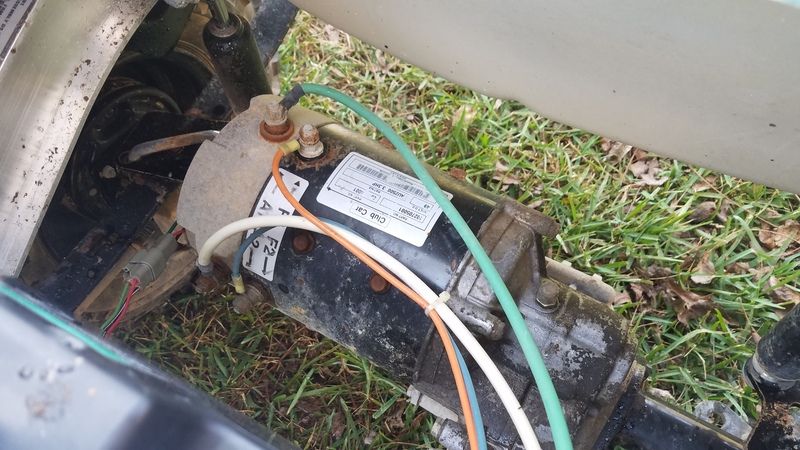 Original Curtis Controller. 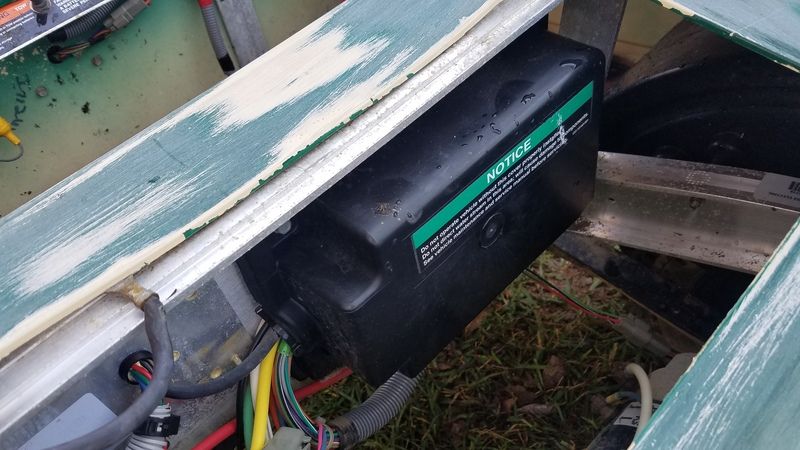 New Batteries Installed, Aluminum Trim painted Satin Black, and the first base coat of camo for the Kryptek paint scheme is on. 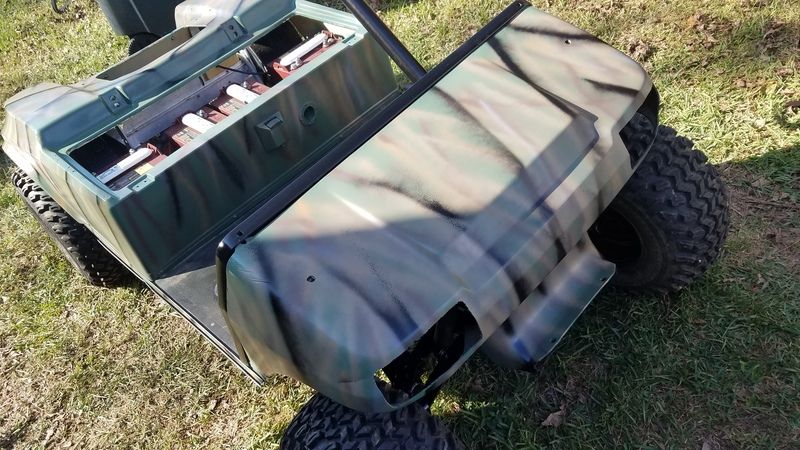 More paint pattern pics. Again, this is the base coat. 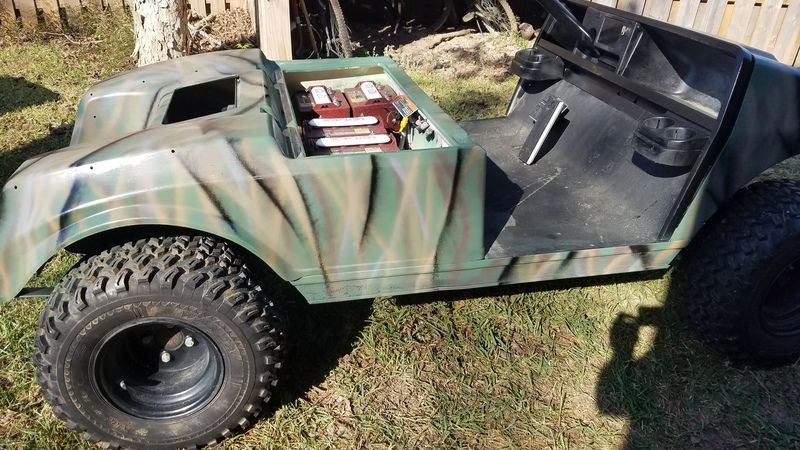 Overall the body was in OK shape, so painting wasn't bad at all. 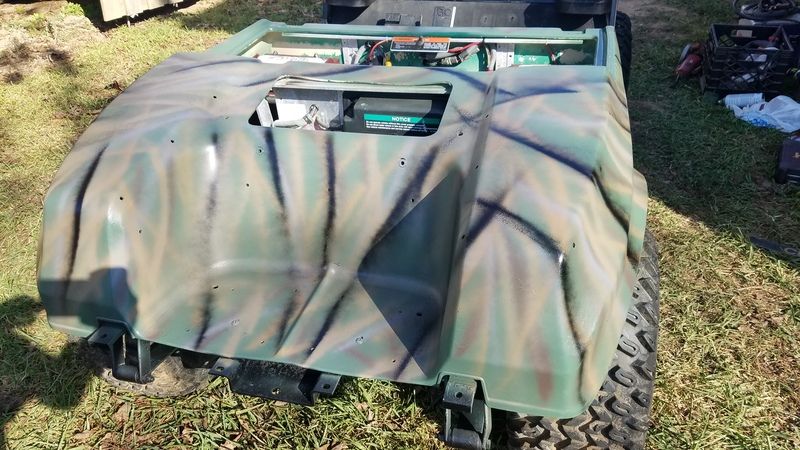 Test fitting the top, charging the new batteries. 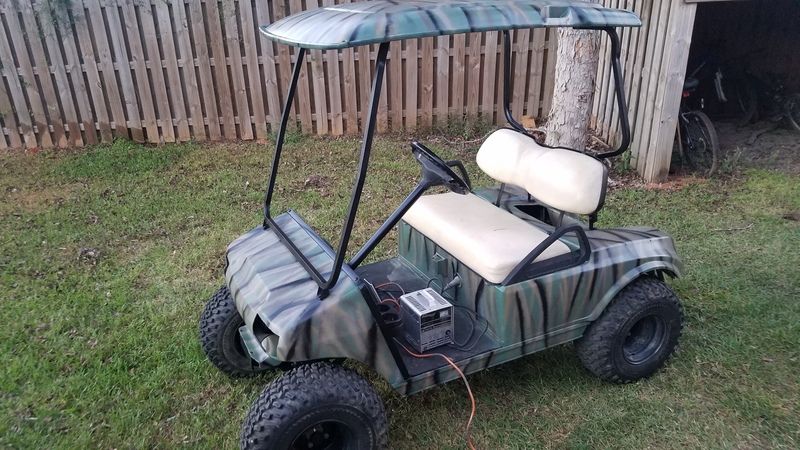 Getting ready to build the winch bumper with basket. 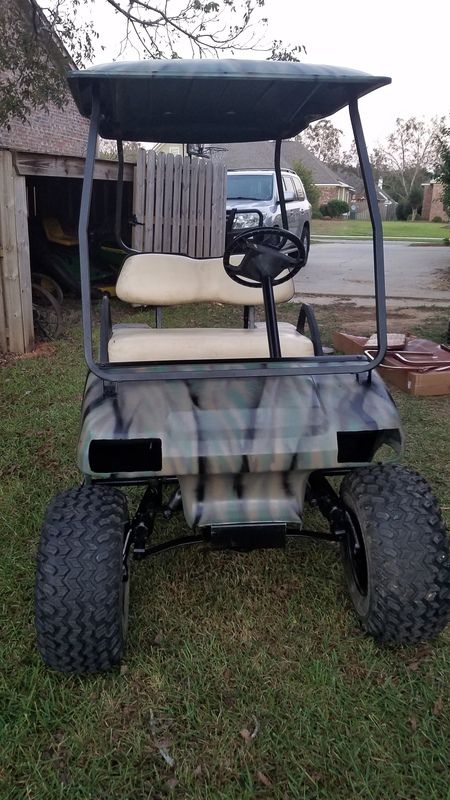 Taking shape... 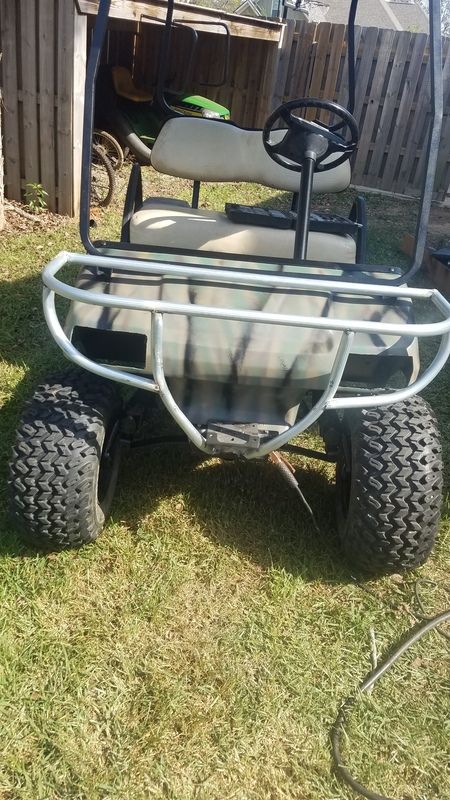 |
|
|

|
|
|
|
|
__________________
This advertising will not be shown in this way to registered members. Register your free account today and become a member on Buggies Gone Wild Golf Cart Forum |
|
|
|
#2 |
|
Not Yet Wild

Join Date: Oct 2016
Location: AL Gulf Coast
Posts: 23
|
Skipping WAY ahead - at this point, Kryptek paint is done, rear flip seat is rebuilt and coated with bedliner, seats are coated with platidip, all electrical is done.
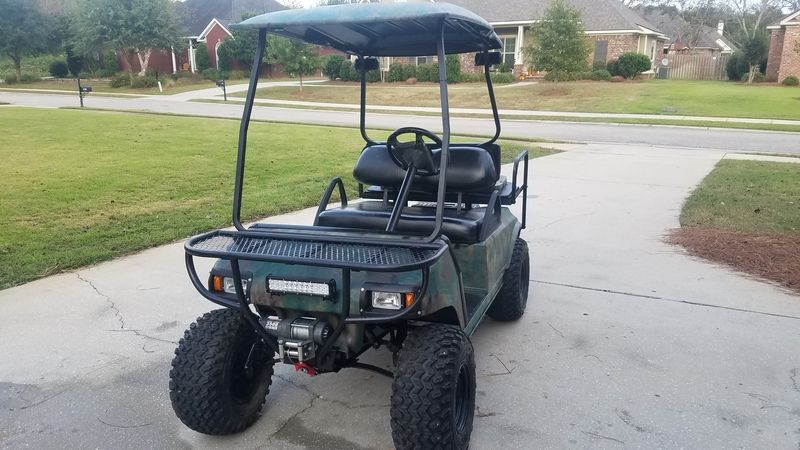 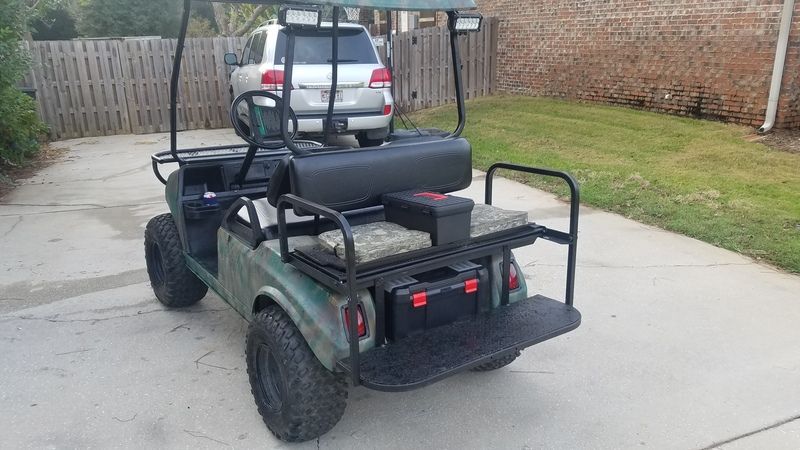 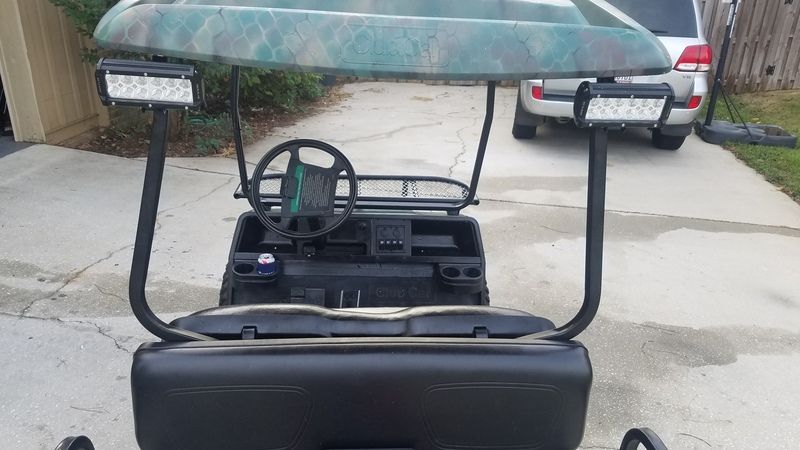 RED LEDS under the lid for finding gear before sunrise. 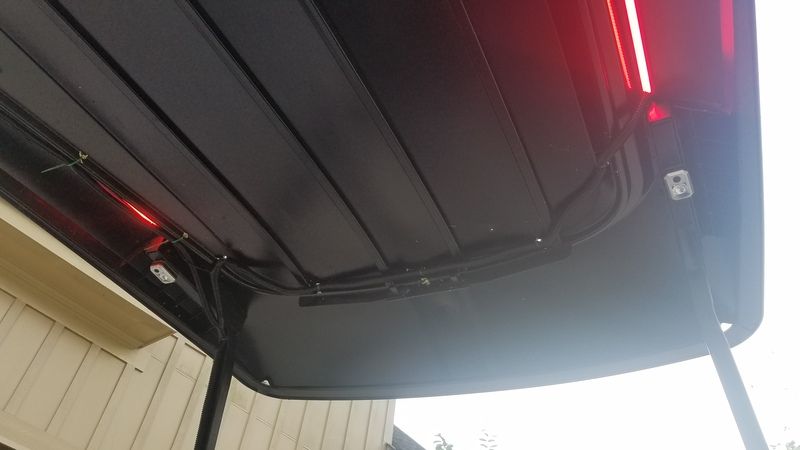 On the left is the winch control switch. It's solenoid switching power is wired in with the red LEDs to help prevent accidental power-up of the winch. On the right is a 4-gang marine switch panel with cig lighter and dual USB battery volt meter. I have the Head Lights, Front Light Bar, Rear Light Bars, and Red LED + Winch on here. The panel is a trimmed and bent cutting board mounted in the cubby. 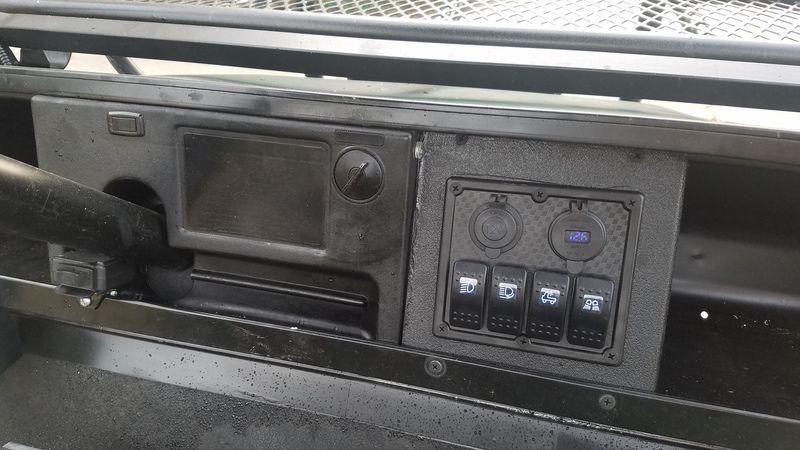 The LED light bars are incredibly bright! 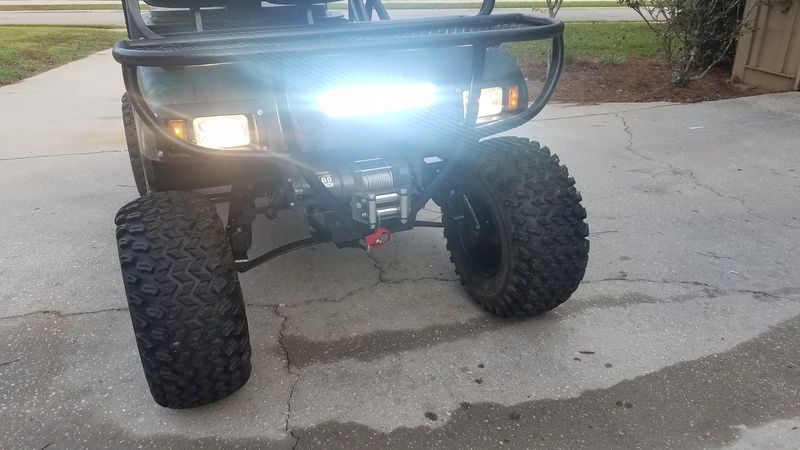 Won't have any problems with light when loading up deer. The lower pads are camo foam seats. The box in the middle is a cheap tool box screwed down to the bed that doubles as a console and storage. The box in the bag well is another tool box that houses the primary charger, cords, extension cord, and 12v charger. Just pull out the cord, plug it in to 120v, and plug in the cart. Works great. 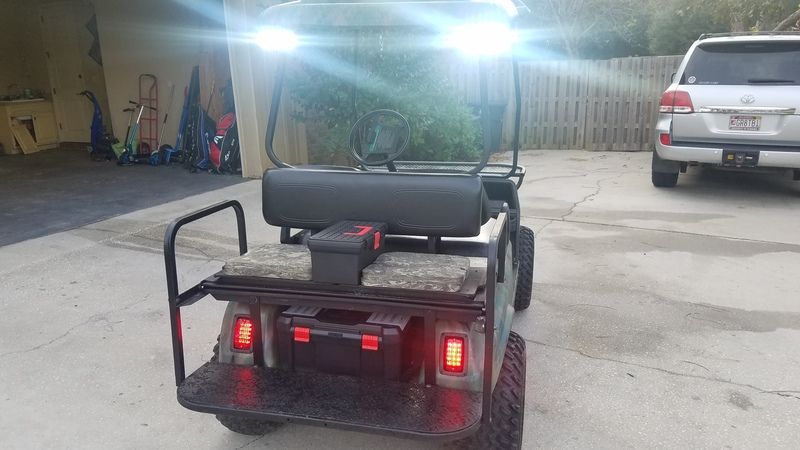 Notice the inverted console/box... 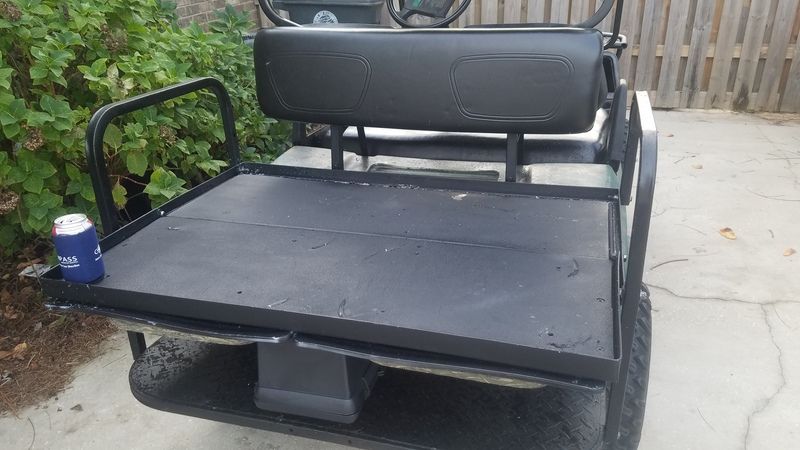 Close up of the camo pattern. 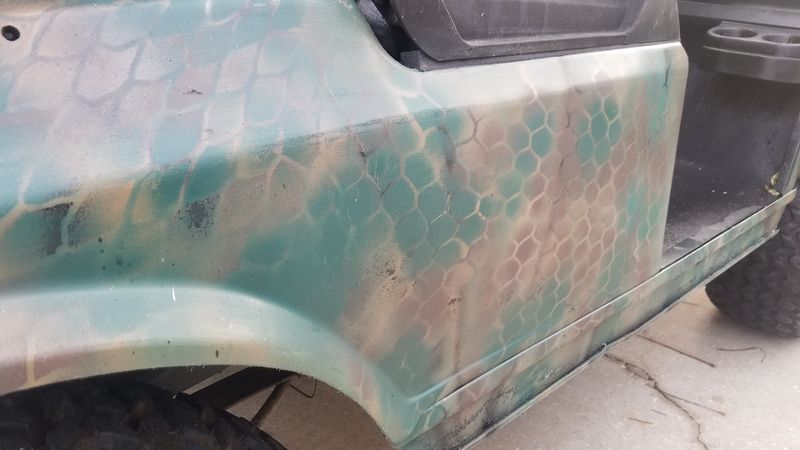 |
|
|

|
|
|
#3 |
|
Not Yet Wild

Join Date: Oct 2016
Location: AL Gulf Coast
Posts: 23
|
Pics aren't uploading. I'll see if I can add them later
|
|
|

|
|
|
#4 | |
|
Gone Wild

Join Date: Feb 2011
Location: Chattanooga TN
Posts: 2,105
|
Quote:
 |
|
|
|

|
|
|
#5 |
|
Not Yet Wild

Join Date: Oct 2016
Location: AL Gulf Coast
Posts: 23
|
For some reason (maybe low post count) I couldn't upload pics here so I hosted them on photobucket. Pics should now be active in the posts.
|
|
|

|
|
|
#6 |
|
Gone Wild

 Join Date: May 2015
Location: Houston
Posts: 903
|
Quite the improvement from the original. Great work on all the upgrades.
|
|
|

|
|
|
#7 |
|
Gone Wild

Join Date: Sep 2016
Posts: 515
|
I like your upgrades especially the storage box in the bag well for the charger & aux. battery. Question, can you access the bag well storage box with rear seat mounted? The addition of a pack voltage meter somewhere on the dash would be good. Sending you a PM.
|
|
|

|
|
|
#8 |
|
Not Yet Wild

Join Date: Oct 2016
Location: AL Gulf Coast
Posts: 23
|
Yeah the tool box is about 10" tall (Wal Mart for about $10) and under that seat there's about 13" of room so I can open the box insitu without removing it. It's really convenient. The box just has the two chargers and the cords. The small lawn & garden battery is under the seat with the Trojan batteries. It's the largest lawn & garden battery I could find and it fits nicely behind the center batteries in the cluster. There's a piece of frame rail there for it to rest on. I used a strap to tie it down. It's a great location and out of the way. I'm about to upgrade the headlights to LED so the only high amperage draw will be the winch that will only get occasional use, so the small battery should be ideal.
The extension cord I got is 25ft, and has three female recepticals, so I plugged in the main charger and the 12v battery tender. Now I just pull one heavy duty outdoor cord out of the box and get power to both chargers. Only other cord I have to run is from the primary charger to the cart. I have a pack voltage meter I haven't installed yet. It's green LED and pretty bright. I'm thinking of either putting it under the seat, or maybe put it on a switch so I can turn the display on/off. It would kill night vision. |
|
|

|
|
|
#9 |
|
Not Yet Wild

Join Date: Oct 2016
Location: AL Gulf Coast
Posts: 23
|
|
|
|

|
|
|
#10 |
|
Not Yet Wild

Join Date: Nov 2016
Location: Troy, MO
Posts: 26
|
Incredible job!! I love what you did with it. Are you planning to add a rifle rack?
|
|
|

|
 |
|
||||||
|
|
 Similar Threads
|
||||
| Thread | Forum | |||
| 72v hunting buggy | Extreme DC! | |||
| Hunting Buggy | Lifted Golf Carts | |||
| Hunting Buggy | Lifted Golf Carts | |||
| hunting buggy,,, | Members Rides | |||
| Hunting Buggy!!! | Lifted Golf Carts | |||