
 |
|
|||||||
| Electric EZGO Electric EZ GO Marathon, Medalist, TXT and RXV. |
  |
|
|
Thread Tools | Display Modes |
|
|
#21 |
|
Happy Carting

 Join Date: Dec 2007
Location: Southern California
Posts: 73,406
|
Go figure, right!?
|
|
|

|
|
|
|
|
__________________
This advertising will not be shown in this way to registered members. Register your free account today and become a member on Buggies Gone Wild Golf Cart Forum |
|
|
|
#22 |
|
Gone Wild

Join Date: Jul 2015
Location: Texas
Posts: 223
|
I just happen to keep 3 golf balls and a "Tee" on my cart and I don't play golf so I guess i'm a little strange
|
|
|

|
|
|
#23 |
|
Gone Wild
Join Date: Sep 2015
Posts: 572
|
I don't suppose you guys have a pic of a golf ball rack? I Googled it and didn't come up with anything on a cart. I like a nice rack. Just ask my wife.
|
|
|

|
|
|
#24 |
|
Not Yet Wild

Join Date: Jun 2011
Location: Shelby, NC
Posts: 25
|
I think he was talking about a sleeve (3) of golf balls. I play golf and that's all I can figure.
|
|
|

|
|
|
#25 |
|
Over This Interview Is...

Join Date: Jun 2012
Location: AZ
Posts: 17,449
|
That spot aint for golf balls
 , its for a stereo that you have yet to install! I took the "ball holder" out of my G2 and installed a "junk holder" tray instead (i put a Jegs sticker on there to make it go faster). , its for a stereo that you have yet to install! I took the "ball holder" out of my G2 and installed a "junk holder" tray instead (i put a Jegs sticker on there to make it go faster). |
|
|

|
|
|
#26 |
|
Gone Wild
Join Date: Sep 2015
Posts: 572
|
I haven't updated in awhile. For some reason I can't get my Supermotors account to work. So I got a photobucket.
Anyways, I got my axles apart and installed a limited slip. The unit seems to be of good quality, but came with no instructions, zero. It's not that complicated, but after I removed the two shipping bolts, I found that it could go together two different ways. I had to guess. I think I got it right as it works. Here is the LSD (left) next to the stock unit. [IMG]  [/IMG] [/IMG]On this forum I saw a thread that said you could spin the brake mounting plate around and install the stock cables on the top. (When using a lift) I liked this idea as it keeps the cables up out of the way and they won't be stretched so tight. When I tried this, I found that you can't just spin it around because then the cable would have to come in from the back. After studying it some, I figured he must have swapped sides and spun it around. So I proceeded with that. But that won't work on my cart either because the actuation arm will hit the lift bracket. [IMG]  [/IMG] [/IMG]I think I could make it work with some mods to the bracket, but I was in a hurry, so it will have to wait till another time. More updates coming. |
|
|

|
|
|
#27 |
|
Gone Wild
Join Date: Sep 2015
Posts: 572
|
Next issue was the controller. Obviously, from the title of this thread, I'm changing the cart to 48V. I hoped to use the controller from my wracked parts cart. The controller got smashed some in the accedent.
 Everyone said it wouldn't work. Said it would explode. But I tried it anyways. No fire works, but no go either. Then a curtis 500 amp controller came up on Craig's. It was a good deal. I guess it was too good. Here I have the tires off the ground and the batteries on the ground for testing. (No go) [IMG]  [/IMG] [/IMG]Notice the corrosion on my battery tray. I was able to clean this up (and paint) while the batteries were out. So I bit the bullet and got a XCT 500. The XCT can be bought with a "flex mount" that has many bolt hole patterns. I have a pretty complete machine shop at my house, so I figured I could make something as good or better. As it turned out, I didn't have to do anything. The controller mounted right on the stock PDS mount. All I needed was longer bolts. [IMG] 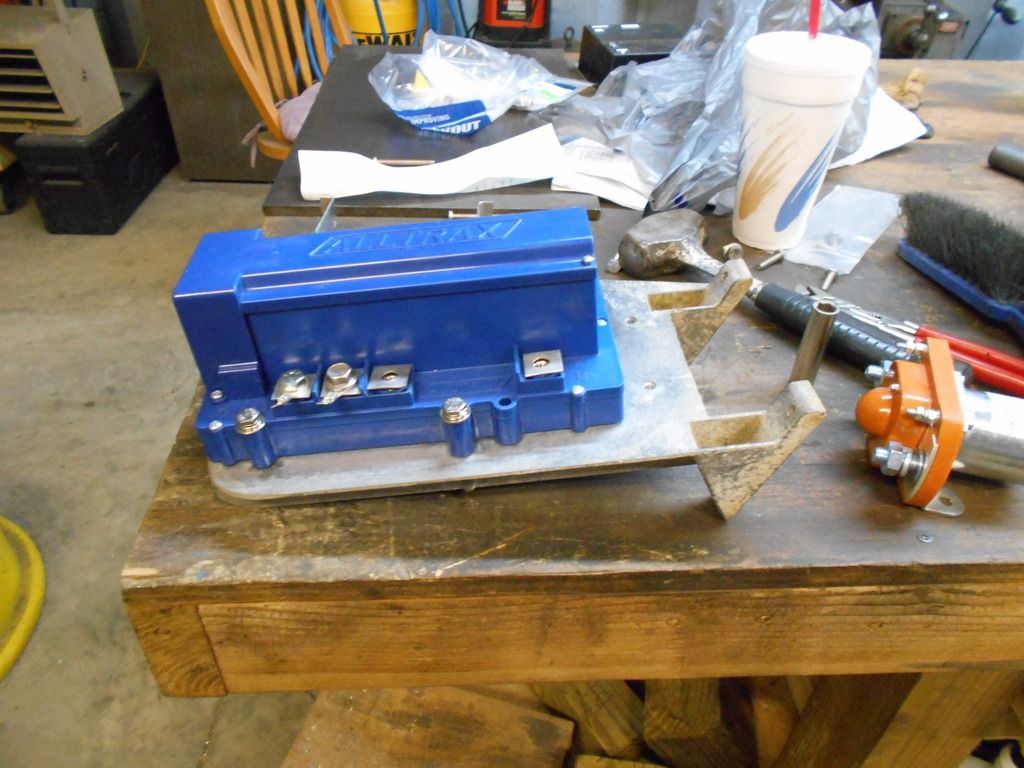 [/IMG] [/IMG]The next item was the selinoid. I found that it almost fit on the stock bracket. A few minutes with a file and it was on. [IMG]  [/IMG] [/IMG][IMG] 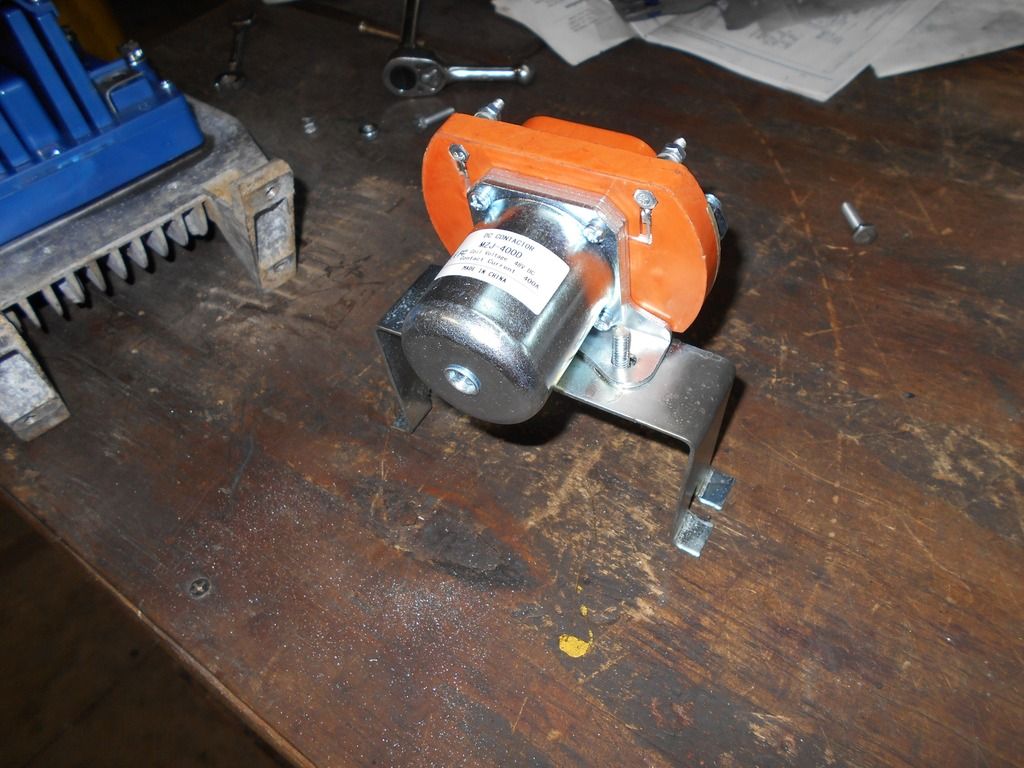 [/IMG] [/IMG]The selinoid bracket fit over the XCT, but it touched it. I didn't like it as I thought it might rub with vibration. [IMG] 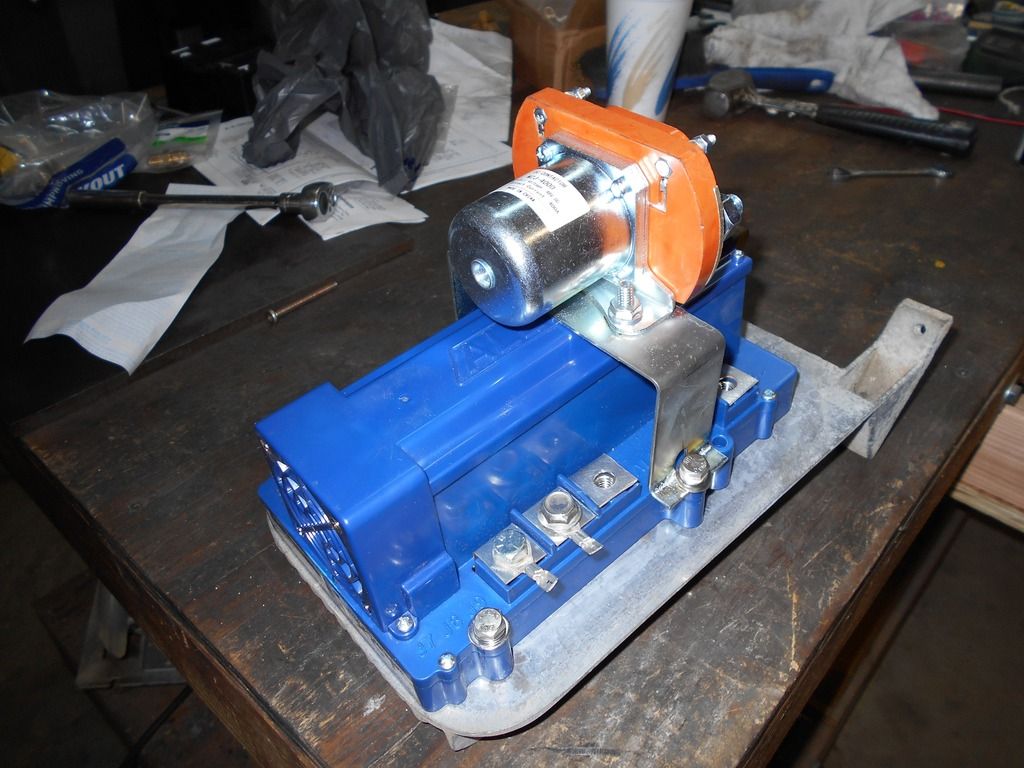 [/IMG] [/IMG]Not sure if that matters because I think the top is only to guide the cooling air, but I did some bending on the bracket to give some clearance. You can kind of see it here. [IMG] 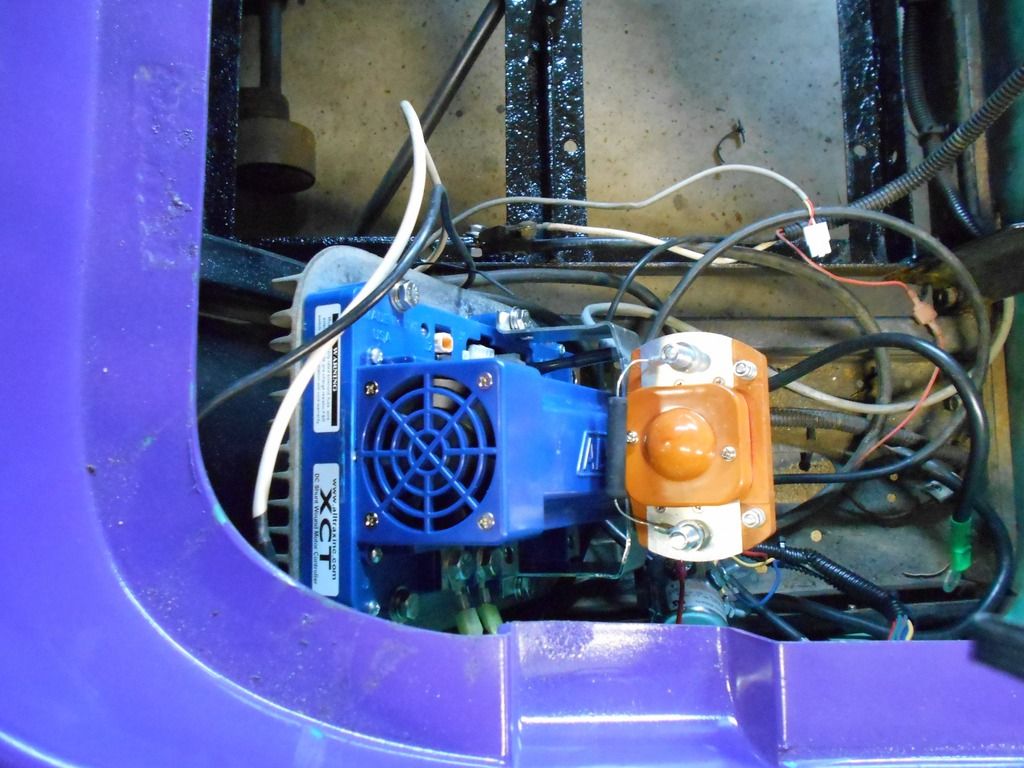 [/IMG] [/IMG]The last thing was the run/tow switch. I just mounted it on a piece of stainless to a mount bolt. [IMG] 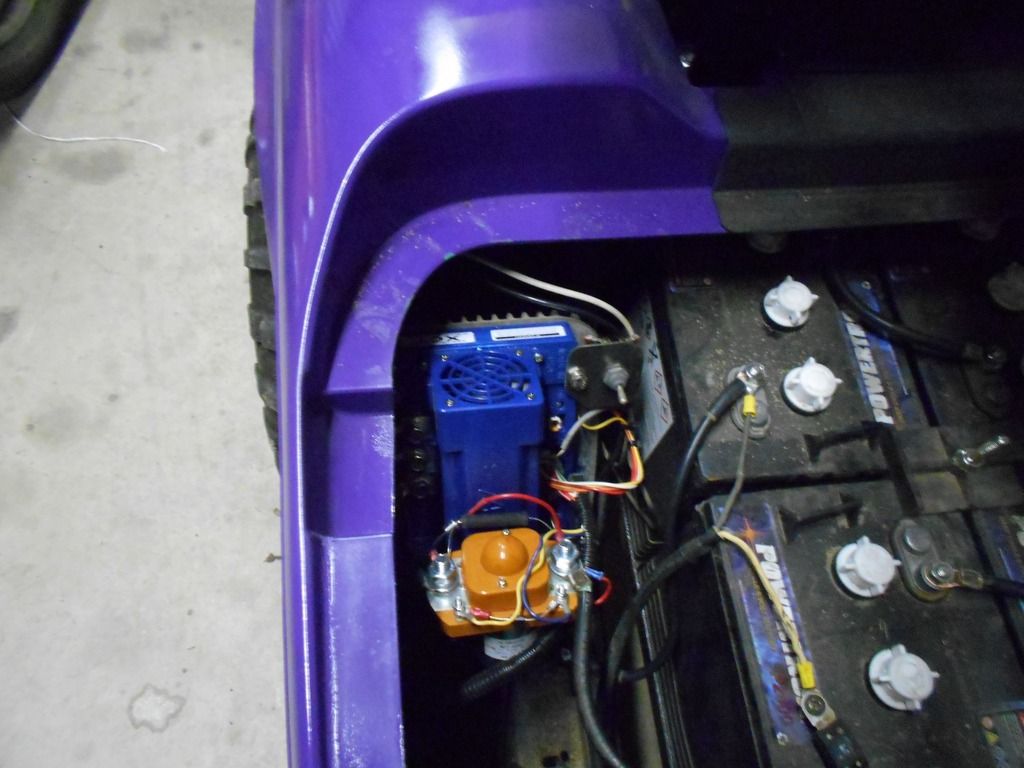 [/IMG] [/IMG]More updates coming. |
|
|

|
|
|
#28 |
|
Gone Wild

Join Date: May 2012
Location: Rio Verde, Az
Posts: 7,167
|
I don't think you want or need the precharge resistor when using the Alltrax controller. My instructions said not to use it.
|
|
|

|
|
|
#29 |
|
Happy Carting

 Join Date: Dec 2007
Location: Southern California
Posts: 73,406
|
|
|
|

|
|
|
#30 |
|
Gone Wild
Join Date: Sep 2015
Posts: 572
|
Just to make sure, is the pre charge resister the big black electrical thing or the little striped electrical thing. What is the effect of having it when it doesn't need it?
|
|
|

|
 |
|
||||||
| Thread Tools | |
| Display Modes | |
|
|
 Similar Threads
|
||||
| Thread | Forum | |||
| Light Connection for 2006 Precedent after 12 Volt - 8 Volt Conversion | Electric Club Car | |||
| 36 Volt to 48 Volt conversion- battery cable lengths? | Electric EZGO | |||
| placement when adding 2 more 6 volt batteries to 36 volt for 48 volt conversion | Electric Club Car | |||
| 36 volt to 48 volt conversion pics | Electric EZGO | |||
| 1990 Club Car DS 36 volt to 48 volt conversion fitting batteries question | Electric Club Car | |||