
|
|
|||||||
| Gas EZGO Gas EZGO Marathon, Medalist, TXT and RXV. |
  |
|
|
Thread Tools | Display Modes |
 12-11-2012, 05:19 PM
|
#1 |
|
Not Yet Wild
Join Date: Oct 2011
Posts: 54
|
So, it's time to upgrade the TXT.
I bought it back in June as just a mall crawler (neighborhood cruiser). It's worked perfectly all summer long and has provided endless entertainment for the kids. Now that it is winter here, we've decided to tear it down for paint. We're still undecided on color or even whether I want to tackle the job myself (rattle can it), or send it to a painter, or purchase one from the likes of Liquid Lenny's (or similar vendor). In the meantime, we'll be installing: 1. Elite Dash (along with radio) - On its way 2. Stainless rockers - got them 3. Light Kit - Got it 4. chrome column cover - got it 5. New steering wheel - last to order For all of the electronics I picked up a fuse block and am considering mounting it behind the key switch. It will run the radio, lights, 12v plug. These will all be powered on by a switch (individual for each component) on the dash. So, I got started on the tear down:  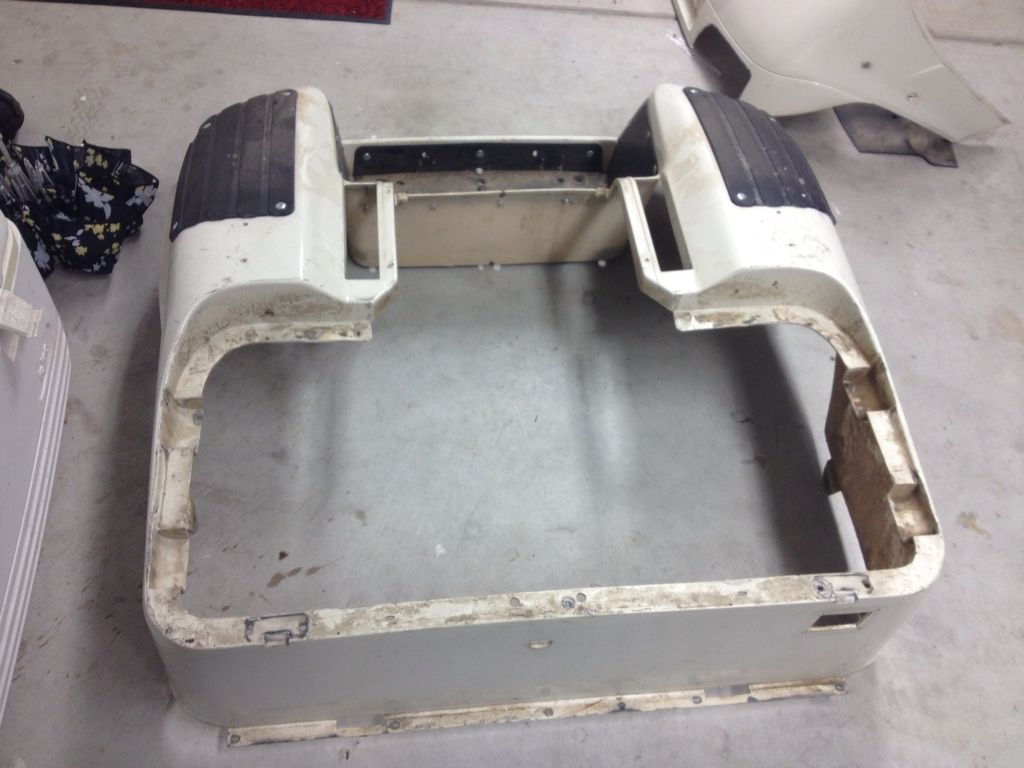 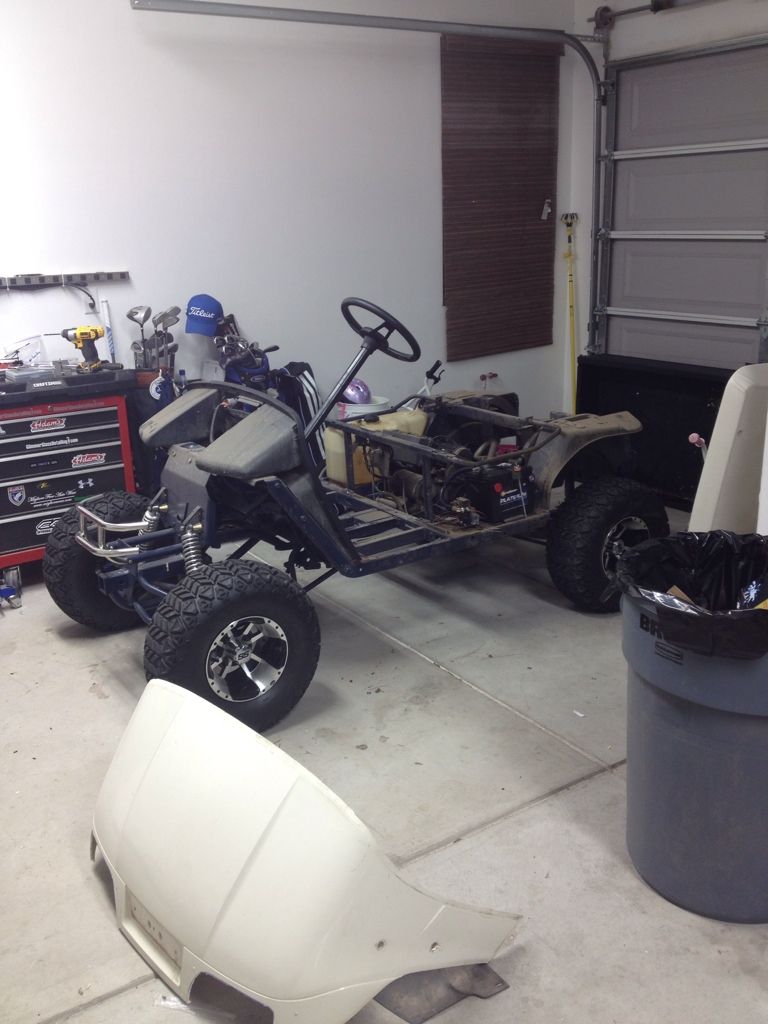 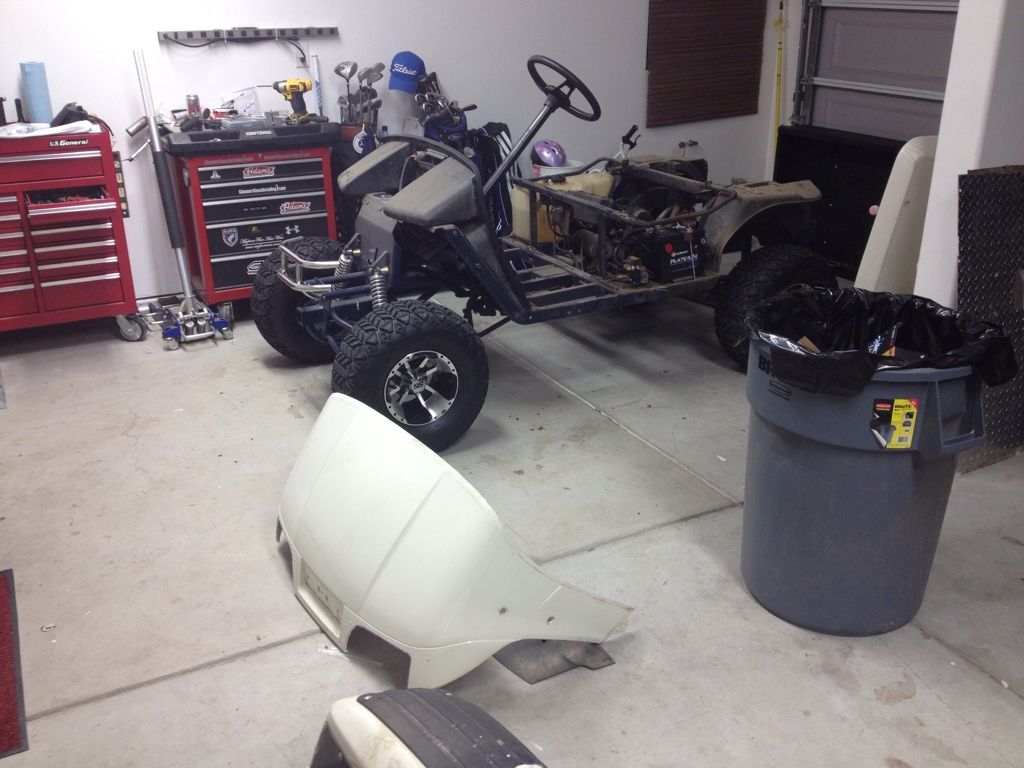 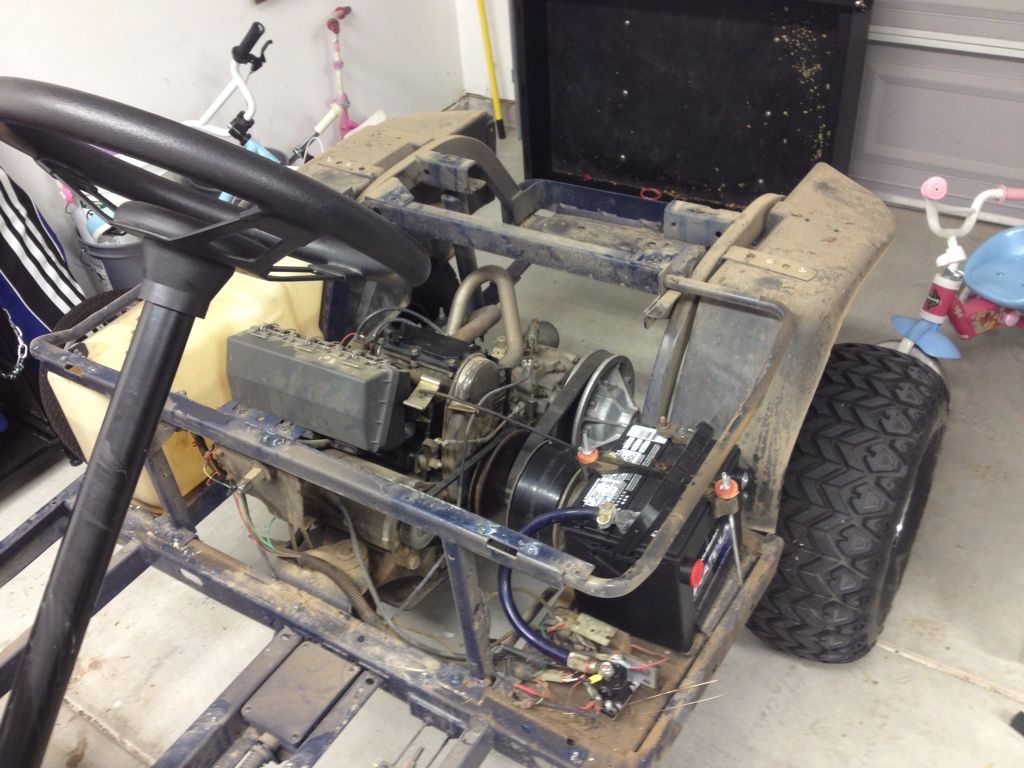 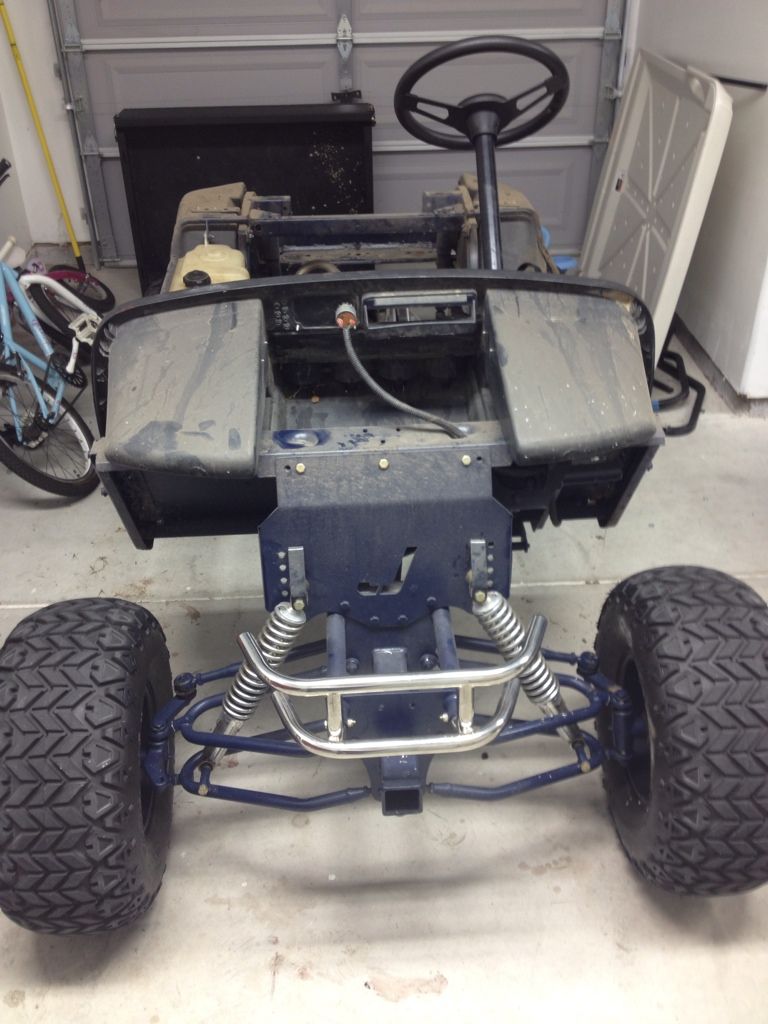 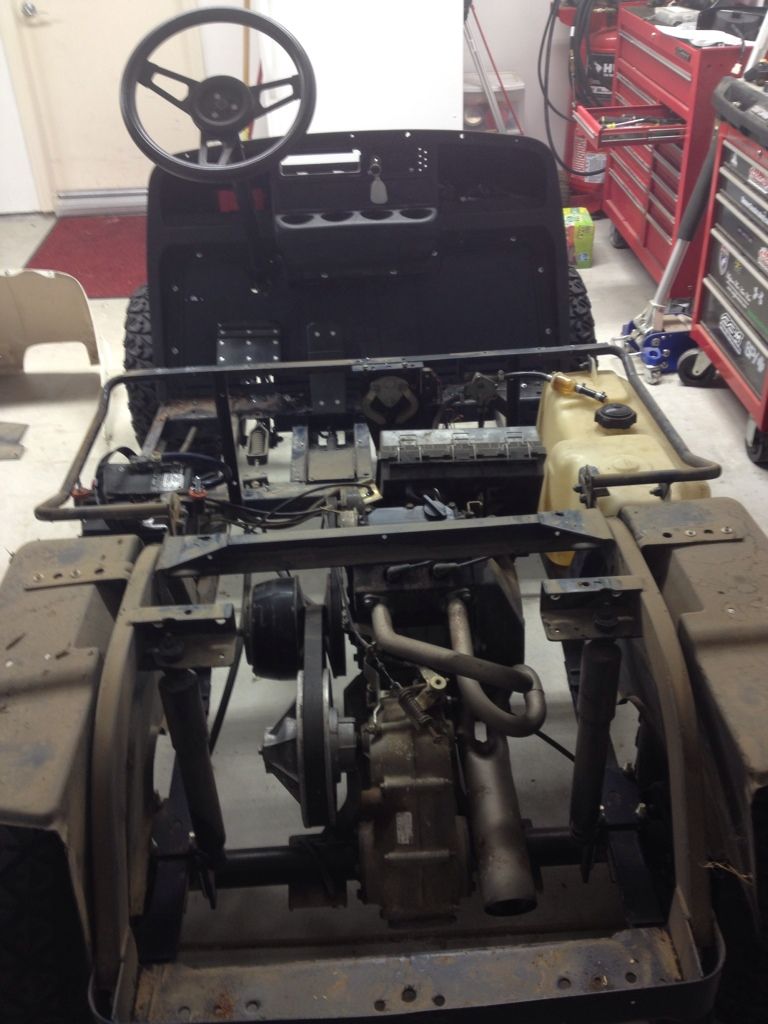 Now that it's torn down, the body is in MUCH worse shape than I figured it would be This is going to take me a while to get back together as I'll only be working on it a little at a time. |

|

|
 Today Today
|
|
|
__________________
This advertising will not be shown in this way to registered members. Register your free account today and become a member on Buggies Gone Wild Golf Cart Forum |
|
|
12-11-2012, 07:54 PM
|
#2 |
|
Monkeylicious

Join Date: Apr 2008
Location: Mississippi
Posts: 952
|
Looks like you got a good start on the rebuild. Keep the pics coming.
|
|
|
|
|
12-12-2012, 11:09 AM
|
#3 | |
|
Not Yet Wild
Join Date: Oct 2011
Posts: 54
|
Quote:
 |
|
|
|
|
|
12-12-2012, 12:57 PM
|
#4 |
|
Gone Wild

 Join Date: Dec 2009
Location: Aiken, SC
Posts: 13,140
|
Lookin good
Not sure about the fuse block behind the switch though.. Would be a pain to troubleshoot if you had an issue. As for changing colors, there are many options, rattle can, sprayed and cleared, wrap and also hydro wrap, etc.... Keep the pics coming |
|
|
|
|
12-12-2012, 03:27 PM
|
#5 | |
|
Not Yet Wild
Join Date: Oct 2011
Posts: 54
|
Quote:
 |
|
|
|
|
|
12-12-2012, 03:41 PM
|
#6 |
|
Gone Wild
Join Date: Dec 2009
Location: Aiken, SC
Posts: 13,140
|
Mine is mounted to the drivers side rear inner fender. Not next to the devices but easier to get to... And there is running a power wire up to the dash issue for each circuit.. but you could run just one ground that is like 8 guage..
Sweet dash.. Would like one but it would never survive with us  |
|
|
|
|
12-12-2012, 06:12 PM
|
#7 |
|
Not Yet Wild
Join Date: Oct 2011
Posts: 54
|
That's a long way to pull all of those circuit wires. I was planning on just running one 4 gauge wire from the battery to the fuse block behind the key switch. Then, to each button on the dash and then to the accessories. I'll be able to turn on/off each accessory independent of the key switch.
The other option I contemplated was running a second main switch that would switch power to the fuse block on/off. However, I'll still need to switch the lights somehow. Hopefully, nothing blows fuses :/ |
|
|
|
|
12-17-2012, 11:55 PM
|
#8 |
|
Not Yet Wild
Join Date: Oct 2011
Posts: 54
|
Elite Dash showed up today.
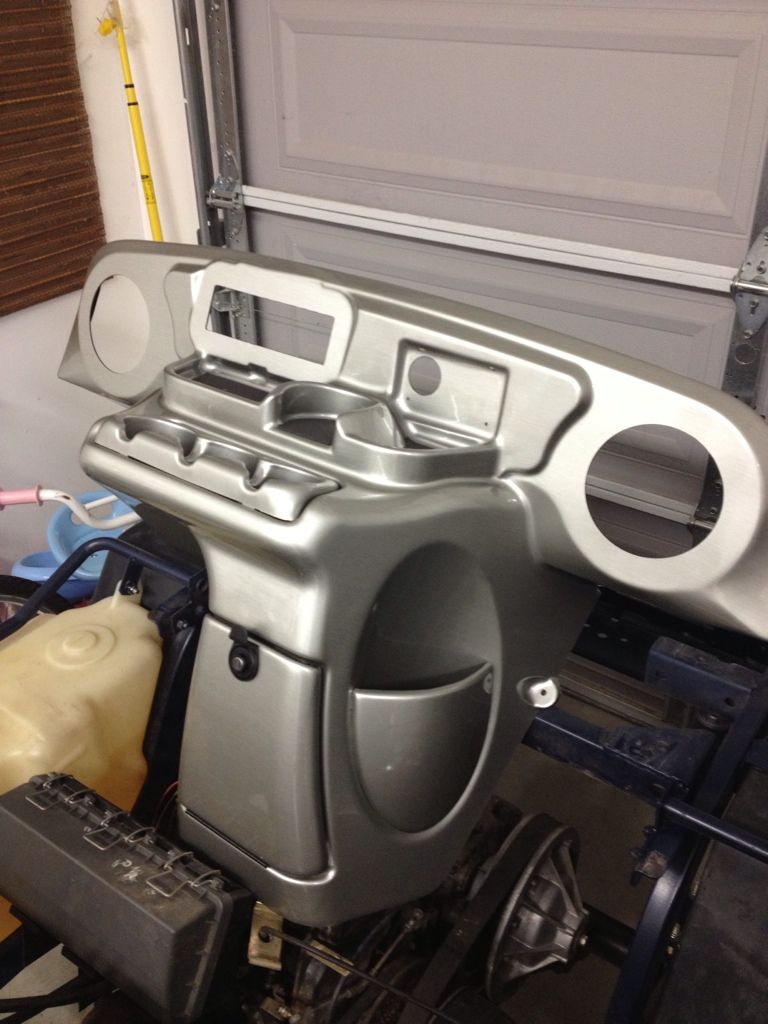  So, now that it's here I can start running wires and making dash modifications. However, I can't really install it permanently until I get the front cowl on. Which means we actually need to make a decision on what the hell we're going to do. So, slow and steady wins the race. |
|
|
|
|
02-25-2013, 10:55 AM
|
#9 |
|
Not Yet Wild
Join Date: Oct 2011
Posts: 54
|
Finally pulled the trigger on a plan of attack. Decided to give Plasti-Dip a shot on the body. It's a cheap way to make a change and technically, it's not permanent. I'm not sure I'm going to like it when finished though.
I think I have everything to start the re-assembly. Got the fuse block wired up finally and radio wired up. Tested it last night and got sound out of a temporary hook up. I wired the 12v switched source to constant power and will just have to hit the power button every time it's stopped. Here's the only shot I took last night as I went in for the night. 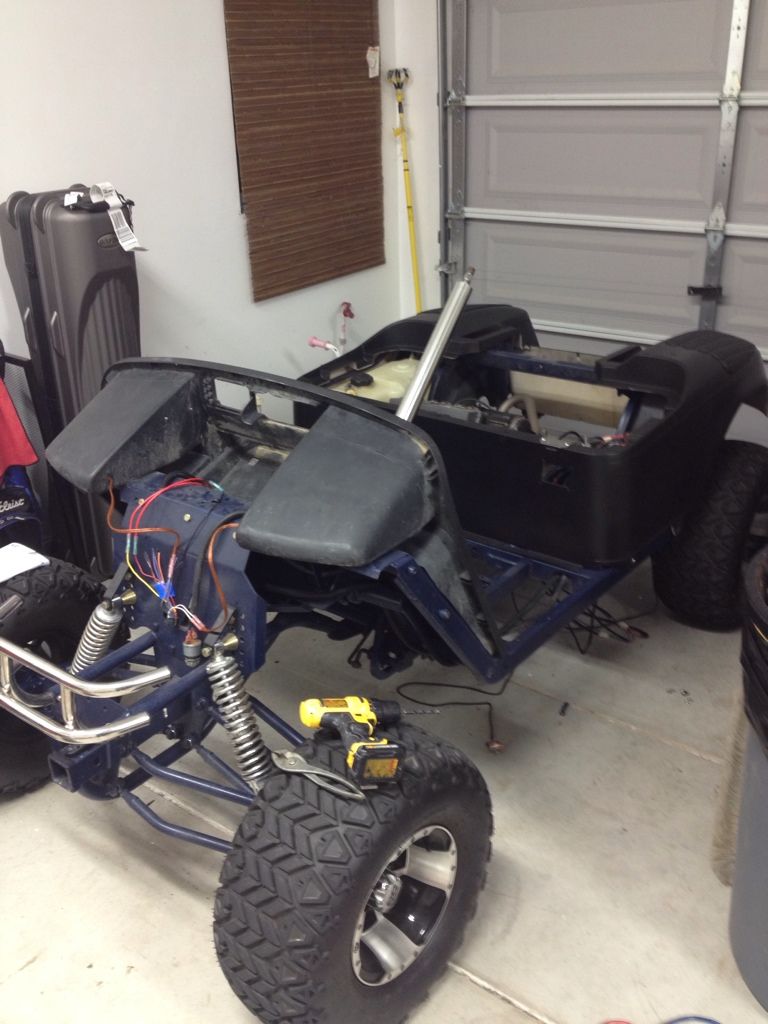 Most of the body will get re-installed using SS nuts and bolts (where feasible). You can see the color is flat black for the plasti Dip and the questionable issue is the color of the undercarriage. My wife thinks this needs to be re-painted to black also, but for now it's going to stay blue. |
|
|
|
|
03-01-2013, 01:21 PM
|
#10 |
|
Not Yet Wild
Join Date: Oct 2011
Posts: 54
|
A little more work got done. I'm ready to have my garage back...
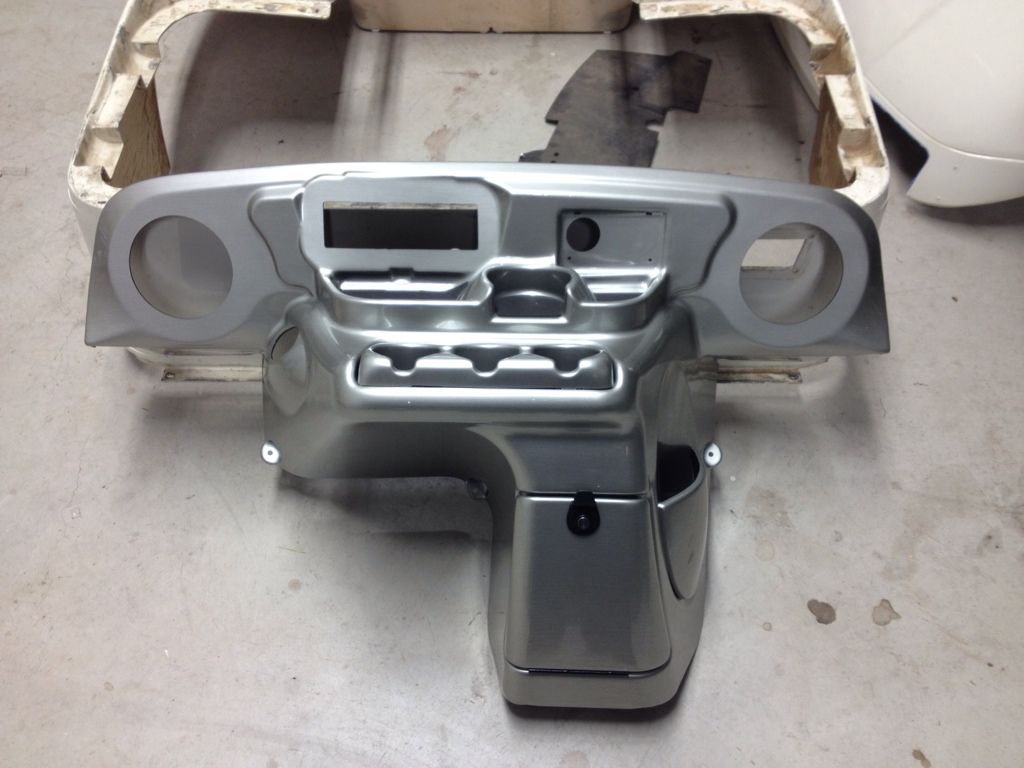
Anyway, got the front body back on, the radio/speakers/dash installed. I used Jack nuts for the front cowl to be able to re-install the cowl without using rivets. To be honest, it would have been easier to just use rivets. I had a heck of a time getting the screw started on each and every hole.  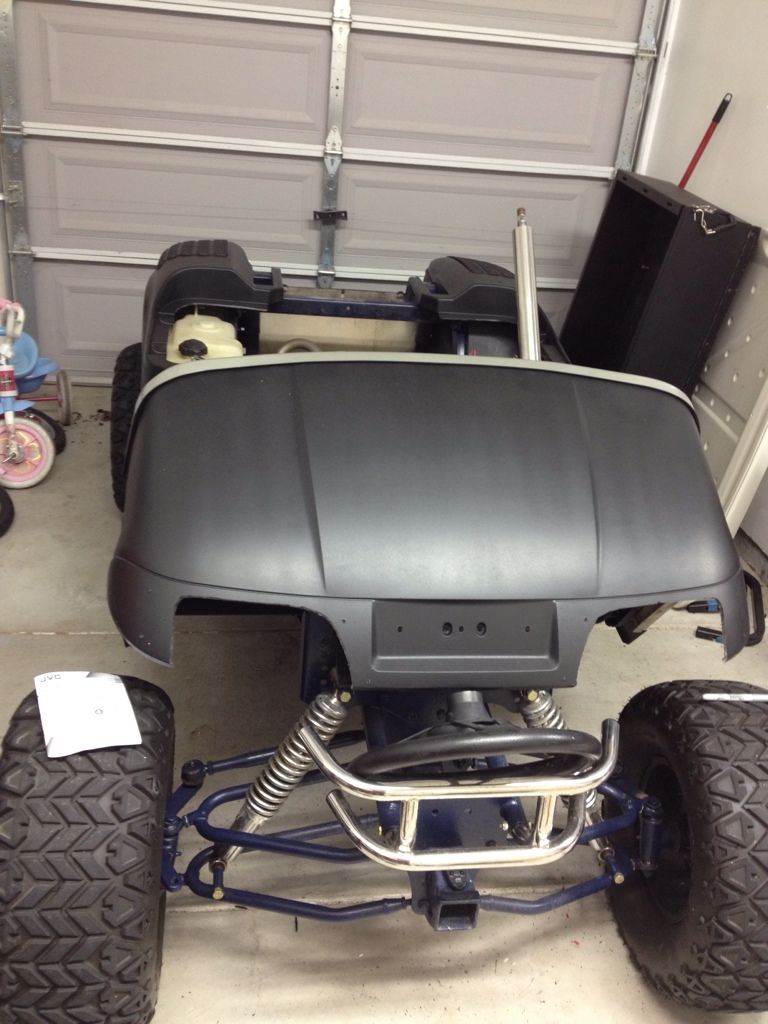 Bolted down. I used Riv nuts in the floor as the mounting point.  Radio and speakers installed. This is the JVC unit with the USB plug on the face. It will charge my phone, so I won't be adding a seperate 12v plug. 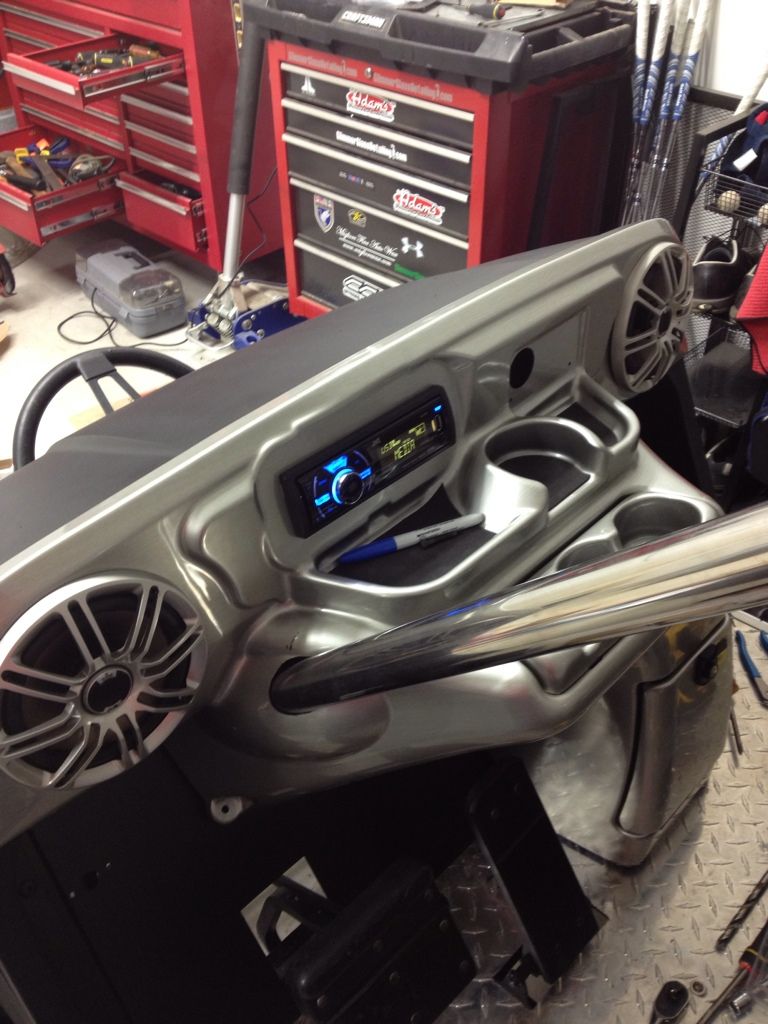 I'm hoping to make some more progress tonight. I still need to plasti dip the roof in order to match the body, but I want this thing back together before I start on the roof. Also, for the dash, in order for the Stainless steering column to fit, you have to open up the hole in the dash. You can see where my dremmel slipped and scratched the dash...I was pissed. |
|
|
|
|
|
||||||
| Thread Tools | |
| Display Modes | |
|
|
 Similar Threads
|
||||
| Thread | Forum | |||
| 07 PDS upgrades | Electric EZGO | |||
| Newbie - 07 TXT/PDS The right upgrades the first time | Electric EZGO | |||
| Take your time and do things right the 1st time | Electric Club Car | |||


 Linear Mode
