
 |
|
|||||||
| Gas Yamaha Gas Yamaha Golf Cars; G1 through "The Drive" and U-Max Utility Vehicles |
  |
|
|
Thread Tools | Display Modes |
|
|
#11 |
|
Gone Wild

Join Date: Dec 2012
Location: E. Wallyworld Vermont
Posts: 234
|
I have done two trial fittings in the past week. The first was a simple flat mount that set the engine nicely in place but I quickly realized there was now way to fit a carb on the engine.
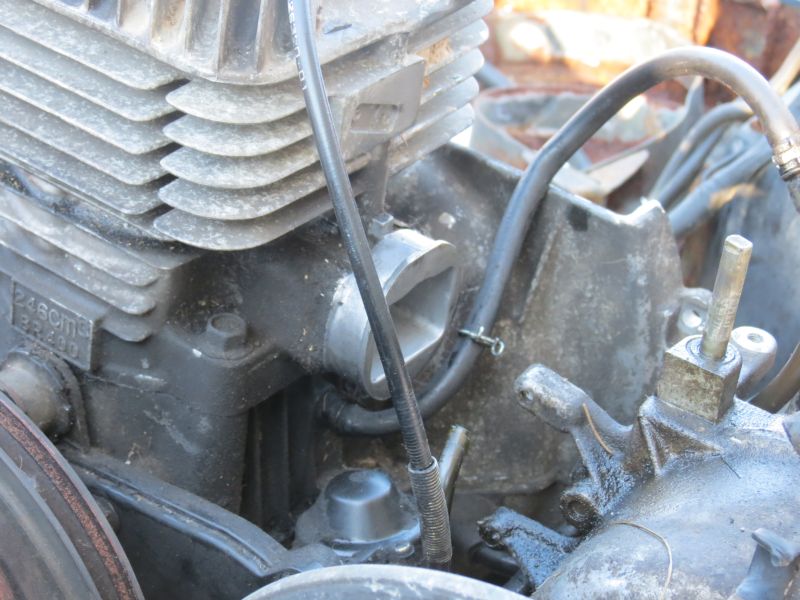 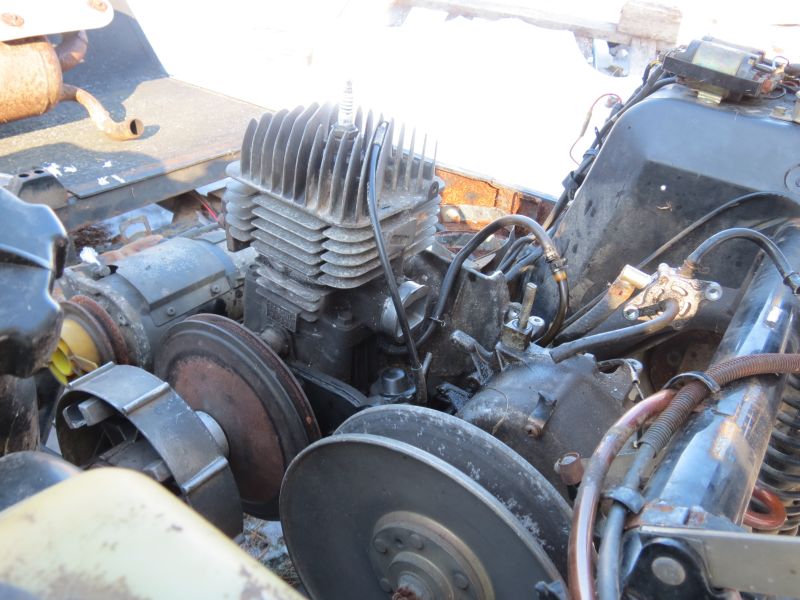 Realizing this was not going to work I took a look at the few Bravo installs and realized the G1 engine leans forward about 15°. With this in mind I quickly welded up a mount and tried it again, 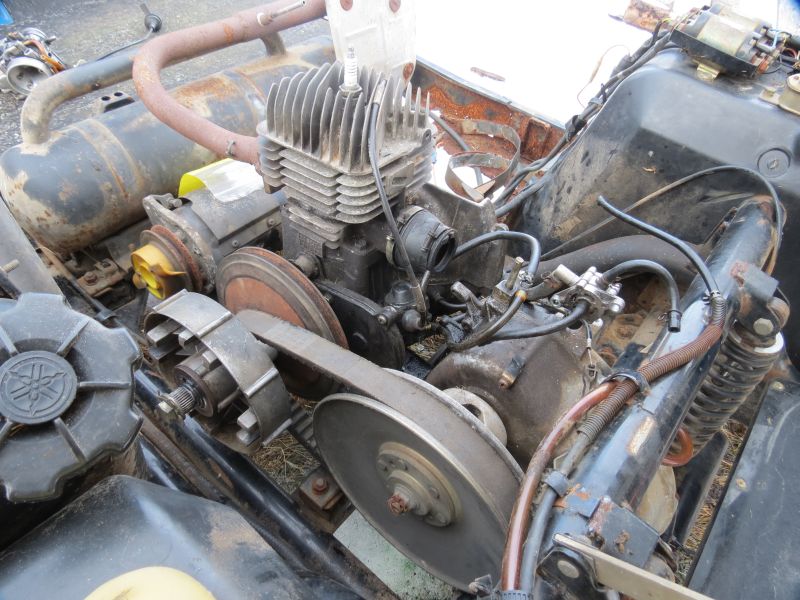 From the rear the carb is over to close to the governor shaft. 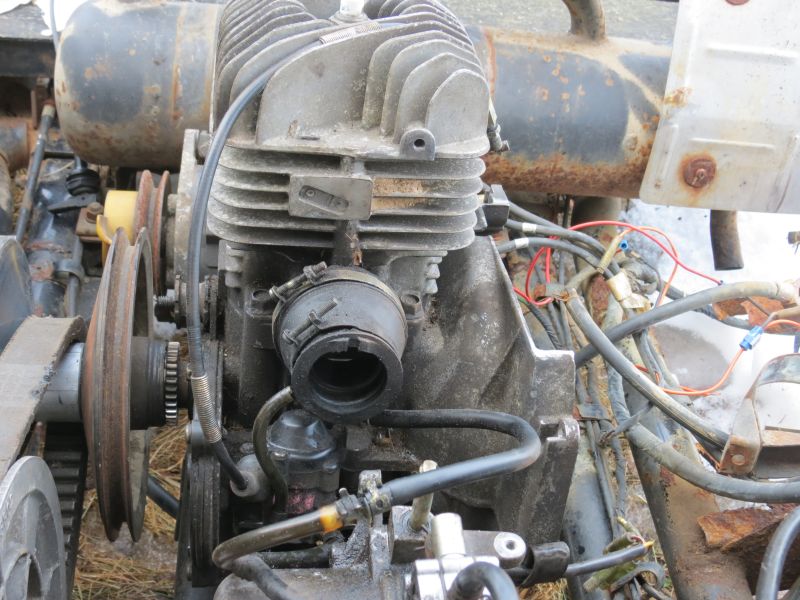 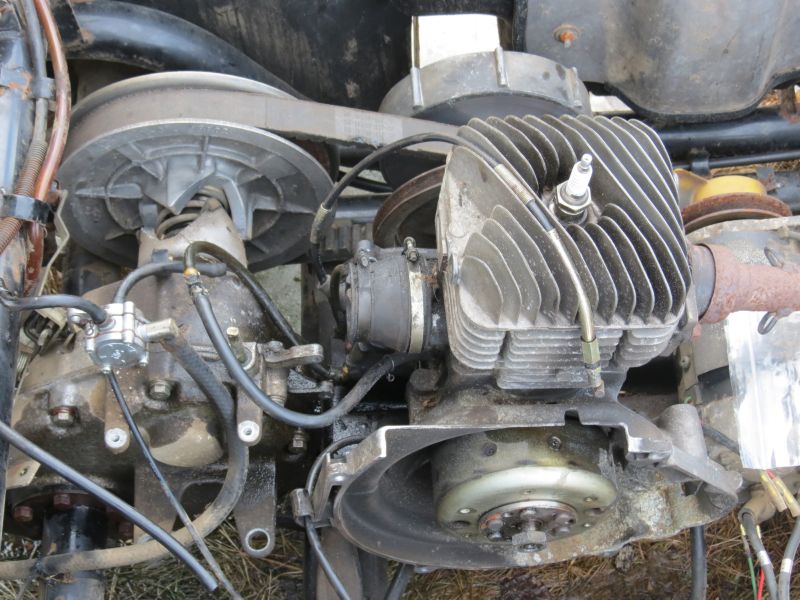 I expect nipping off the fuel pump mount tab will the the float bowl fit but there is still heavy interference with the boss the governor shaft mounts in. Looking at some pictures on this site where the Comet clutch I presume from an EZ-go is used it appears the clutch mounts in closer to the engine case allowing the engine to be moved to the left a bit. I positioned my engine by measuring from the pulley face over to the mount bosses for each engine. It would be nice to close up this dimension a bit. Back to design work again. I am beginning to think doing an axle flip which would give about 3" of lift would get me all the room I would need. I had made my engine mount |
|
|

|
|
|
|
|
__________________
This advertising will not be shown in this way to registered members. Register your free account today and become a member on Buggies Gone Wild Golf Cart Forum |
|
|
|
#12 |
|
Searching for The Way

 Join Date: Oct 2009
Location: Medina, Ohio (NEOHIO)
Posts: 11,436
|
Great pics! Yeah moving the axle might be just the ticket. Are you talking about mounting the axle under the swing arm?
|
|
|

|
|
|
#13 |
|
Gone Wild

Join Date: Dec 2012
Location: E. Wallyworld Vermont
Posts: 234
|
|
|
|

|
|
|
#14 |
|
Gone Wild

Join Date: Dec 2012
Location: E. Wallyworld Vermont
Posts: 234
|
My decision is made, right or wrong. After some measuring and quite a bit of looking at options I decided to approach my engine swap and carb clearance issues a bit differently.
I have decided to go with a wider drive belt. This offers a few advantages as well as a few issues still to solve. First, going up to a 1¼" wide belt will utilize the full range of the drive system. In the pictures below you will see the new belt rides right up to the top of the secondary sheave, the front has plenty of room allowing full disengagement as well. The belt will also be able to ride much higher in the primary sheave as well. Obviously nothing is proven yet and no clue as to what tuning of the drive is needed. This is not this weeks issue. Pardon the block of wood holding the motor forwards here, 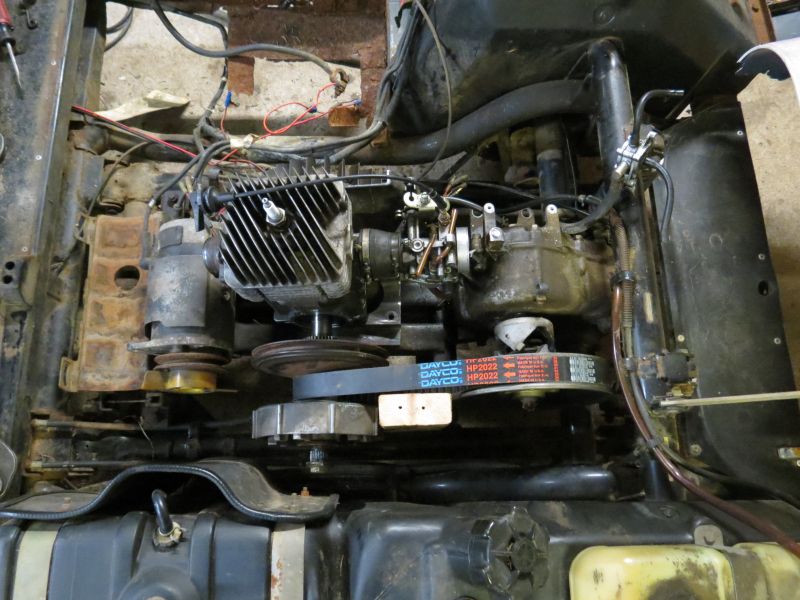 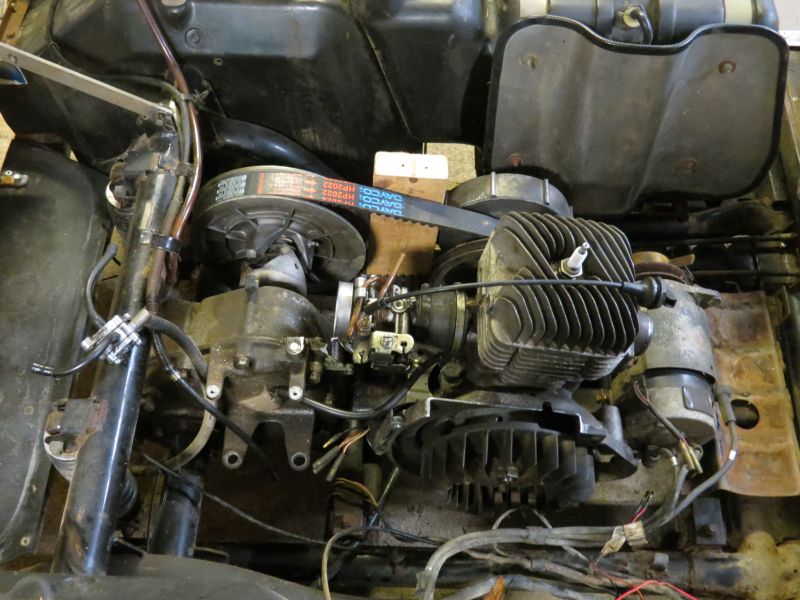 From this side we can see I now have plenty of room for the carby. The engine once it is on a mount will be up a bit higher as well. 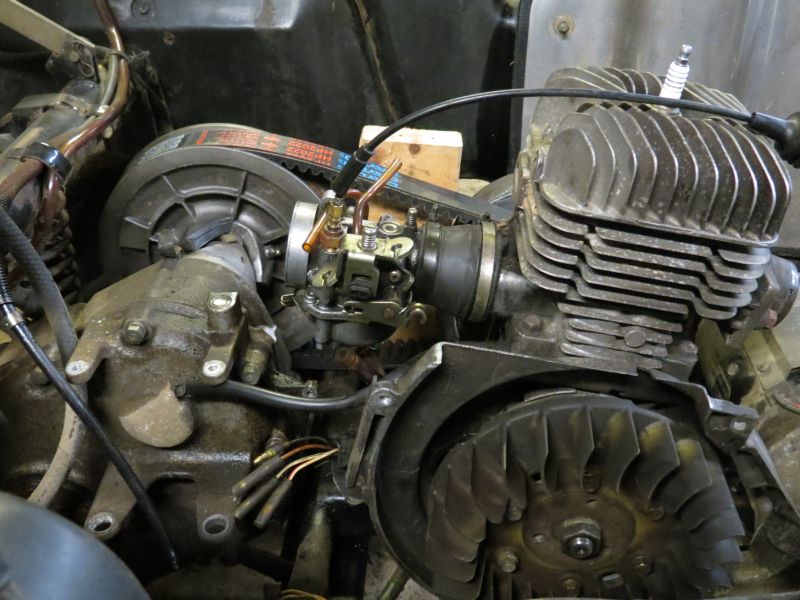 Here is the new belt and old belt, the old one measures 1.15" so it is around the low end of spec but the new one is just right. In the upper part of this pic you can see the motor mount and how much the engine has moved forwards, 1¾" is about what I measure. 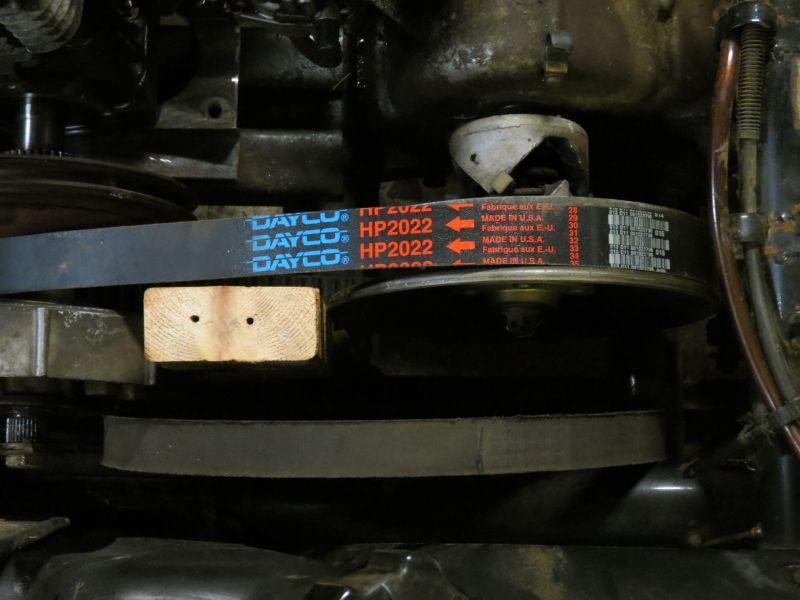 My next step will be to remove the engine cradle, mount it on a mill and drill new holes for the engine bracket. I think I will slot these holes so I can tune the belt length. Then cut a bunch more clearance in the blower housing for the starter and mount things back up. The starter just might be able to mount on it's original hole. We will see. The original tensioner will no longer suffice. Other stuff I have done have been to replace the crank seals and swap over the G1 flywheel and ignition. I am waiting on a new oil pump drive gear, the Bravo manual says the gear is to be replaced each time it is removed, I said hah, no issue. Well then it bound up on the shaft and came off as a potato chip shape. So a new gear, throttle cable and other little bits are on their way. I expect I will make my own choke cable, the G1 cable is a bit frayed and I am wanting to change to the little flip lever choke control. So out will come the solder pot and new cable will be made. |
|
|

|
|
|
#15 |
|
Gone Wild

Join Date: Dec 2012
Location: E. Wallyworld Vermont
Posts: 234
|
The oil pump drive gear for the Bravo engine is on backorder with no availability date from Yamaha at this time. The new throttle cable has been shipped today so I can get that part done.
I suspect push comes to shove I will put this together without the oil pump for the time being and install that later, need to see how things go. As for rear tires I have bought a pair of CST C9309 Ambush Sport tires in a 18x10-8 size and will be mounting these on 8.5x8 ATV rims. The rims will need a different bolt pattern drilled in them to mount up. I think these will work well around the yard,  |
|
|

|
|
|
#16 |
|
Gone Wild

Join Date: Dec 2012
Location: E. Wallyworld Vermont
Posts: 234
|
This morning I got a chance to make the new bracket for the starter, this is a tube with machined ends that I welded on to the motor bracket.
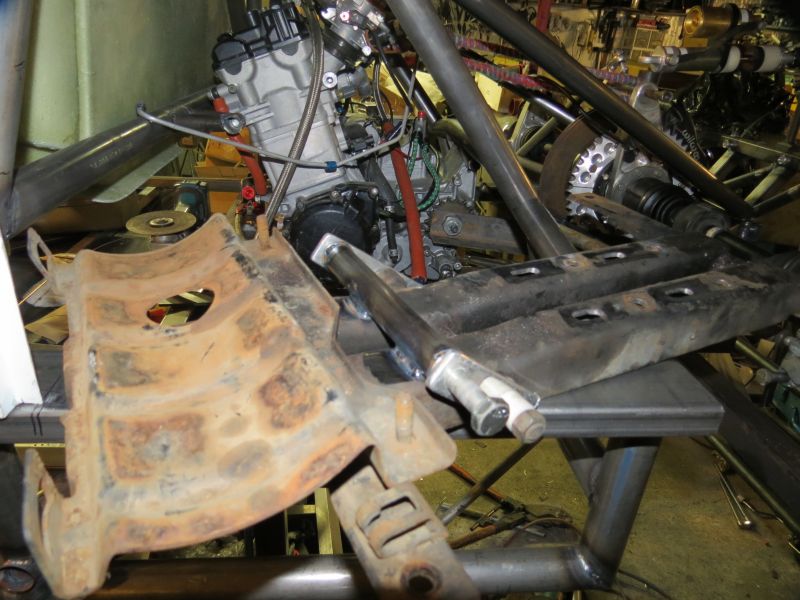 I use some scrap aluminum to position the bracket as I Tig welded it in place. 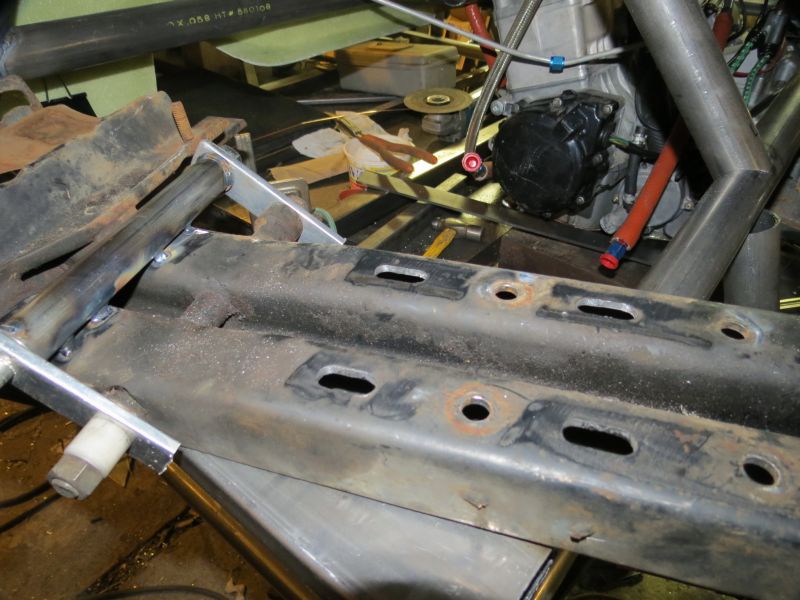 And installed in place. Notice the slotted engine mounting so I can adjust the drive belt. 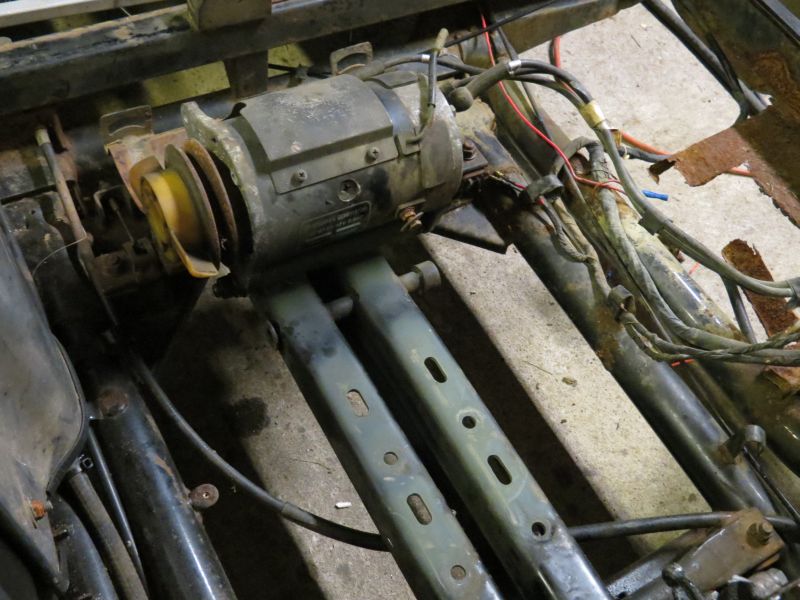 My new tires and rims arrived as well, I like them. 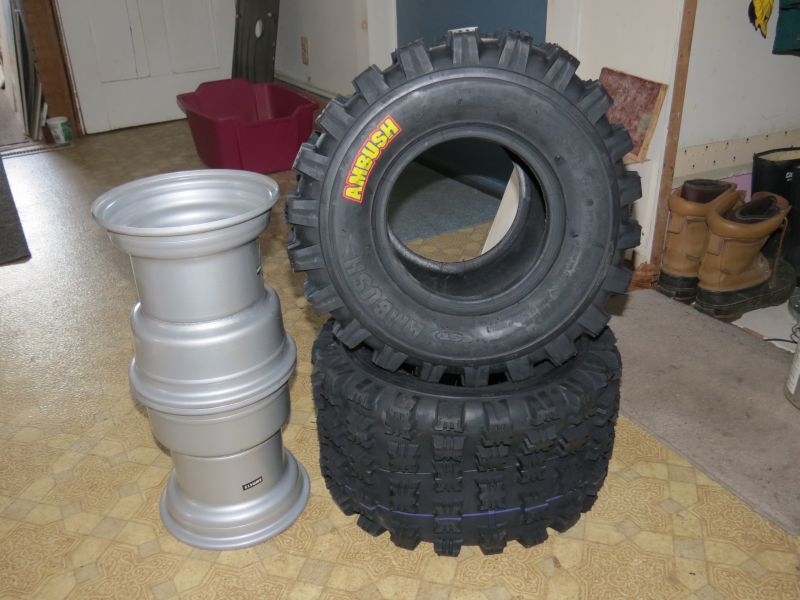 These are mounted on 8X8.5 rims, quite a bit wider than the 7" rims the carts normally ride on. 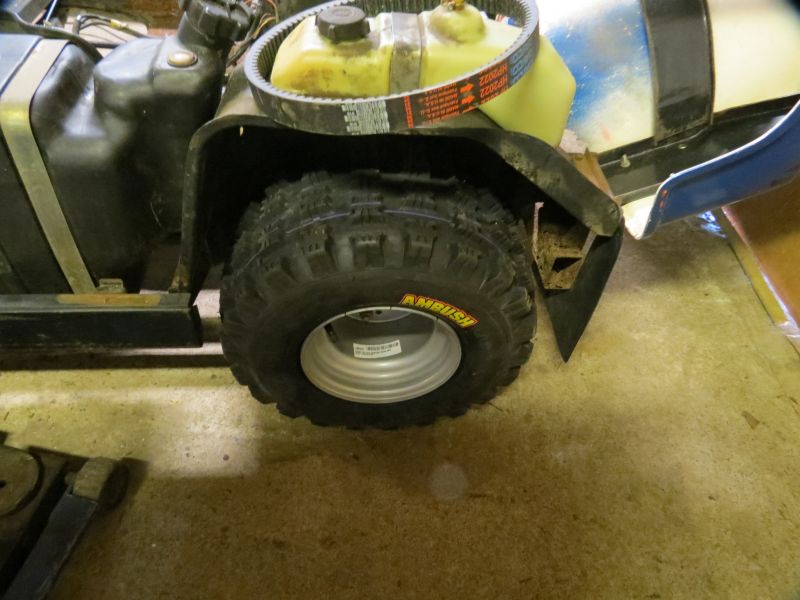 |
|
|

|
|
|
#17 |
|
Searching for The Way

 Join Date: Oct 2009
Location: Medina, Ohio (NEOHIO)
Posts: 11,436
|
Man you aint playin around are you? I can't wait til she runs! I'm getting anxious to start my Enticer jug and piston swap.....
 |
|
|

|
|
|
#18 | |
|
Gone Wild

Join Date: Dec 2012
Location: E. Wallyworld Vermont
Posts: 234
|
Quote:
I am getting a good feeling with my build, I am staying quite conservative, at least for what I am used to building but should have a good usable multi function car once it is running. |
|
|
|

|
|
|
#19 |
|
Searching for The Way

 Join Date: Oct 2009
Location: Medina, Ohio (NEOHIO)
Posts: 11,436
|
Looking forward to it!
 |
|
|

|
|
|
#20 |
|
Gone Wild

Join Date: Dec 2012
Location: E. Wallyworld Vermont
Posts: 234
|
First Saturday of spring update.
Sunny breezy day out and it looks like my FedEx driver is not in the mood to deliver a Mcmaster order today. Fifth time this year for this driver, dang. I was so hoping the V belt for the starter would be here so I could mount the engine. Looks like I need to go ahead and change the inlet of the muffler with the engine just set in place. But I did make new battery cables and set a lawn mower battery in place so I could motorize the starter. glad I did because the starter is not what I would call quite. It has a howl to it and I think I will be best off pulling it apart and look inside before it locks up. One other holdup is the oil pump drive gear for the Bravo is on backorder from Yamaha, it will be end of April before it arrives so for the short term I will run premix. This will not stop me from getting it running and in reality it will be warm out them so I can do a proper job of cleaning parts. Oh another thing I noted today as I was working with the throttle cable, the pedal travel only pulls the cable enough to give the Bravo half throttle. Looks like more changes need to be done. |
|
|

|
 |
|
||||||
|
|
 Similar Threads
|
||||
| Thread | Forum | |||
| G1 big block project br250 bravo | Gas Yamaha | |||
| G1 bravo, how to lock the rear end | Gas Yamaha | |||
| Help with Green Car model Bravo | Electric golf carts | |||
| Bravo Buggy For Sale | Golf Carts and Parts | |||
| Bravo engine in a G1 | Gas Yamaha | |||