
|
|
|||||||
| Electric EZGO Electric EZ GO Marathon, Medalist, TXT and RXV. |
  |
|
|
Thread Tools | Display Modes |
 09-24-2015, 03:16 PM
|
#21 |
|
Guest
Posts: n/a
|
i went with the rivets also .. the kit includes the ezgo name plate nuts
check out my 97 ezgo build http://www.buggiesgonewild.com/elect...old-build.html |

|
 Today Today
|
|
|
__________________
This advertising will not be shown in this way to registered members. Register your free account today and become a member on Buggies Gone Wild Golf Cart Forum |
|
|
09-24-2015, 03:48 PM
|
#22 |
|
South LA Coonass

 Join Date: Mar 2014
Location: New Iberia, LA
Posts: 531
|
Thanks guys. I was planning rivets on the floorpans, but might just stick with rivets. I got plenty rivets in the shop already so I won't have to buy any. Which rivets require a special tool,
|

|
|
|
09-24-2015, 03:54 PM
|
#23 |
|
Guest
Posts: n/a
|
the 1/4" bigens ...
 1/4" rivets at the bottom of the body, just use the standard ones made for the dash. They work fine. As for the others, if I remember... 7 sm black across the dash, 2 sm blk behind the nameplate, dont forget the dust cover, 2 silver lrg flange for lower part of front cowl, 4 blk lrg flange for skirts, 4 slvr lrg flange for hinges, 5 sml silver lower body at floor, 1 silver at top center front of body. |
|
|
|
09-24-2015, 07:59 PM
|
#24 | |
|
Gone Wild
Join Date: Aug 2009
Posts: 14,245
|
Quote:
|
|
|
|
|
|
09-24-2015, 08:29 PM
|
#25 |
|
Guest
Posts: n/a
|
not an ezgo guy but it was a steal and made $1300 ... got 3 in the works 01 ds gas (my show cart), 85 36v ds, 48v ds 02
|
|
|
|
09-24-2015, 08:37 PM
|
#26 |
|
Gone Wild
Join Date: Aug 2009
Posts: 14,245
|
Nice flip!
|
|
|
|
|
09-27-2015, 08:21 PM
|
#27 |
|
South LA Coonass
Join Date: Mar 2014
Location: New Iberia, LA
Posts: 531
|
Weekend progress: all threaded holes in frame have been drilled and tapped. Whomever disassembled the cart cut some of the bolts with a torch. The four holes for the ITS had to be drilled and tapped. There are two 1/4" bolt holes on the rear facing side of the middle crossmember up against the frame rails. My drill doesn't get good alignment to drill so I will play these out once I get the seat frame piece. Worst case is I drill new holes and use a nut on the backside.
Got the ITS pulled apart and cleaned it up. Then I painted the ITS bracket. Will install Tuesday afternoon. I need to order my parts before any major progress comes. |
|
|
|
|
09-28-2015, 07:54 AM
|
#28 |
|
Gone Wild
Join Date: Aug 2009
Posts: 14,245
|
 |
|
|
|
|
09-29-2015, 08:06 PM
|
#29 |
|
South LA Coonass
Join Date: Mar 2014
Location: New Iberia, LA
Posts: 531
|
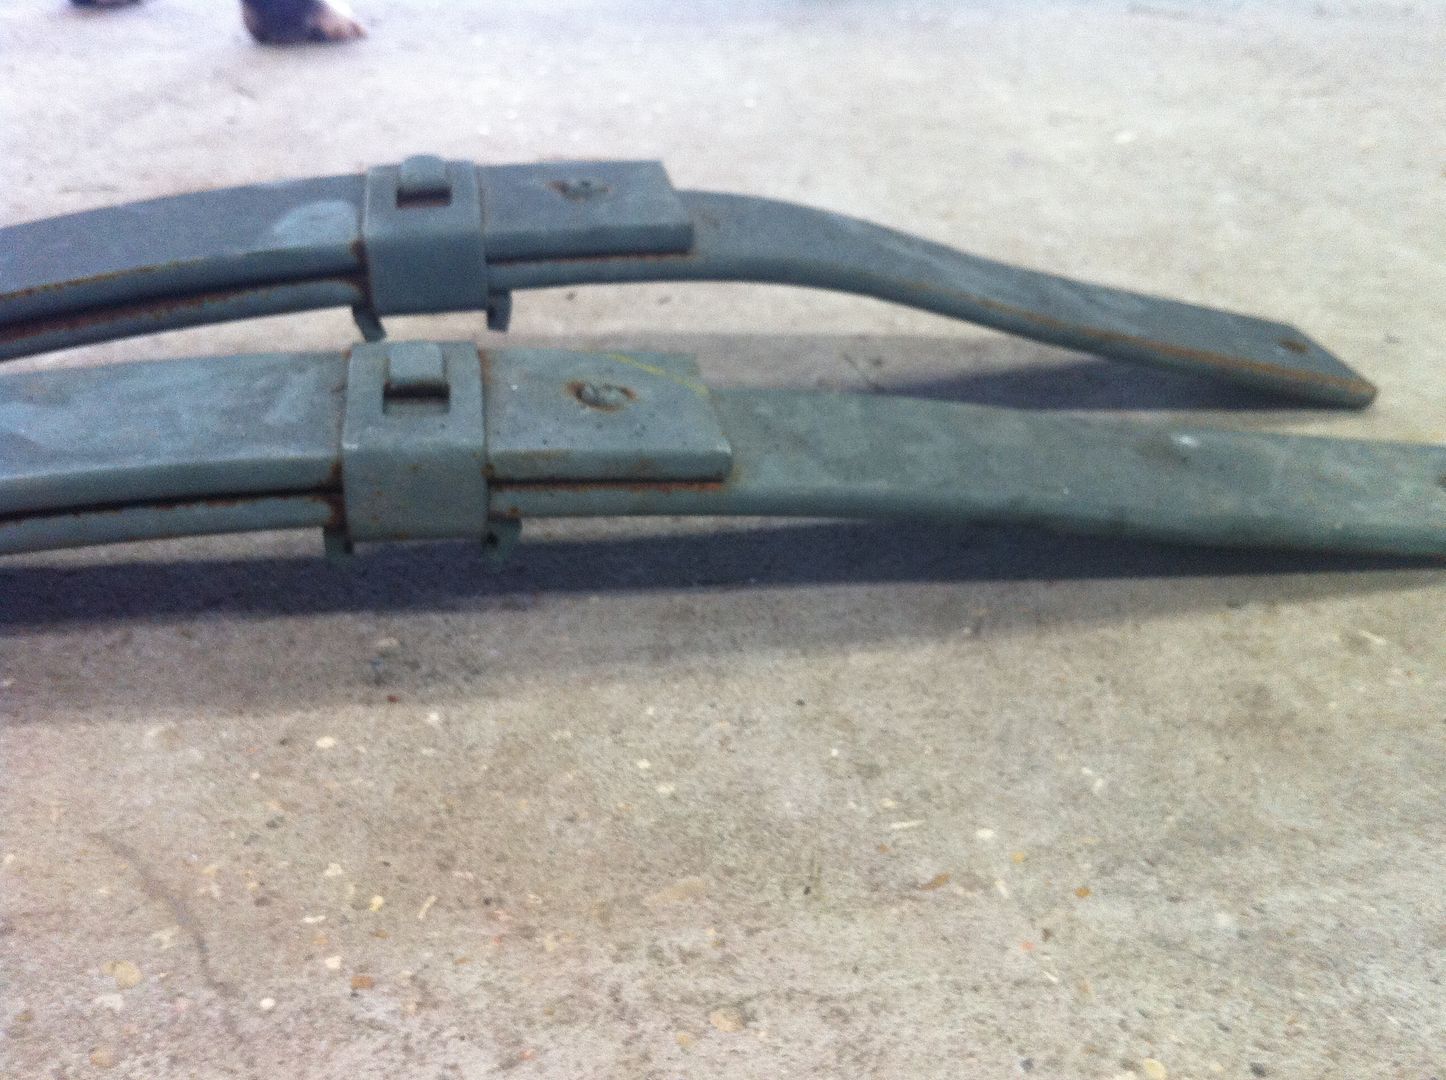
Did some touch up painting from where I grinded the bolts for drilling out tonight. Also got the upper and lower floorpans cleaned up and washed. Will paint the lower floorpan later this week or weekend. I got the front spring to clean up and noticed one had more arc than the other. Is this normal? The only numbers I can read on them is on the band that wraps around the spring pack and both have 099 on them. Length wise, they are the same as one another.
 |
|
|
|
|
09-29-2015, 09:12 PM
|
#30 | |
|
Gone Wild

Join Date: Feb 2015
Location: Acworth, Ga
Posts: 244
|
Quote:
|
|
|
|
|
|
|
||||||
| Thread Tools | |
| Display Modes | |
|
|
 Similar Threads
|
||||
| Thread | Forum | |||
| Helmet Required | Gas EZGO | |||
| Paint help required PLZ | Body and Paint | |||
| New Batteries Required ? | Electric Club Car | |||
| Yamaha G1 Help Required | Gas Yamaha | |||


 Linear Mode
