
|
|
|||||||
| Electric EZGO Electric EZ GO Marathon, Medalist, TXT and RXV. |
  |
|
|
Thread Tools | Display Modes |
 08-14-2011, 12:03 PM
|
#1 |
|
Not Yet Wild

Join Date: Jul 2011
Location: Dallas, TX
Posts: 26
|
I enjoy following projects posted on the site so I figured I'd document mine. I had purchased a brake light kit, turn signal kit, and seat belt all at the same time. I installed the easiest first, the seat belts for my kiddos on rear flip top seat.
Then days(maybe weeks) later I installed the turn signal kit. In monkeying with it I could never get the turn signals to work when the lights were on, but I knew I'd be installing the brake light kit and told my self I'd deal with it then. So after some encouragement on this board and a few tool suggestions later I got started on the brake light kit install and overall light troubleshooting. 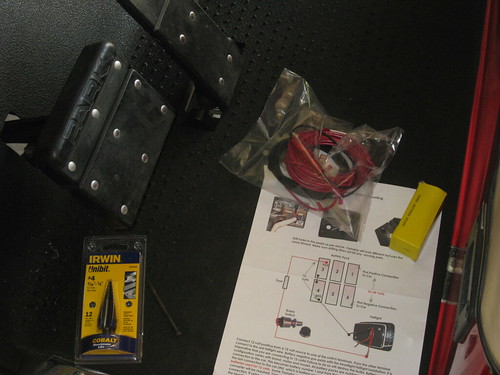 Last edited by ray_g; 08-14-2011 at 12:09 PM.. Reason: picture didn't work |

|

|
 Today Today
|
|
|
__________________
This advertising will not be shown in this way to registered members. Register your free account today and become a member on Buggies Gone Wild Golf Cart Forum |
|
|
08-14-2011, 12:13 PM
|
#2 |
|
Not Yet Wild
Join Date: Jul 2011
Location: Dallas, TX
Posts: 26
|
I started by drilling a 7/16 hole through my brake petal. I cheated a bit and simply drilled out a whole that was already in the pedal. I was curious to know what that whole is used for on a stock cart.
Finished product below. I still need to drill the whole bigger on the rubber side as the instructions on the kit state that the screw on rubber bulb should be close to flush to the pedal. To do that I need at least an 1" hole on the top side. 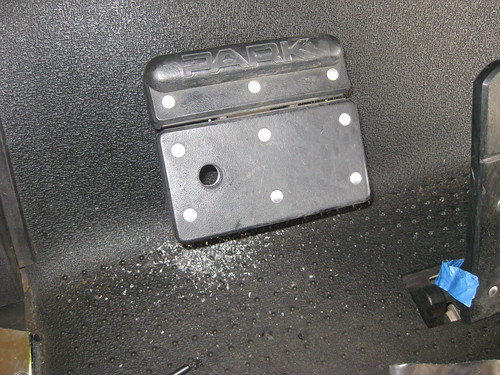 |
|
|
|
|
08-14-2011, 12:17 PM
|
#3 |
|
Not Yet Wild
Join Date: Jul 2011
Location: Dallas, TX
Posts: 26
|
Next, I needed to route some wire - or so I thought!
So I pulled off the cup holder to reveal my wonderful turn signal wire job. I guess I should have purchased the adapter so the kit just plugged in. I didn't so i used wire nuts and wire cutters. No one is going to see this, right!?!! 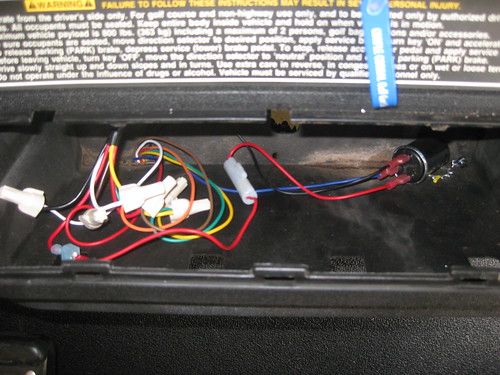 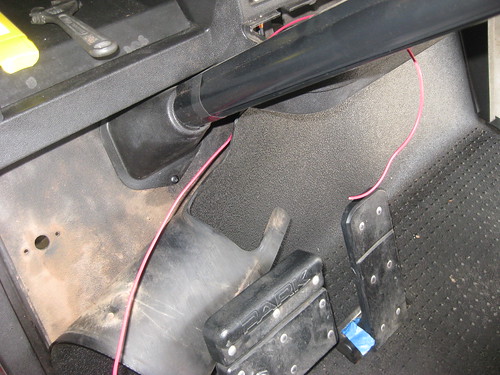 Last edited by ray_g; 08-14-2011 at 12:18 PM.. Reason: added pics |
|
|
|
|
08-14-2011, 12:24 PM
|
#4 |
|
Not Yet Wild
Join Date: Jul 2011
Location: Dallas, TX
Posts: 26
|
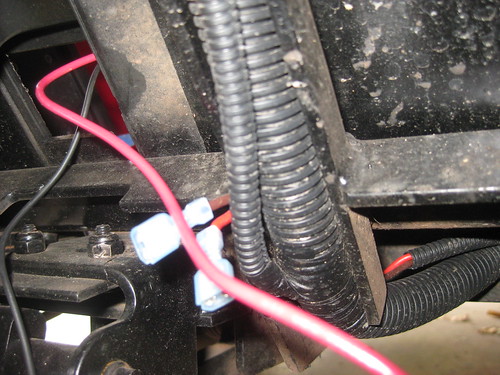
This is when I noticed that the cart had a two wires located underneath in an ideal place for a brake light connection. Since I'm new to carting I purchased this kart. I new that the previous owner had put in a whole new wiring kit so I hoped that I was so lucky as to find the right hookups. Turns out I was and the wires to hook up the horn are located close by as well!
 |
|
|
|
|
08-14-2011, 12:33 PM
|
#5 |
|
Not Yet Wild
Join Date: Jul 2011
Location: Dallas, TX
Posts: 26
|
I determined that the red wire was my power, and the brown was my brake lights so I proceeded to hook my new brake light switch up there. Easy!
Then came the hard part. Not so much hard, but time consuming and frustrating. Remember when I said that the turn signal would not work when the lights were on? This is the reason. When they wired up wrong. I found that the running lights were wired to the brake light wires. So when the lights came on, they were "SUPER" Brake Light ON bright. I couldn't tell this however until I just started moving the connected wires around. 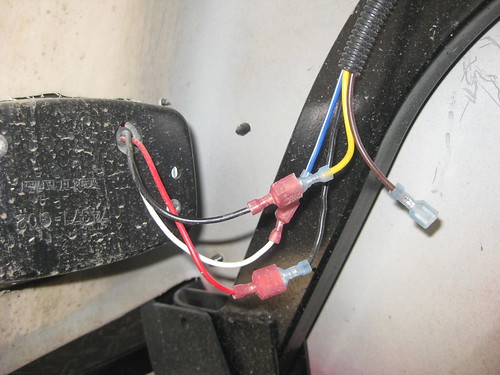 |
|
|
|
|
08-14-2011, 01:18 PM
|
#6 |
|
Not Yet Wild
Join Date: Jul 2011
Location: Dallas, TX
Posts: 26
|
May I make a few points?:
1. It's hot in a garage in Texas when its 108 outside. 2. It's a pain in the butt to try and depress the brake button and look at the brake lights at the same time. I fixed number two as you can see below. 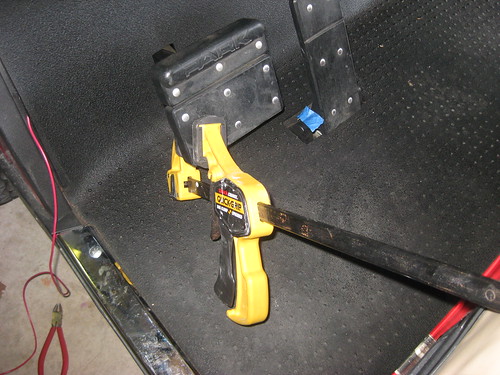 |
|
|
|
|
08-14-2011, 01:19 PM
|
#7 |
|
Not Yet Wild
Join Date: Jul 2011
Location: Dallas, TX
Posts: 26
|
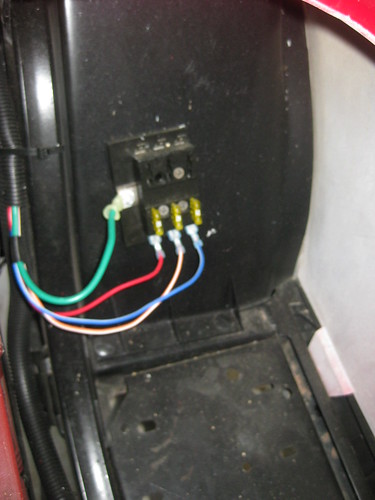
I do recall hearing a pop and it took me about 40 minutes and another two or three rewiring of the turn signal to realize that I blew one of these. I then gave up as I didn't have any spares laying around. I do now!
 |
|
|
|
|
08-14-2011, 01:27 PM
|
#8 |
|
Not Yet Wild
Join Date: Jul 2011
Location: Dallas, TX
Posts: 26
|
I was honestly frustrated at this point and was going to post to the board and see if any one was in Dallas and wanted to come over for a few beers to troubleshoot. I was tired of walking around my cart over and over and over and over and over and over. Here's was the agenda:
Try the red wire and check: running lights on/off L turn signal, lights off (check front and back) L turn signal, lights on (repeat) R turn signal, lights off (check front and back) R turn signal, lights on (repeat) brake light, lights off brake lights, lights on I could get any number of combinations right, The brake lights would work, but the turn signals wouldn't. Or I'd hit the brakes and only one light would come on. I was able to get everything working. But... 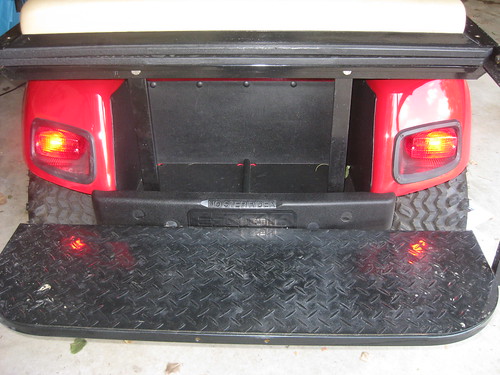 |
|
|
|
|
08-14-2011, 01:30 PM
|
#9 |
|
Gone Wild
Join Date: Jun 2011
Posts: 191
|
What kit did you purchase? I need to install a brake light switch to get the regenerative braking to work on my AC system that I'm putting in.
|
|
|
|
|
08-14-2011, 01:33 PM
|
#10 |
|
Not Yet Wild
Join Date: Jul 2011
Location: Dallas, TX
Posts: 26
|
But, I still have one problem.
All of the lights work except for the right front turn signal. Picture included for front light bar.  I assumed and still do? that this front lite is plugged in with a plastic adapter to the cart wiring. If that's the case I'm not sure how to fix this. Here's the problem: Right front blinker does not work. The right rear blinker does. Right front blinker will only come on in when the brake lights are turned on. All other lights on the cart work correctly. I may poke around on it today but need to see if I know how to get to the light bar easily. |
|
|
|
|
| Tags |
| brakes |
|
||||||
|
|
 Similar Threads
|
||||
| Thread | Forum | |||
| Yamaha G1 <>Step by step instructions to change crankshaft seals<> | Gas Yamaha | |||
| PDS Turn Signal & Brake Light Install | Electric EZGO | |||
| Brake light switch install | Gas EZGO | |||
| Brake light install | Electric Yamaha | |||
| Is there a website or link or step by step pictures for the HEI conversion | Gas EZGO | |||


 Linear Mode
