
 |
|
|||||||
| Electric Club Car Electric DS, and Precedent golf cars |
  |
|
|
Thread Tools | Display Modes |
|
|
#21 |
|
Not Yet Wild
Join Date: Jun 2013
Location: Houston, TX
Posts: 39
|
Phase III: Electrical Infrastructure
Time has been tight, so progress over the last week has been less than I might have hoped. But, that’s the way it goes. With the chassis done, and waiting on all my electrical stuff from Scotty B (which didn’t take long) I decided to focus on a few other projects. The body and cowl that came with the cart was trashed, so I was on the hunt for a replacement. I really liked the looks of the new black bodies you can buy, but I did not like the $600 price tag. Then, fate smiled on me. While picking up a few small parts at my local CC shop, the parts guy mentioned they had a gently-used late-2000’s body and cowl out back. Apparently another customer had ordered a red body, and told them just to keep the stock tan one. I said let’s go look at it. Turned out it was in pretty good shape. It had a few dings and scratches, but overall it was pretty nice. When I asked him what he wanted for it, he shocked me when he answered “$20 bucks.” SOLD! I handed the man his money and loaded it up before he could change his mind! It’s not black, but for a $550 savings I can live with it for now and maybe get it painted later. As my Dad always said, “Better to be lucky than good.” With the new-to-me body back at the house, I decided to make a try at installing the light kit I ordered. This kit has uses LEDs front and rear. So, hopefully the headlights are nice and bright without using much juice. The downside was I now had to cut holes in my precious new body One side on, other side cut: 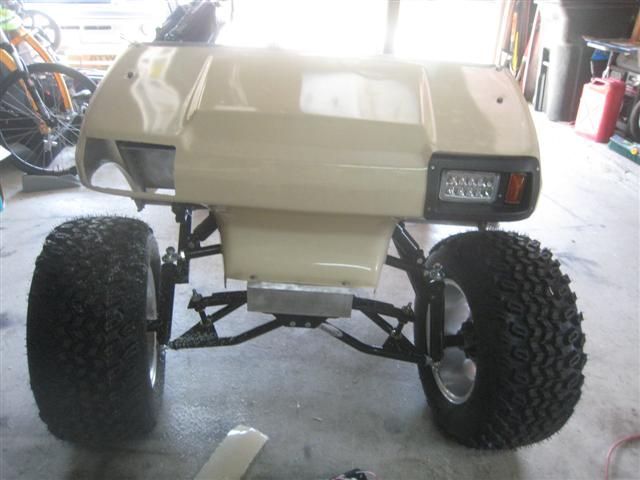 Next I installed the rear tail lights, shined up the step pads, and installed a new black diamond plate access panel. 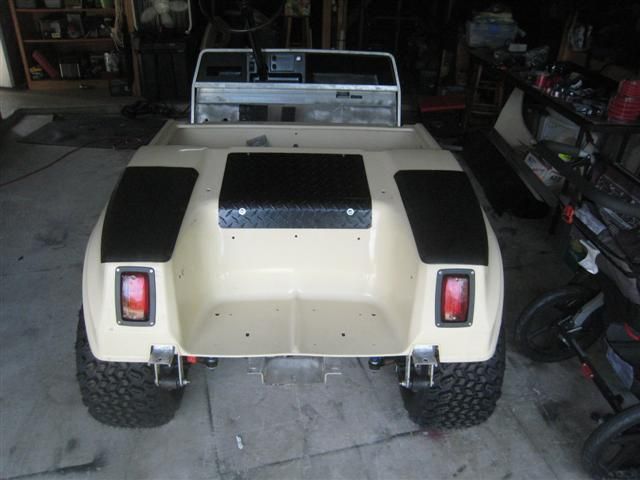 With the lights in, I couldn’t resist rolling the cart outside and throwing the body and cowl on just to see what the cart was starting to look like. 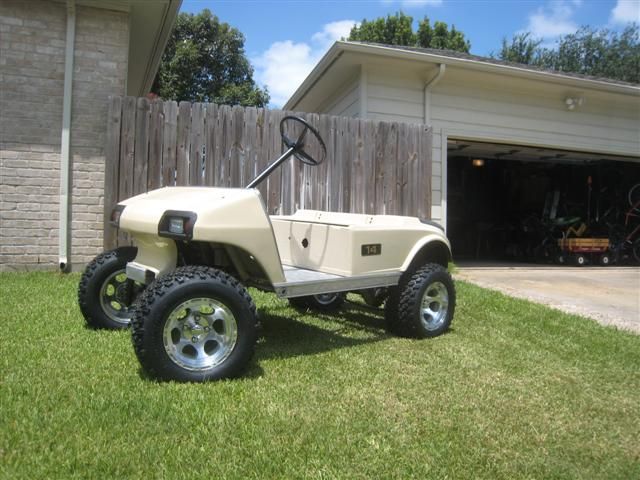 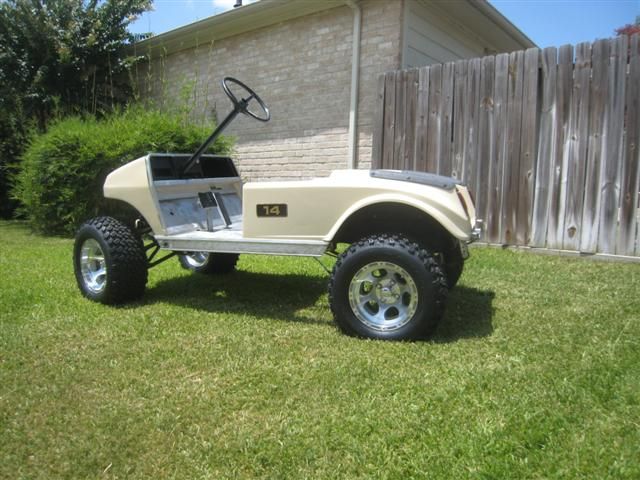 You can now see where the Project gets it’s name from, courtesy of the “new” body fleet number. Alright, enough screwing around. Next up, I started work on the new dash panel. I installed a new key switch, and the pull switch for the light kit. I also put in a marine-grade rocker switch that will control the activation signal for the voltage reducer. This will let me kill the reducer and all 12V accessories with one switch. I also installed a couple red-LED smaller rockers to control accessory lights down the road. Eventually I will install a ScottyB volt meter in the space to the right, and a 12V outlet below that. 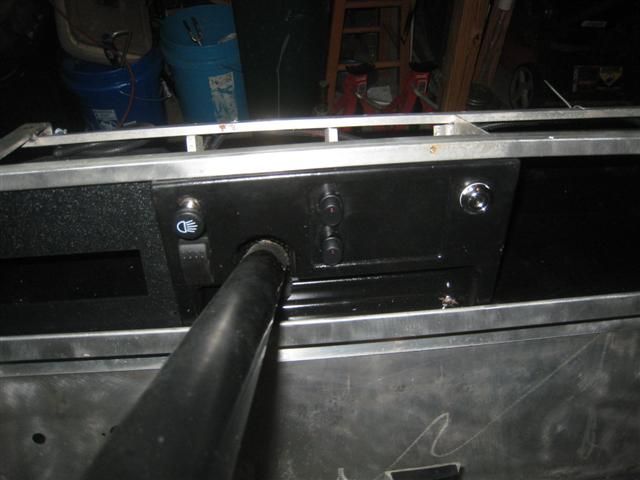 Next I cut a new 2” cross-member from 1/8” aluminum angle. This will be where I’ll eventually mount the controller and voltage reducer.  I also cut a new floor mat. I have seen the replacements from Club Car, and they wanted $60 for them. No thanks. I used some ¼” horse mat from Tractor Supply. Looks pretty good and ran me about $20  . .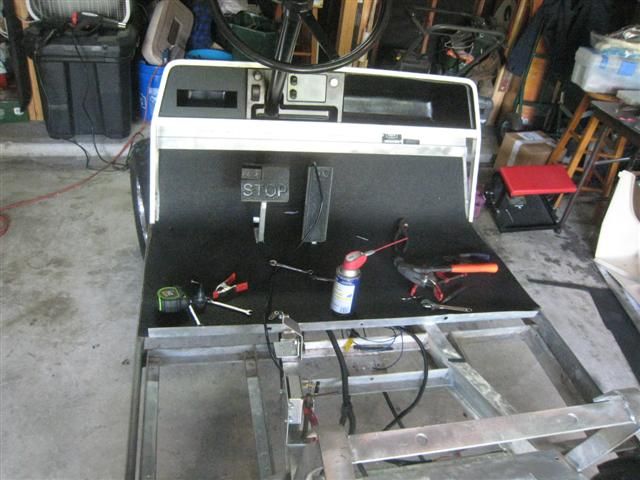 Once that was done I turned my attention to fabbing up a front body support. I learned here on Buggies Unlimited that the new-style plastic bodies require a front “support strut”. Since my old cart was a 1990 with a fiberglass body, I didn’t have one. Oh well, looked pretty simply. I used some 1/8” flat bar and some ¾” angle, measured to fit, and riveted together. Looks real close to the factory one, hopefully it does the job. 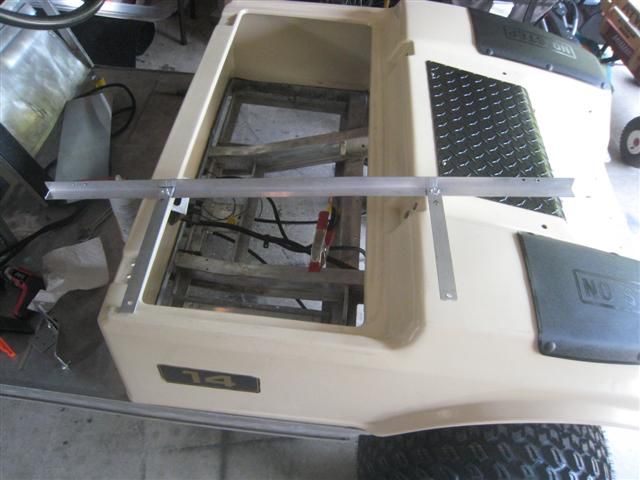 About this time a real heavy box showed up from Carts Unlimited. I was very impressed with their packing job. ScottyB manages to extract nearly all the useable space from that USPS flat-rate box, and all the components were very well protected. As I started to unpack it, I won’t lie: I began to feel pretty intimidated. Once I had the stuff from ScottyB, I decided to make one more run for wire/terminals/hardware based on what I could see I did not have. At this point I think I have bought out about half the electrical section at Autozone, and I also think I am single-handedly raising the value of Ace Hardware stock. Anyway, here’s my table once I got everything spread out. Good grief. 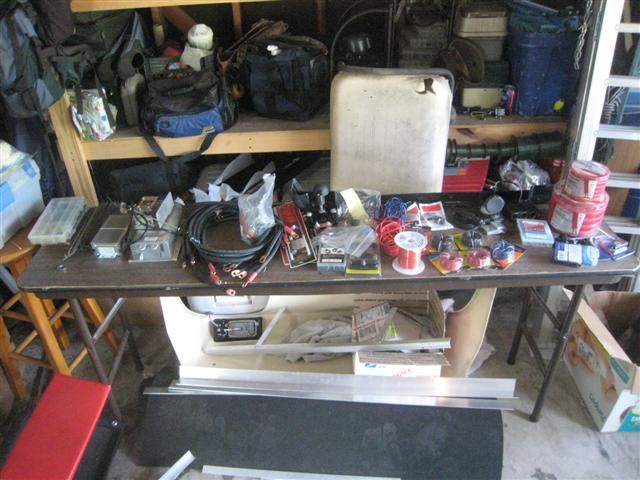 Finally I started to dig in to the Throttle Conversion Kit. ScottyB supplies some great schematics and supporting documentation, so I spent some time studying. Now I’m at the point of trying to pick the perfect mounting spots for the Bell Crank arm and the Potentiometer. Got them clamped down for now to check stroke. 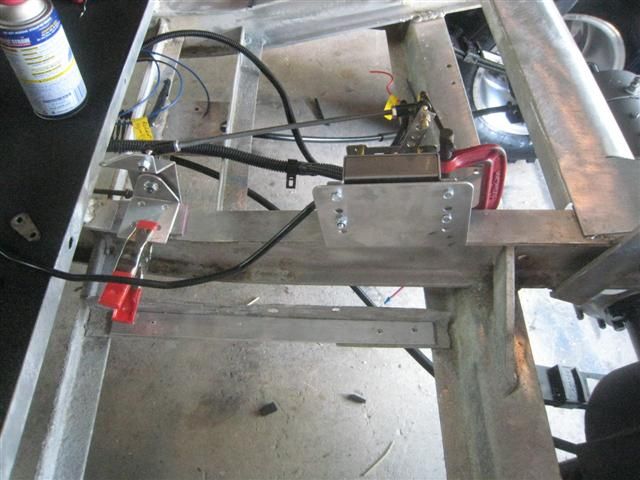 ScottyB, if you’re reading this I have a couple questions  : :1) When I manually move the potentiometer arm all the way to the forward stop, I can only get 4.5K ohms. Should it not be 5K? 2) I’m not yet able to get full-stroke with the potentiometer using the gas pedal. I can only get about ¾ stroke. Any tips from Scotty or you guys that have done this conversion before? Is it just a matter of playing with the position of the Bell Crank until you can get full stroke? So, that’s where I am now. Hopefully I will get a few hours sometime soon to get the new components mounted in the cart, and can start some wiring. |
|
|

|
|
|
|
|
__________________
This advertising will not be shown in this way to registered members. Register your free account today and become a member on Buggies Gone Wild Golf Cart Forum |
|
|
|
#22 |
|
Gone Wild

 Join Date: Feb 2013
Location: Plant City, FL
Posts: 2,212
|
You'll be rolling in no time!
|
|
|

|
|
|
#23 |
|
Gone Wild
 Join Date: Aug 2009
Posts: 14,245
|
I love project threads like this, with good pics and descriptions!
 Keep it coming! |
|
|

|
|
|
#24 | |
|
Gone Wild

 Join Date: Mar 2011
Posts: 441
|
Quote:
|
|
|
|

|
|
|
#25 |
|
Gone Wild
Join Date: May 2013
Posts: 552
|
Looking good
|
|
|

|
|
|
#26 |
|
Getting Wild

Join Date: Aug 2013
Location: S,SE USA
Posts: 80
|
Read all 3 impressive pages. Great job so far. And I did learn some stuff along the way.
|
|
|

|
|
|
#27 |
|
Getting Wild

Join Date: Mar 2013
Posts: 82
|
WOW! From top to bottom complete rebuild. Very nice and can't wait to see it complete.
 |
|
|

|
|
|
#28 | ||
|
Gone Wild

 Join Date: Mar 2011
Posts: 441
|
Quote:
If I recall correctly, I was able to utilize one of the old vglide holes. Mine looks like it's in the same place as yours. Quote:
|
||
|
|

|
|
|
#29 | |
|
Not Yet Wild
Join Date: Jun 2013
Location: Houston, TX
Posts: 39
|
Quote:
Yeah, I think I'll be able to re-use one of the V-glide holes as well. I played with the stock throttle linkage a little and extended it as much as I feel comfortable. I can only get 4.5kohm out of the PB-6 even with all linkage off and using my hand to push the arm all the way to the forward stop. I think I may need to to what you mentioned previously, and adjust where the arm is clamped to the pot shaft to get a bit more rotation. The balance point will be where it goes back to 0 with no throttle. |
|
|
|

|
|
|
#30 |
|
Not Yet Wild
Join Date: Jun 2013
Location: Houston, TX
Posts: 39
|
|
|
|

|
 |
|
||||||
|
|
 Similar Threads
|
||||
| Thread | Forum | |||
| Hunting buggy project so far | Lifted Golf Carts | |||
| Another dune buggy project !! | Design Center | |||
| Project Speed Buggy | Bike & ATV Engine Swaps | |||
| My Hunting Buggy Project | Lifted Golf Carts | |||
| Before and after Hunting Buggy Project !! | Lifted Golf Carts | |||