
|
|
|||||||
| Electric EZGO Electric EZ GO Marathon, Medalist, TXT and RXV. |
  |
|
|
Thread Tools | Display Modes |
 08-29-2010, 12:35 PM
|
#11 |
|
Gone Wild

Join Date: Jun 2010
Location: Central Florida
Posts: 2,757
|
they can be mounted either way. Personally if there is nothing going to be mounted on the other side of the plate (as in the case of this build) I would mount it directly to the plate to allow heat dispersement via the plate. On many of my builds I mount the voltage reducer to the back side of the plate so I use standoffs to allow the bolts to go both ways. Also, Alltrax controllers have a very thin plate on thier mount surface so I try to use the mounting plate as often as possible for an extra heat sink. On controllers made by GE, they use a much thicker plate on the controller so the extra heat sink isn't needed.
|

|

|
 Today Today
|
|
|
__________________
This advertising will not be shown in this way to registered members. Register your free account today and become a member on Buggies Gone Wild Golf Cart Forum |
|
|
08-29-2010, 02:04 PM
|
#12 |
|
Gone Wild
Join Date: May 2010
Location: Upstate, S.C.
Posts: 208
|
wild about the stike info, but nice clean work ! Looks good !
|
|
|
|
|
08-29-2010, 06:42 PM
|
#13 |
|
Getting Wild
Join Date: Apr 2009
Location: Cumberland, MD
Posts: 84
|
This update will cover the body, molding, exterior lights, seat covers, and wheels.
The body pieces had a few dings that needed pounded out and a few rust spots that needed tending to with rust treatment. The spots needing attention were on the floor boards. I am including the bag well in this area too. Due to the prior rear ending the bag well needed a little JB Weld and some paint too. I replaced all the molding on the cart with new and placed two new fenders on the front to match the back. The fenders on the back and front were OME but putting two on the front was not original. I must say that I am pleased with the look now and the price was much cheaper than other fender types. I think they really flow with the rest of the molding. 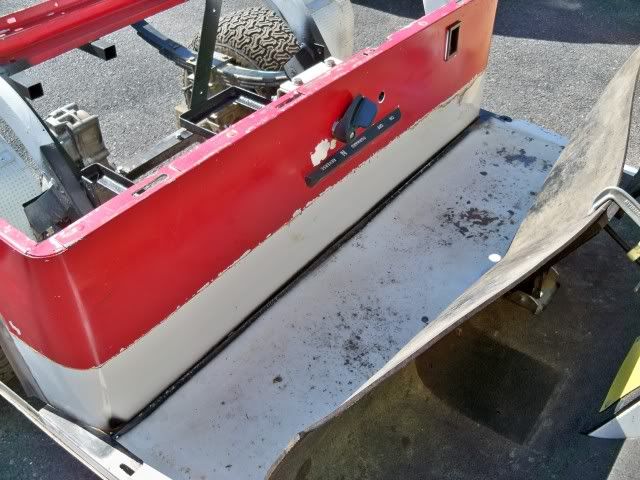 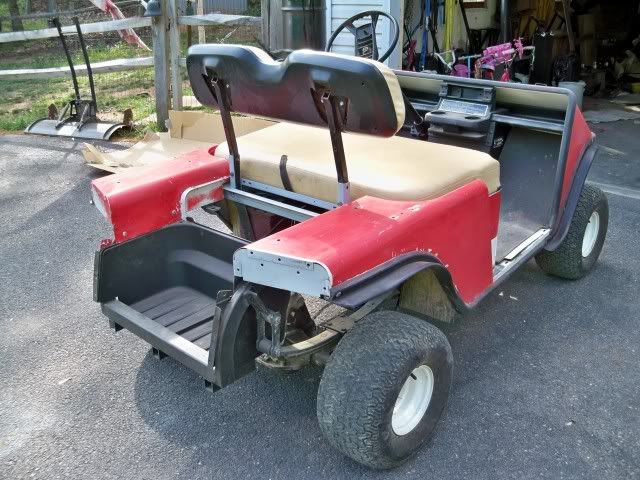 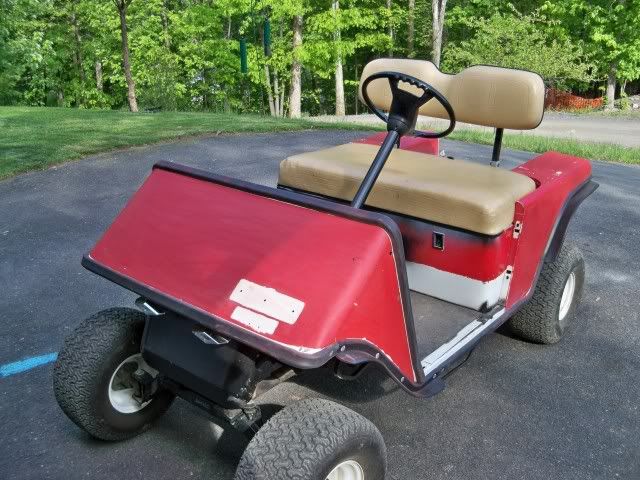 After much deliberation I chose to use a bed liner coating on the body instead of paint because it is mainly a woods cart for hunting. I considered various brands and finally decided on The Durabak Company. They had a nice package for the DIY, I found the color I wanted, it was brush or air application, and the price was satisfactory. To apply the Durabak I decided to assemble the body on the cart, install the molding, and tape up everything not to be covered. The coating went on well. I spent about 3 hours from set up to clean up. I ordered a gallon and had 1/3 left over after 3 coatings on everything. 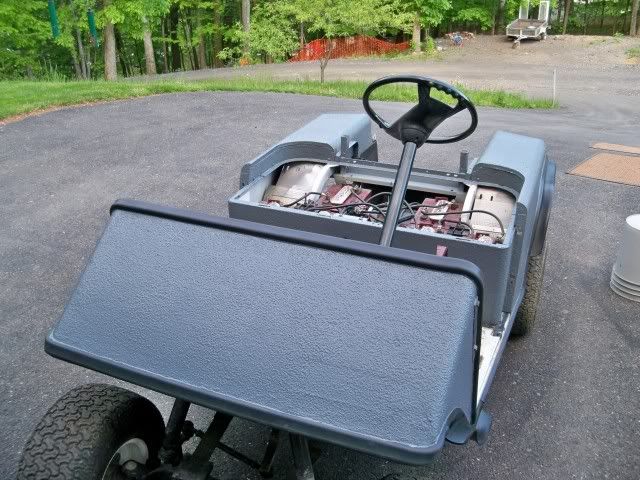 The lights came with the cart and were mounted on top of the front cowl. I decided to move them under the cowl so I built a little bar to hold them. I think they look better under the cowl and are plenty bright for my needs of putting thru the woods in the dark and gallivanting up and down my lane with my daughters. 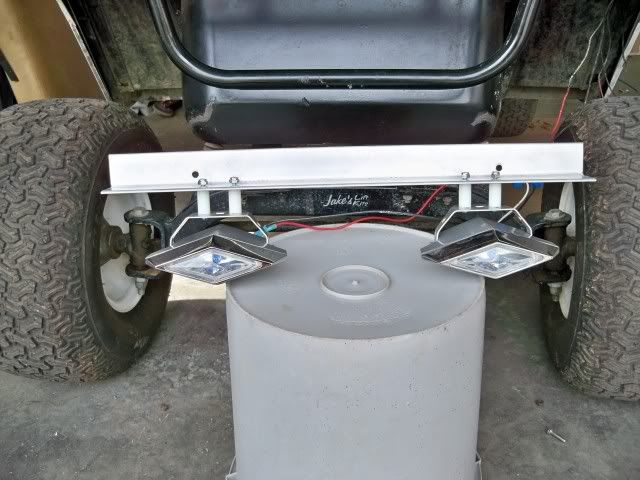 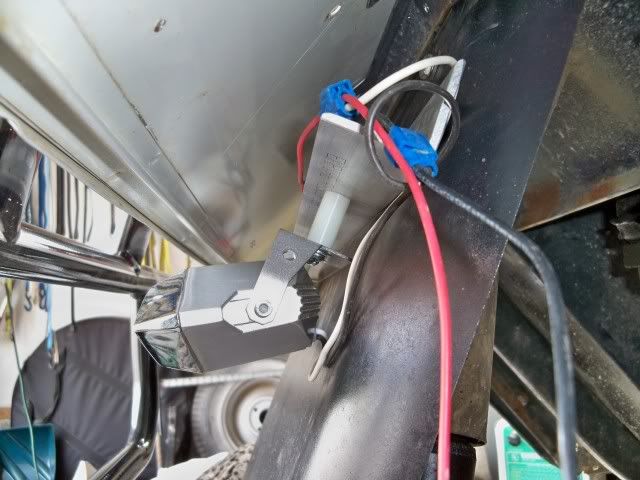 Next came the seats. I looked into having someone locally reupholster them, checked on line for a set, and considered painting them myself. Continuing with the DIY plan and the cheaper cost, I painted them with SEM Marine Vinyl Coat. It was half the cost and the finished product satisfied me thus far. It has had one washing and has stayed on. Yippee!  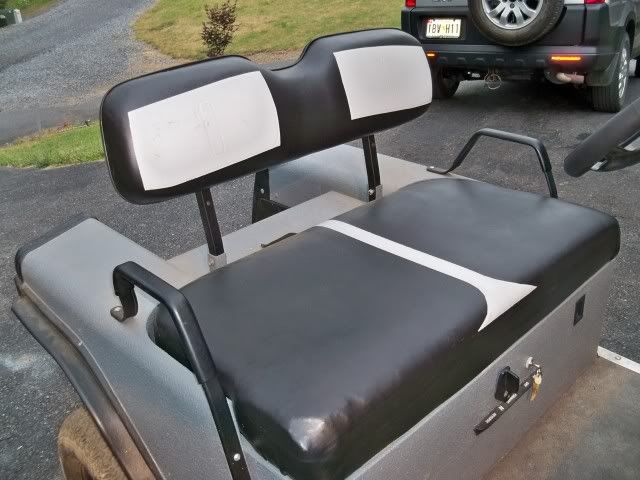 The wheels were the simplest of the build. I kept the tires and wheels that came with the cart. All that I did was scratch the rims with some sand paper and apply a couple coats of paint and clear coat.    The next additions will be a modified rear seat, the step bumper, seat belts, new solenoid, and 8 new crown batteries. 48v here I come!  |
|
|
|
|
09-05-2010, 07:38 AM
|
#14 |
|
Getting Wild
Join Date: Apr 2009
Location: Cumberland, MD
Posts: 84
|
I am at the point where I can use my cart but still want to add those little personal touches. Those would be a rear seat, cargo box, and slide in rear step, a hitch, taillights, auxiliary battery, and upgrade to 48 volts.
The biggest upgrade was to 48v. I decided on 8 6volt Crown 225s. I found a dealer an hour away and the price was right at $105 a battery. To complete this I decided to place two in the bag well. I neglected pics of this install. But, what I did was used angle aluminum and attached two pieces with rivets to the bag well and ran two pieces across the top of the batteries and bolted things together. I sprayed the aluminum with underbody spray. The solenoid is a 48v hd 586 series. The batteries are very secure and I have no fear of losing them. I topped off the batteries under the seat with new battery hold downs. The taillights and auxiliary battery will have to wait until I can afford them. If anyone is contemplating an upgrade from 36 to 48 you will NOT be disappointed. I topped out at 16-17 mph with a GPS on my torque motor from 12-13 on the same setup with 36 volts. My goal was torque and does the cart keep it. I do not bog down on hills at all. I am amazed at the speed I maintain even when the cart has other people in it. 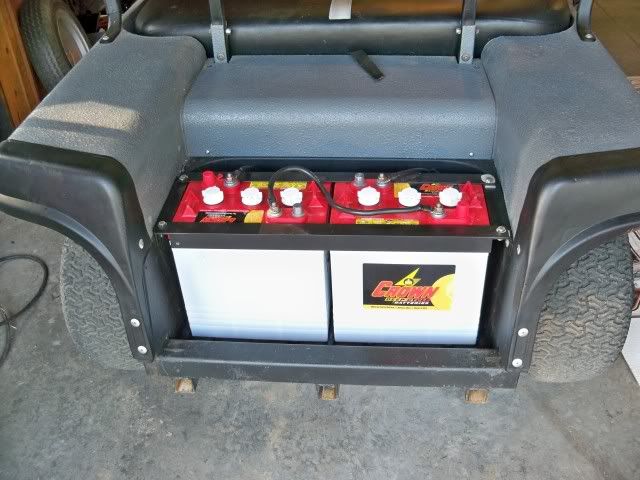 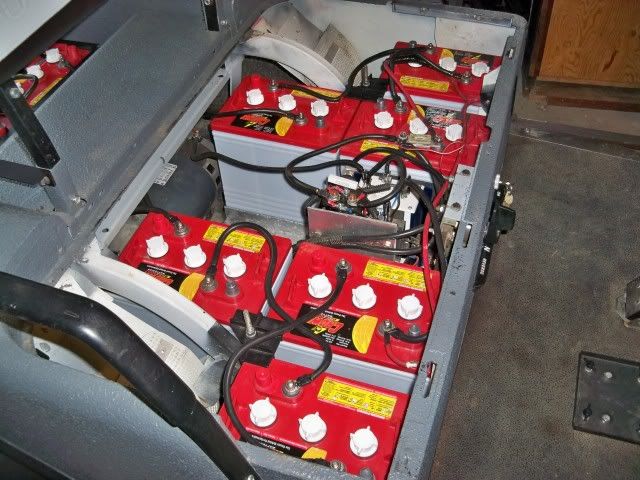 The hitch is a tool and a toy. I like having the ability to tow a trailer or sled this winter. My two girls are going to love this feature. To start the seat/cargo box I used an old bed frame and cut it to fit my needs. To help with side to side support I secured it with a piece of rebar. Then I sprayed everything with underbody spray and attached it to the seat frame on the cart and let it rest on the rear bumper. I had to slow down my spending for a while so the cargo box has to wait. I am thinking about building one from pine and painting it, something about 3x3 with 8 sides and a tail gate. If I come across something metal I will consider it. 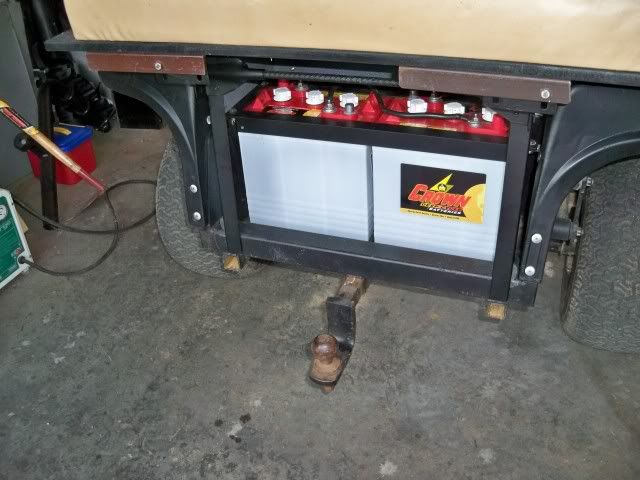 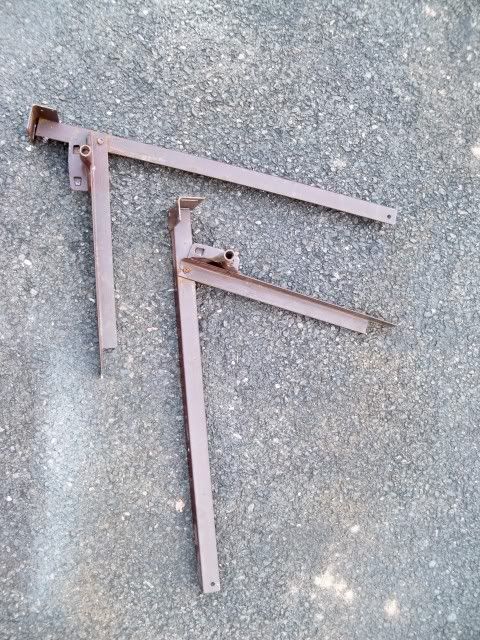 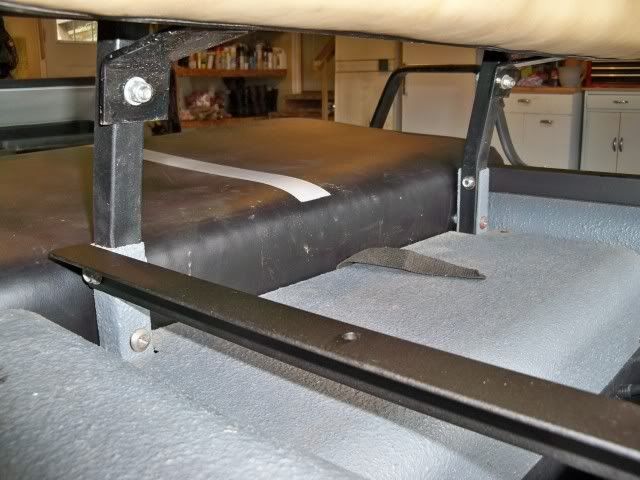 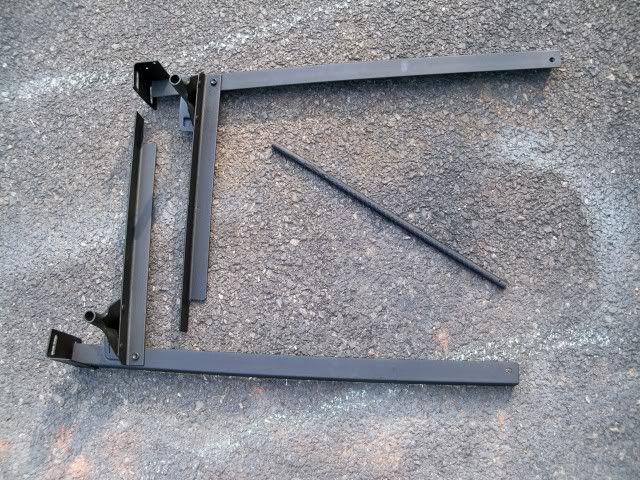 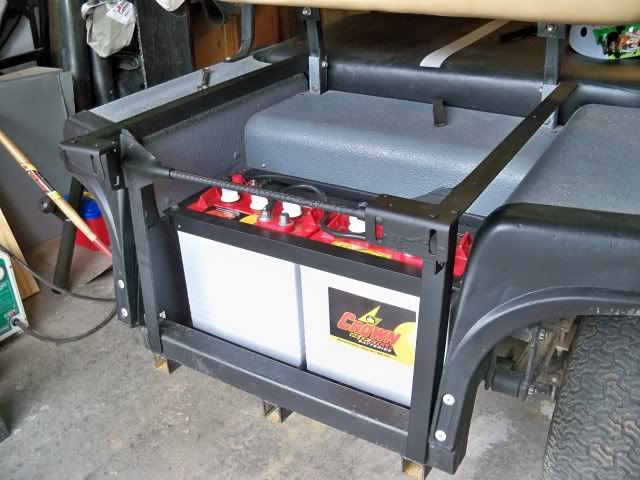 From previous work a friend welded a square rear bumper with three receiver tubes. The outside tubes are for a slide in step for the rear seat. I added some square tubing to the rear step that came with the original setup on the rear seat. Then I used the original seat, attached two pieces of angle iron and bolted it to my cargo box/seat frame. 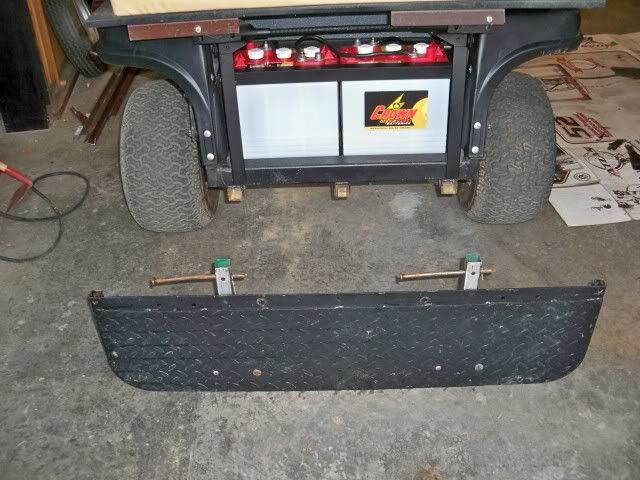 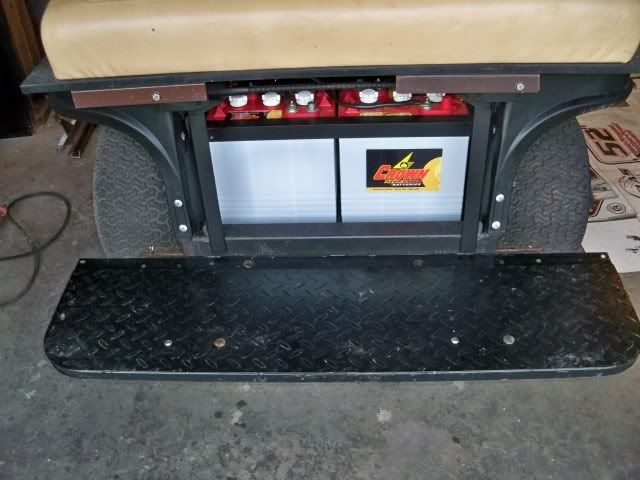 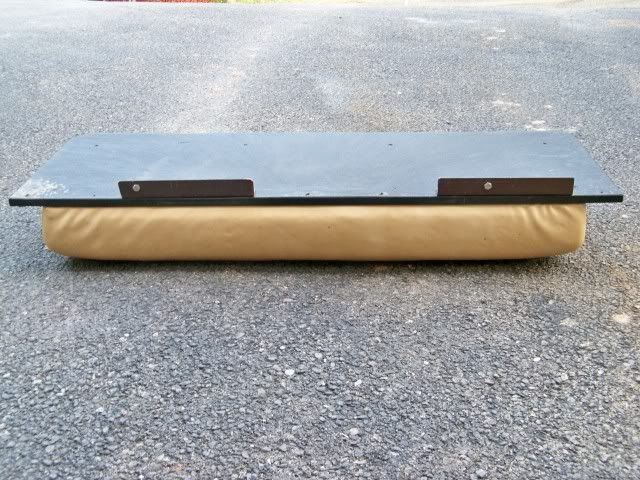 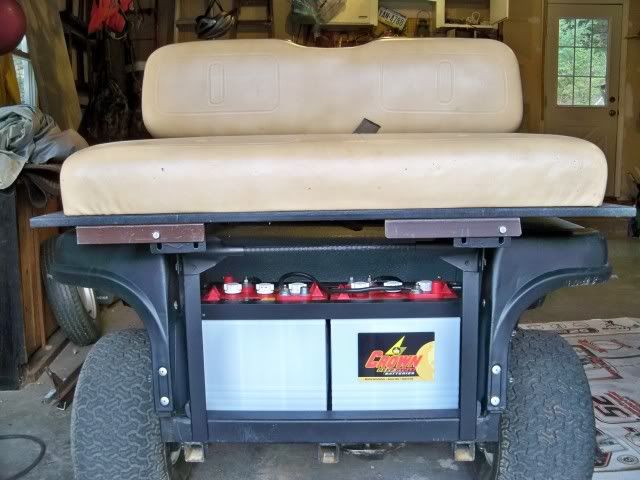 Now it is time to break in the batteries and enjoy this cart this fall. I hope to haul out a few deer soon and play this winter. Once my current tires wear out I will go to something more agressive and around 22x10x10. I need at least 10" rims for front brakes. |
|
|
|
|
09-05-2010, 08:37 AM
|
#15 |
|
Gone Wild

 Join Date: Sep 2009
Location: Forest City N.C.
Posts: 2,660
|
You have done an outstanding job with your rebuild.
|
|
|
|
|
09-15-2010, 12:17 PM
|
#16 |
|
Gone Wild
Join Date: Aug 2008
Location: fairfield ca
Posts: 258
|
nice job,nice to see some steel bodied carts,
|
|
|
|
|
02-09-2011, 07:49 AM
|
#17 |
|
What was I thinking?

Join Date: Jul 2009
Location: Brooksville, Florida
Posts: 577
|
I'm not sure how I missed this build. Bravo! Great job.
Placing the PB was one of my big challenges too. There are so many different ways to do it. 48 volts is definately the way to go. |
|
|
|
|
02-10-2011, 10:53 AM
|
#18 |
|
Getting Wild
Join Date: Dec 2009
Location: Moiser, Oregon and Baja
Posts: 103
|
Very nice pictures. Nice build. I have one question about battery trays. Why builders dont put some metal between the batteries and the ground? I ran over something once and it poked a hole in one of my 2 month old batteries, and I was on the road not boondocking. Tried some hot-rod glue to repair the casing. No luck. A $125.00 lesson.
|
|
|
|
|
03-05-2011, 03:23 PM
|
#19 |
|
Not Yet Wild
Join Date: Mar 2011
Location: PTC, GA
Posts: 25
|
love how you used the old bed frame as a frame for the seat there. Nice way to recycle that!
I am thinking of doing some of the same upgrades on my '86 eventually, but the axle being a strike part, makes me wonder if another model would fit on it? Nice cart, sure looks good with all those nice and new batteries in there!! |
|
|
|
|
03-05-2011, 04:17 PM
|
#20 |
|
Gone Wild
Join Date: Apr 2010
Location: West Tennessee
Posts: 1,269
|
Never thought about using bed rails for the rear seat kit build? We use them for battery boxes to replace the rusted out ones in years past.
|
|
|
|
|
|
||||||
|
|
 Similar Threads
|
||||
| Thread | Forum | |||
| Marathon 350 rebuild ? | Gas EZGO | |||
| More pics of my restoration/rebuild | Members Rides | |||
| Rebuild Update....Pics | Electric EZGO | |||
| pics of 84 marathon rebuild | Gas EZGO | |||
| First Timer's G14 Rebuild w/Pics! | Gas Yamaha | |||


 Linear Mode
