
|
|
|||||||
| Electric EZGO Electric EZ GO Marathon, Medalist, TXT and RXV. |
  |
|
|
Thread Tools | Display Modes |
 08-21-2010, 07:17 PM
|
#1 |
|
Getting Wild

Join Date: Apr 2009
Location: Cumberland, MD
Posts: 84
|
Well, here is my 86 1/2 Ezgo Marathon. I purchased it in February of 09 on a limited budget. I was looking for something to use in the woods for hunting and putt around with my two daughters. It did everything I wanted it to do but being a resistor cart it had its flaws compared to one with modern components. I considered my alternatives and decided that I would keep this cart and turn it into what I wanted. May not have been the simplest or cheapest route, but I learned a lot and had fun doing it. So, here is my rebuild with plenty of pictures and descriptions. Please comment and ask questions. I have many pictures so my plan is post some with descriptions every few days. I don't have time to sit down and post everything at once. The build took a few months and I didn't want to let anyone hanging by posting as I built.
Here is the cart as I purchased it after 8 months of use. 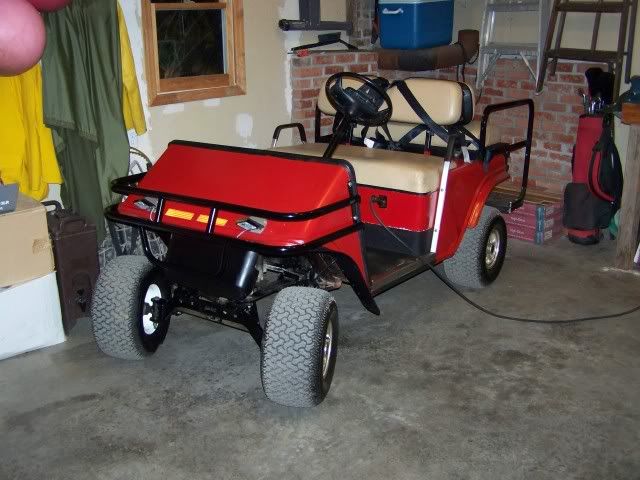 Once I had the body off the only problem I encountered was a bent rear bumper from being rear ended when the previous owner had it. Other than that and some surface rust that was it. 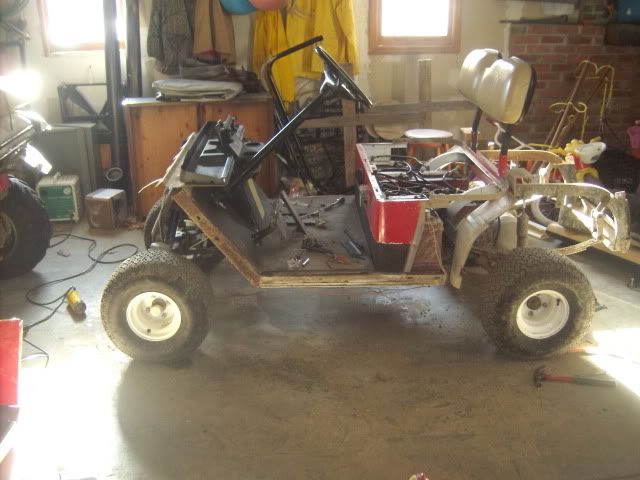  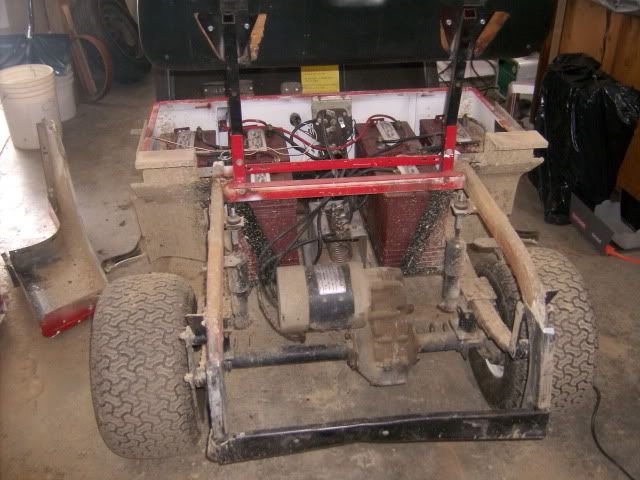 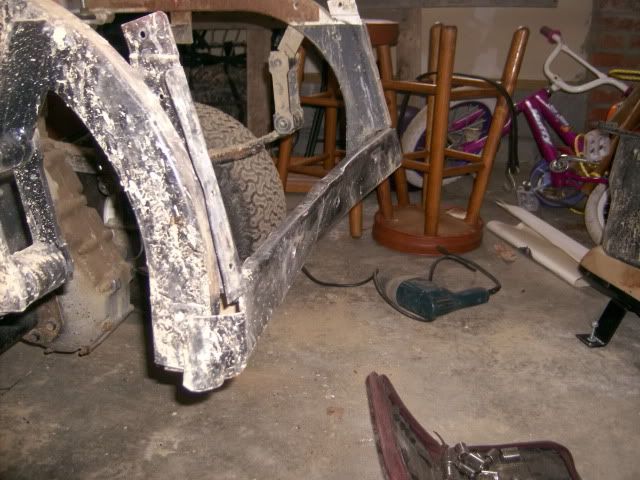 This problem was resolved by cutting the old bumper away and having a friend weld on a square tube bumper with 3 receivers for future add ons. I plan to slip a rear step in the outer two and use the middle one for towing. This will allow for quick removal for my rear seat. The rear frame and new bumper is cleaned and painted. 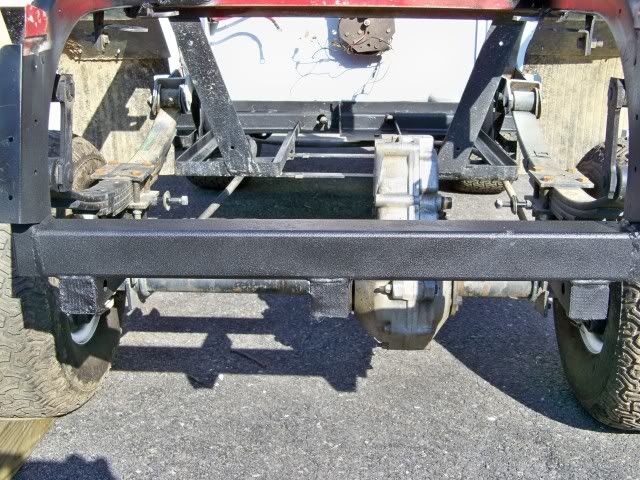 It is not really bent, just the camera angle. 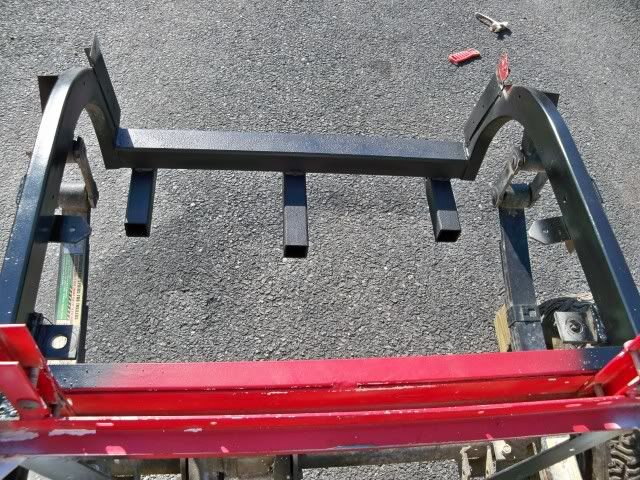 Next is scrapping and painting of the battery trays and the front end. 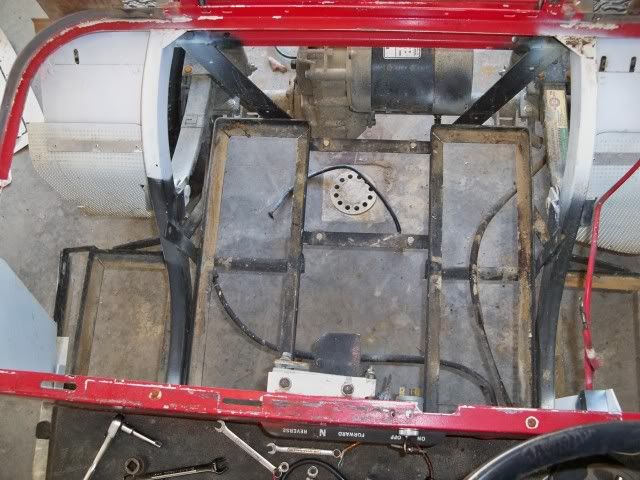 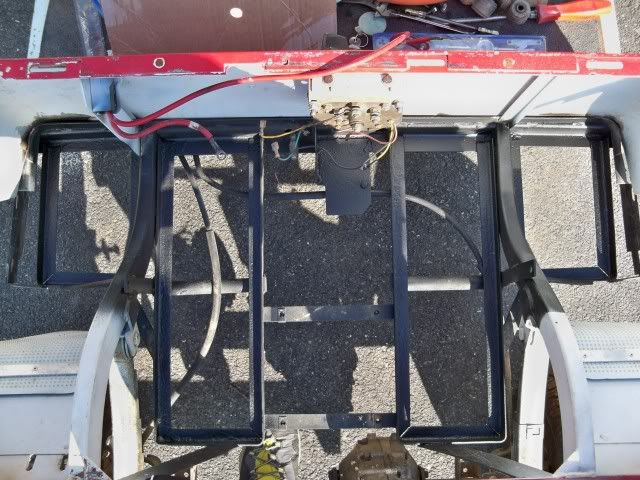 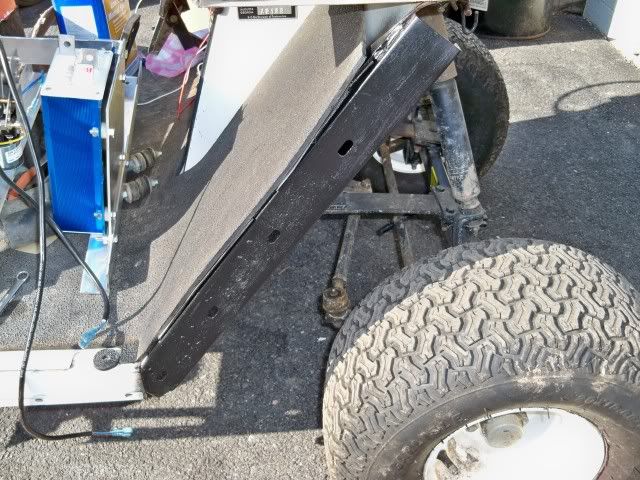 |

|

|
 Today Today
|
|
|
__________________
This advertising will not be shown in this way to registered members. Register your free account today and become a member on Buggies Gone Wild Golf Cart Forum |
|
|
08-21-2010, 09:14 PM
|
#2 |
|
no clue
 Join Date: Sep 2009
Location: spicewood, texas
Posts: 3,308
|
that looks great, just need more pics.
 |
|
|
|
|
08-22-2010, 07:18 PM
|
#3 |
|
Getting Wild
Join Date: Apr 2009
Location: Cumberland, MD
Posts: 84
|
To replace the resistor parts that make the cart go I decided/needed to purchase a pb, an Alltrax 700 amp controller, a 36v hd solenoid and, an hd buss bar kit. The biggest hurdle for me was the install of the pb. It was challenging due to the necessary play in the arm. I had to access manuals sent to me and instil the help of my father who is a former machinist. I ordered two ball joints from a machine store in the Midwest and purchased the perfect linkage rod, with divine intervention, from a local store that carries surplus items for diy'ers. I was able to use some original parts from the wiper board connection. You will notice them in the first post. Next was how to arrange the controller and solenoid. Basically it was, "This is your space available and this is what needs to go in it". I purposefully stayed away from the space where the resistor coils were because I pan on putting a battery there to run lights. I since raised the solenoid. You will notice it in the last pic post of the electric components if you look closely enough. To make the juice flow correctly a friend helped with the wiring. He sails in the summer off the East coast and has rewired and replaced the motor in his sail boat. He knows his stuff! This is not to say that sparks didn't fly. I did a little welding to my wedding ring and received some minor burns. I know, I know, take off jewellery, unhook batteries and, use rubber handled wrenches. I am a rookie and make rookie mistakes.
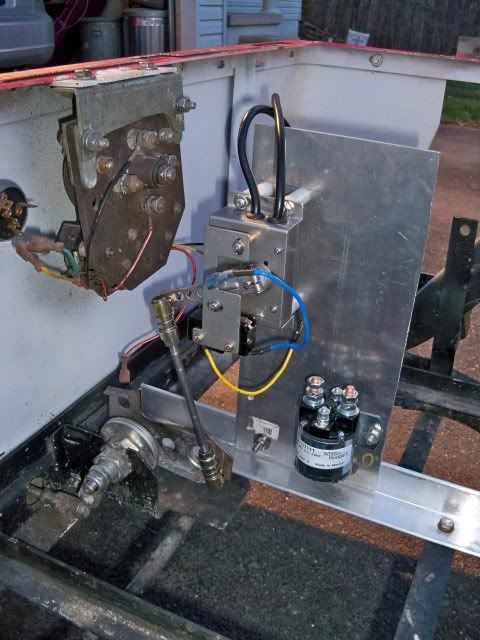 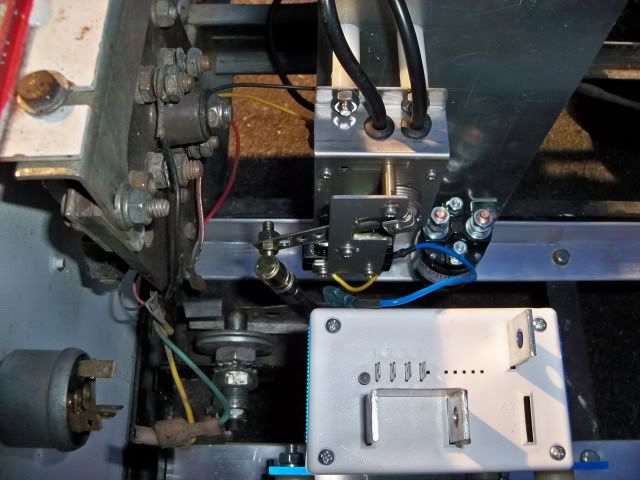 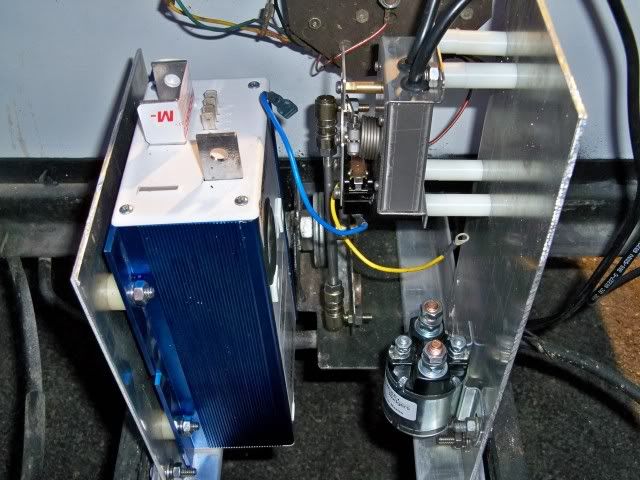 This is the complete install with wires and batteries. 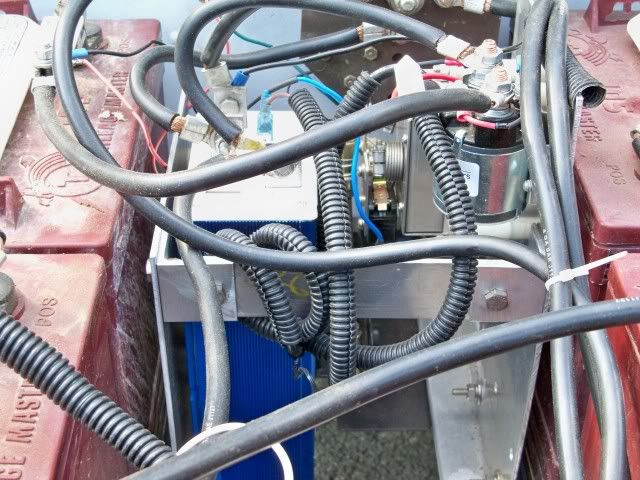 Next will be the motor and the chaos that ensued with the install. |
|
|
|
|
08-22-2010, 07:26 PM
|
#4 |
|
Gone Wild
Join Date: Jan 2009
Location: Meridian,MS
Posts: 183
|
Very Nice!
Keep them comin! |
|
|
|
|
08-22-2010, 08:06 PM
|
#5 |
|
no clue
Join Date: Sep 2009
Location: spicewood, texas
Posts: 3,308
|
wow, that is beautiful work. always blows me away what some of you techies can do! jim
|
|
|
|
|
08-23-2010, 10:55 AM
|
#6 |
|
Gone Wild
Join Date: Aug 2008
Location: Cumming, GA
Posts: 313
|
Very nice.....
|
|
|
|
|
08-27-2010, 02:50 PM
|
#7 |
|
Getting Wild
Join Date: Apr 2009
Location: Cumberland, MD
Posts: 84
|
What a 3 ring circus!
Ring 1-During my quest to acquire a motor I discovered from that the axel on my cart was unique in that it was only used for 6 months to a year while Dana was on strike and Ezgo got their axels elsewhere. That meant that there was no bolt on motor upgrade available to fit my axel. Rats!! To continue the build, my choices were to have the current motor rebuilt or buy an axel that would accept an upgraded motor and fit my cart. 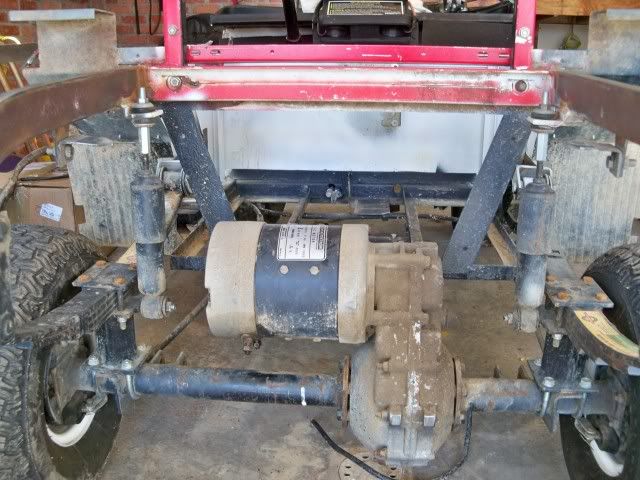 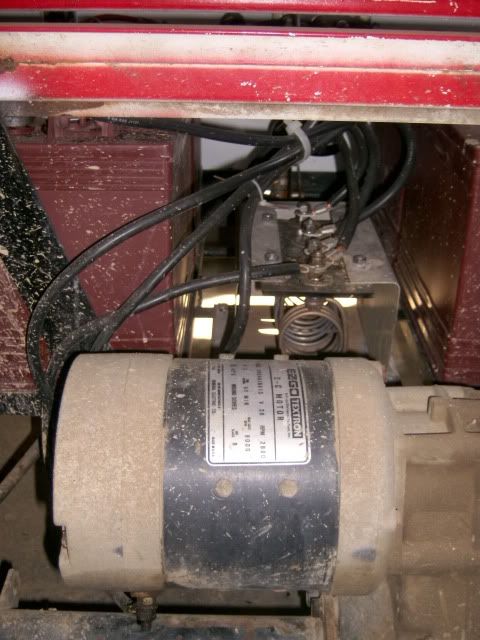 Ring 2-I decided on purchasing an axel since I already had the motor. Finding an axel was relatively easy. I found one with brake mounts on the bottom and one with brake mounts on the top. I need mounts on the bottom. Lets just say that the shop with the axel I preferred did not make me a priority. After 2 weeks of waiting for them to remove the axel from a parts cart it still was not done. I contacted the other shop and they said they had the axel off a few days after I called and was wondering if I wanted to pick it up. Axel ordered, paid for, shipped, and 3 weeks lost on the build. 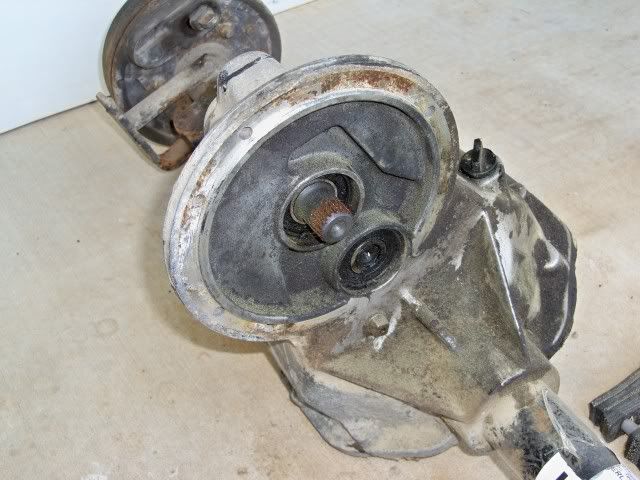 Ring 3-The axel I purchased had the mounts on the top so that meant they had to be cut and welded on the bottom. Talented friends with blue collar skills are a blessing. Once things were cut, reversed, and welded there was this little problem of getting the lift tweaked to fit and get the brakes adjusted to stop this new motor. Kind of an anticlimactic ending for ring 3 but it was all part of the build. After tapping, drilling, filing, and cleaning, axel on and motor mounted. 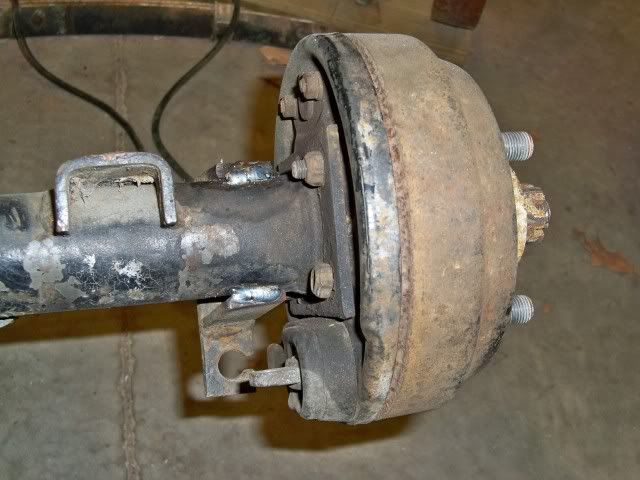 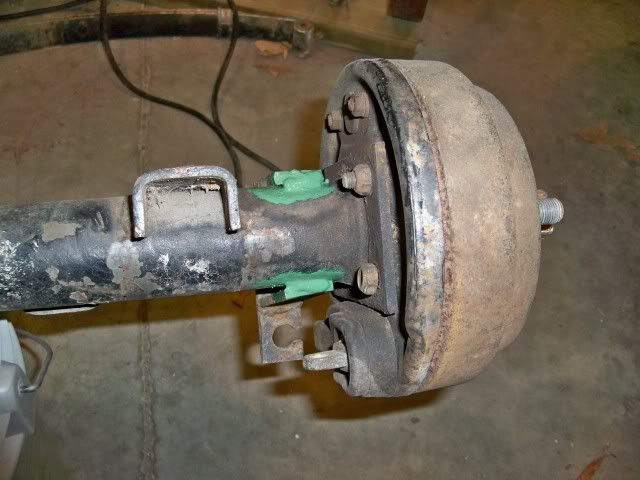 Well, once the circus was over this is what I installed. I must say I am well pleased with the results. It pulls like a trooper. It keeps its speed up hills and it doesnt even feel like there is a load with two adults on. The throttle response is completely different from the old wiper board. I gpsed it and achieved 12-13 mph on flat ground and the torque is everything I could have hoped for. I must say that this is on one bad battery too. All 6 batteries are 03s. 5 are 90-95 capacity and 1 is 40-50 capacity. 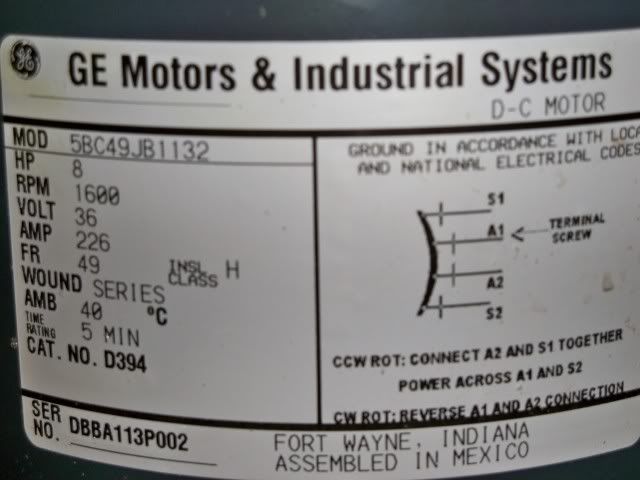 The next update covers 5 areas on the exterior: the body, molding, exterior lights, seat covers, and wheels. |
|
|
|
|
08-27-2010, 06:20 PM
|
#8 |
|
no clue
Join Date: Sep 2009
Location: spicewood, texas
Posts: 3,308
|
coming along nicely. wish we were closer, i would give a good used batt. why don't you check and see if you can find an older batt that match you others? that will make them all last a bit longer. keep it up.
|
|
|
|
|
08-28-2010, 09:10 PM
|
#9 |
|
Gone Wild
Join Date: Nov 2008
Location: MI, West Coast
Posts: 235
|
So Dana was on strike and that is the reason the axles in the 86.5 through 87 model years used the different style. I never realized I had a strike breaker axle in my cart... I'm a little bummed to hear that.
A question I have on the controller mounting... I see that you are using stand offs to mount to the plate. I always thought that the controller used the plate as a heat sink and should be mounted flush on the plate? Nice looking cart. |
|
|
|
|
08-29-2010, 08:54 AM
|
#10 |
|
Getting Wild
Join Date: Apr 2009
Location: Cumberland, MD
Posts: 84
|
iaefebs, If you need to fix or replace something I have everything you may need laying in my garage. I can not answer your question about the controller because I do not know. I chose to raise it with spacers because I believed it would help to keep it cool. I am ignorant on this subject. When you say "heat sink", do you mean the plate would absorbe the heat created by the controller? Maybe a member with more knowledge will comment for us.
|
|
|
|
|
|
||||||
|
|
 Similar Threads
|
||||
| Thread | Forum | |||
| Marathon 350 rebuild ? | Gas EZGO | |||
| More pics of my restoration/rebuild | Members Rides | |||
| Rebuild Update....Pics | Electric EZGO | |||
| pics of 84 marathon rebuild | Gas EZGO | |||
| First Timer's G14 Rebuild w/Pics! | Gas Yamaha | |||


 Linear Mode
